Renesas RA Family EK-RA6M5 – Quick Start Guide
R20QS0021EG0101 Rev.1.01 Page 20 of 33
Apr.15.21
5. Customizing the Quick Start Example Project
This section lists the requirements and instructions for customizing the Quick Start example project.
Hardware Requirements
• EK-RA6M5 board
• Micro USB device cable
• A PC with at least 1 USB port
Software Requirements
• Windows
®
10 operating system
• e
2
studio IDE
• SEGGER J-Link
®
USB drivers
• FSP
• Quick Start example project
5.1 Downloading and Installing Software and Development Tools
Before the Quick Start example project can be modified, it is necessary to download and install software and
development tools on the host PC.
The FSP, J-Link USB drivers, and e
2
studio are bundled in a downloadable platform installer available on the
FSP webpage at renesas.com/ra/fsp.
New users are recommended to use the Quick Install option provided
in the installation wizard, to minimize the amount of manual configuration needed.
There is no need to download and install software, development tools, and drivers separately.
5.2 Downloading and Importing the Quick Start Example Project
1. Download and extract the Quick Start example project to a local directory on the host PC.
The Quick Start example project (source code and project files) is available in the EK-RA6M5
Example Projects Bundle that is available in the Downloads tab of EK-RA6M5 webpage at
renesas.com/ra/ek-ra6m5
Download and extract the example projects bundle (xxxxxxxxxxxxxxx-ek-ra6m5-
exampleprojects.zip) to a local directory on the host PC.
Browse to the Quick Start example project at xxxxxxxxxxxxxxx-ek-ra6m5-
exampleprojects\ek_ra6m5\_quickstart\quickstart_ek_ra6m5_ep
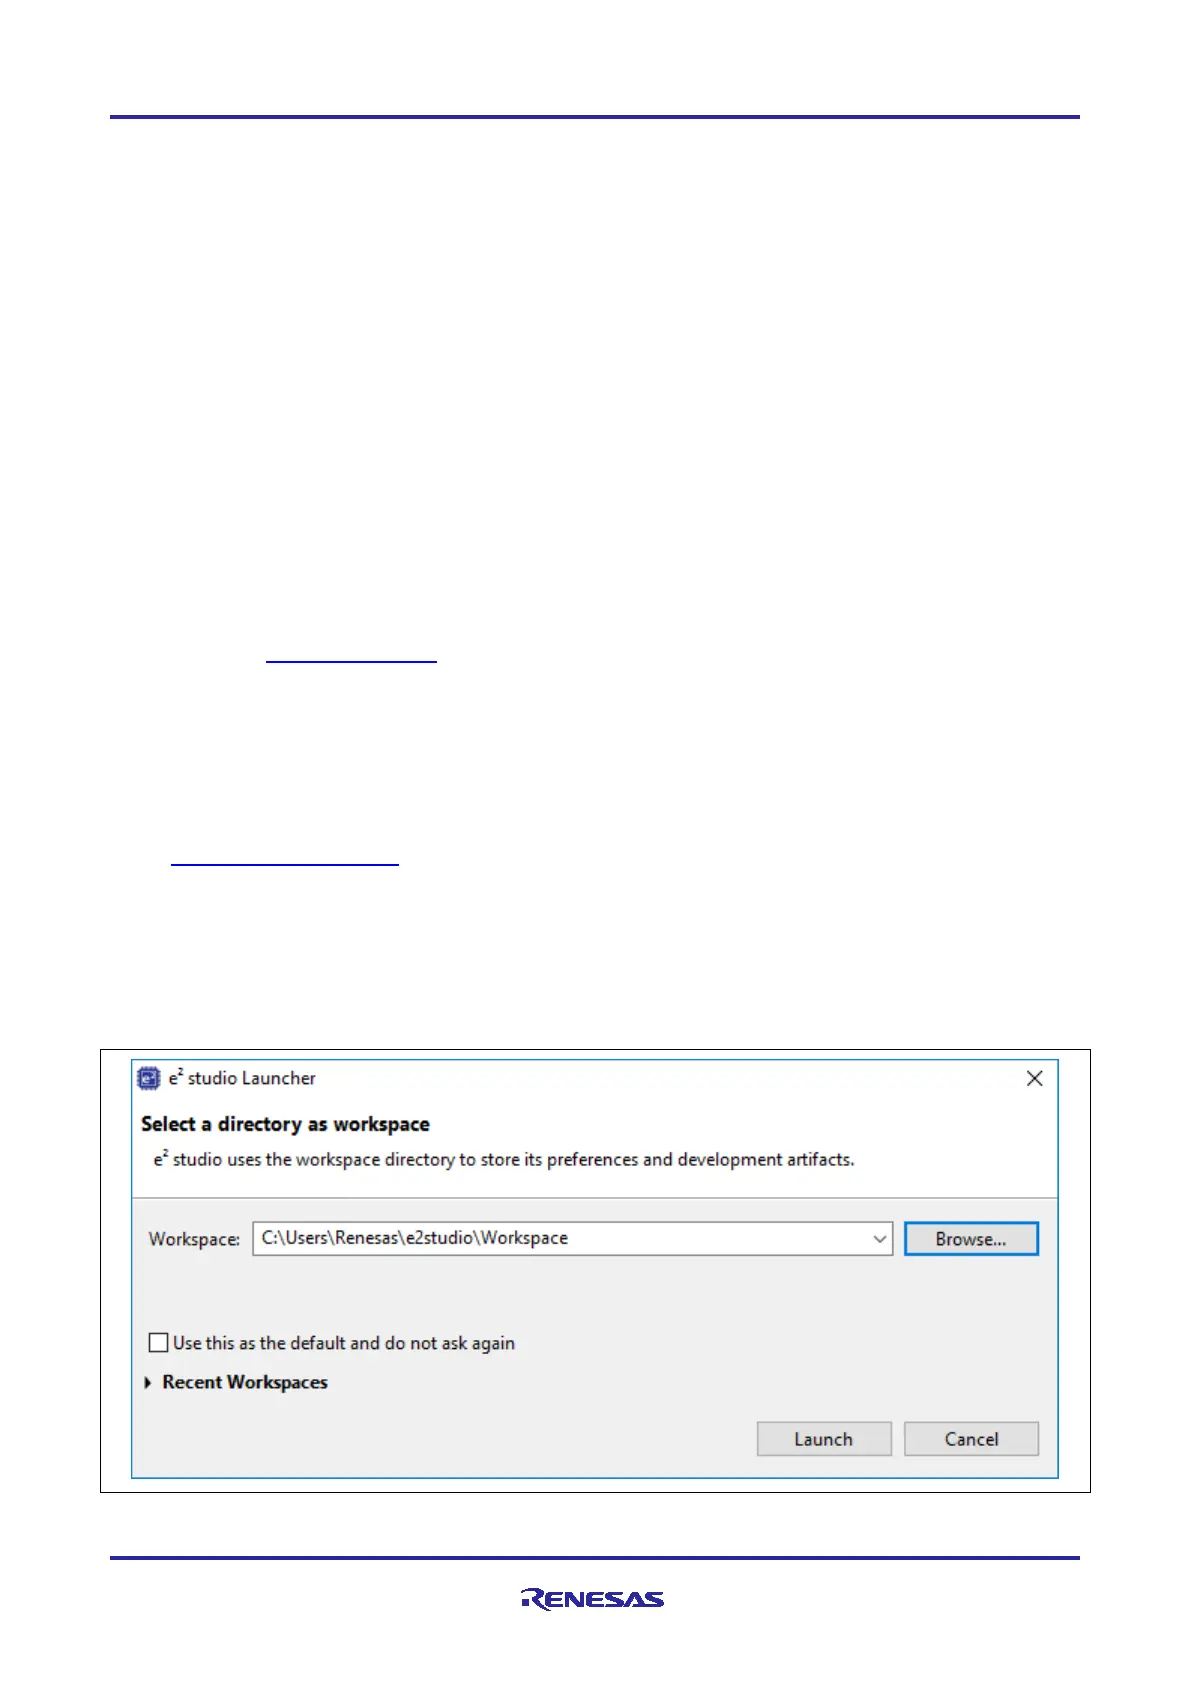
2. Launch e
2
studio.
3. Browse to the Workspace where the project file is to be imported. Enter the name in the Workspace
dialog box to create a new workspace.
Figure 22. Creating a New Workspace

 Loading...