75
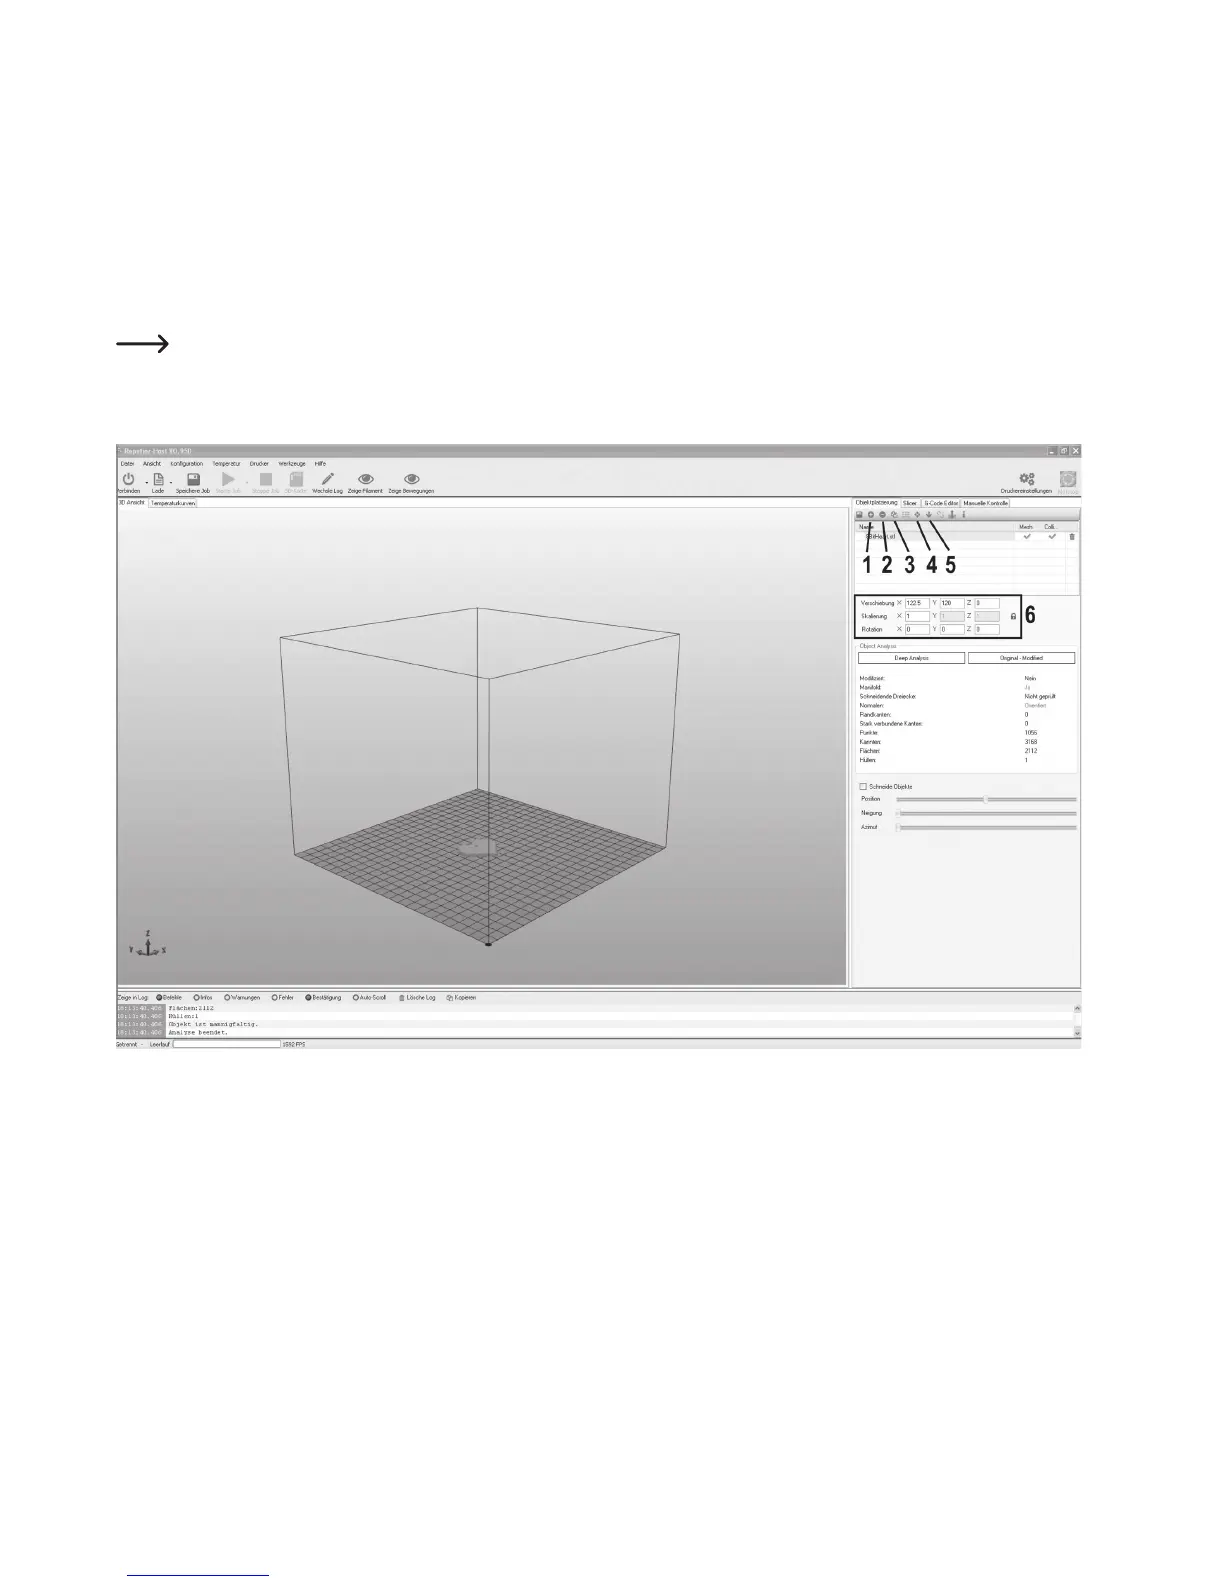
Short description of the most important buttons in the object placement tab:
(1) Adding objects (as described above)
(2) Deleting the objects from the printing plate
(3) Copying objects for multiple printing (in another window, the number of copies can be chosen)
(4) Centring the object on the printing plate
(5) “Dropping” again (this button should be pushed again before the further steps to ensure that the object is supported cleanly
on the printing plate)
(6) In the fields below, the object can still be moved, scaled and rotated.
Use the scaling function to compensate the size retention of the printed object here as well. If it is known, e.g., that the
filament material used shrinks by 2 %, set the scaling to the value 1.02 (this is an approximate reference value). After
printout, you can measure the object and adjust scaling again if required.