POP 2 3D Scanner User Manual
COPYRIGHT ©2022 REVOPOINT 3D ALL RIGHTS RESERVED 14
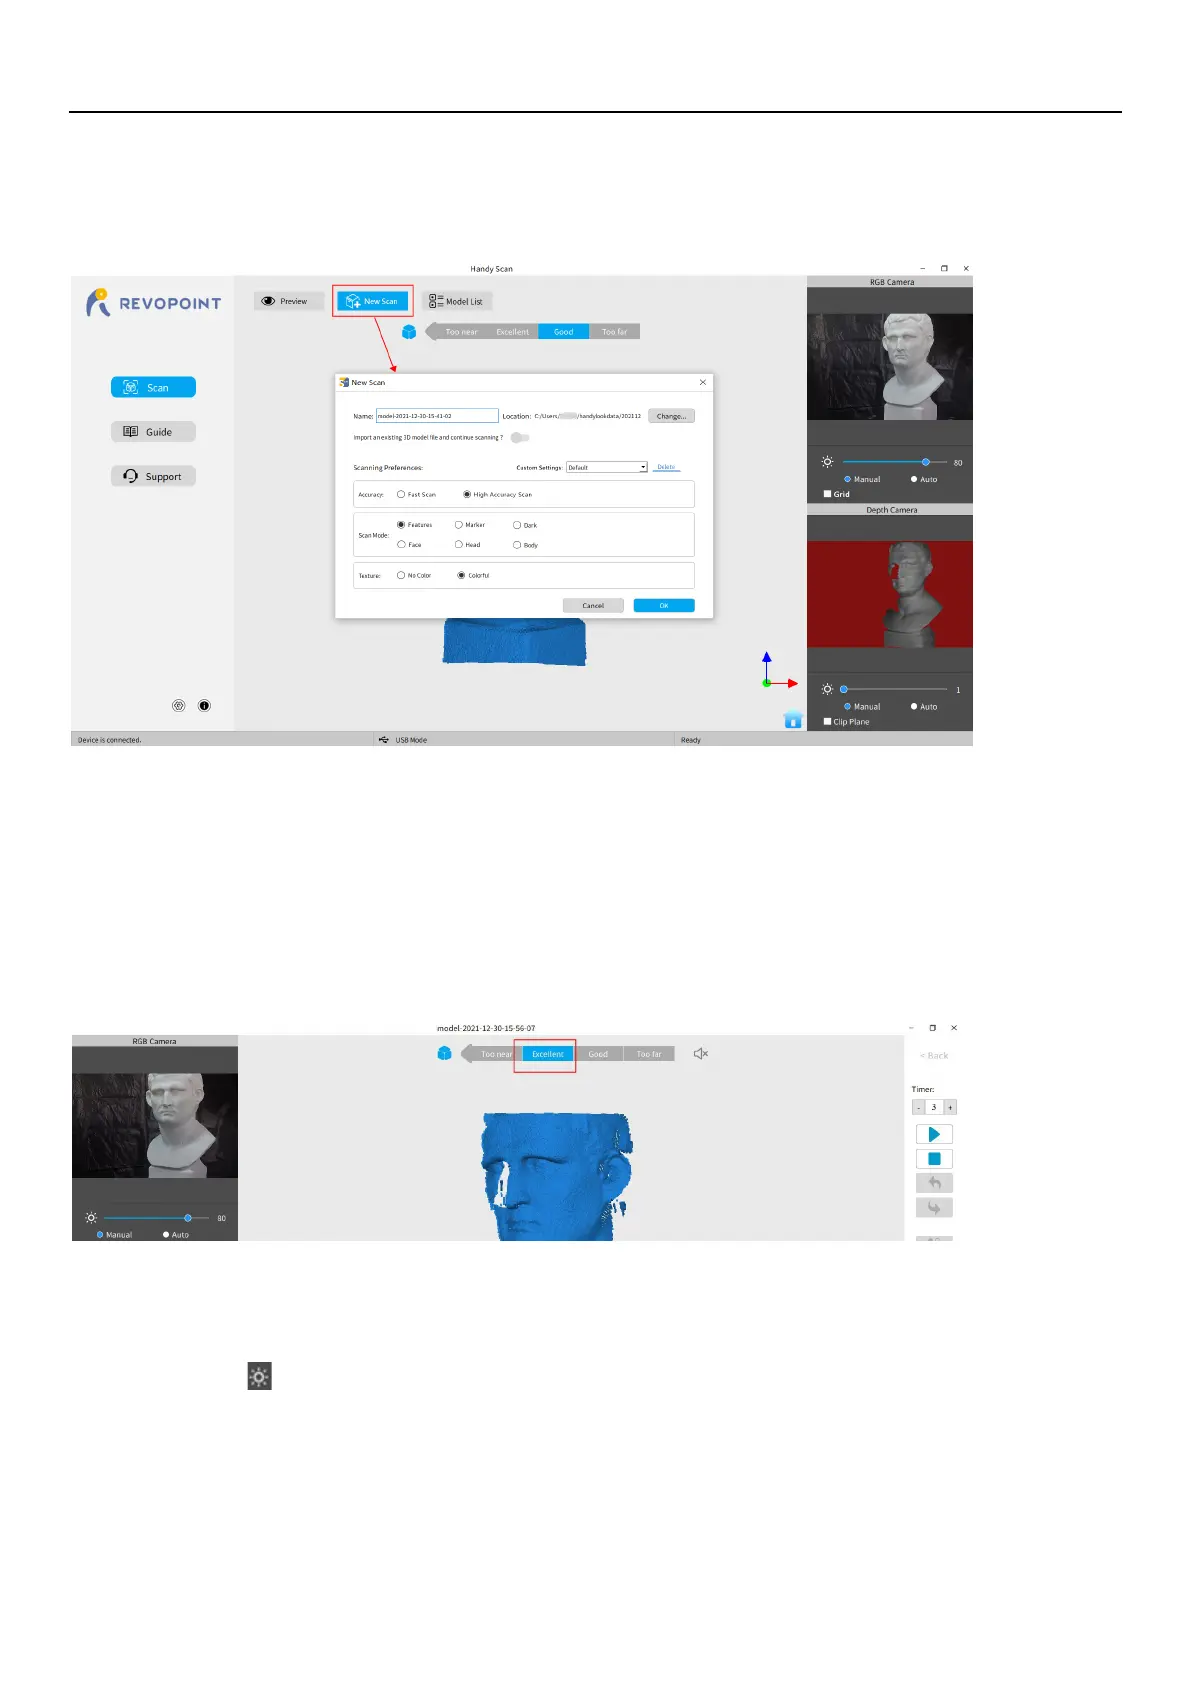
Click New Scan to select Accuracy, Scan Mode and Texture
Once connected successfully, the device is ready to scan. Configure the desired operational characteristics as described in
Section 2. New Scan (see p. 9-10) of the UI Introduction.
Confirm distance to be "Excellent"
After specifying the Accuracy, Scan Mode and Texture options, press “OK” to enter the scanning page. The top area of the
3D Model Preview window shows the distance. Position the POP 2 scanner or the object to confirm an "
Excellent
" distance
and keep it during scanning. Higher-resolution scans are possible in the “Too near” range, but tracking is more likely to be
lost.
Adjust the brightness in the RGB Camera and Depth Camera
Adjust the Sun Icon on both of the smaller displays (for Android and iPhone smartphones, click on the Gear icon in the
upper right of each small window to make the controls visible). If available, try Auto first, but switch back to Manual before
capturing data to prevent lockups.