EasyManua.ls Logo

Revopoint MIRACO - User Manual

Revopoint MIRACO
18 pages
Print Icon
To Next Page IconTo Next Page
Loading...
MIRACO 3D SCANNER
Quick Start Guide V1.1
Question and Answer IconNeed help?

Do you have a question about the Revopoint MIRACO and is the answer not in the manual?

Summary

About the Miraco 3 D Scanner

Miraco 3 D Scanner Package Contents

Getting Started with Miraco

Miraco Unboxing and Initial Setup

Steps for unboxing the device and performing initial setup, including charging.

Miraco Scan Interface Explained

Identifies and explains the various icons and controls within the Miraco scanning interface.

Miraco Screen Gestures Guide

Details various touch gestures for navigating the Miraco's interface.

Performing a 3 D Scan with Miraco

Miraco Scanning Environment Setup

Guidance on preparing the scanning environment and positioning the object.

Miraco Scanning Mode Selection

Instructions on choosing between Continuous and Near scanning modes.

Miraco Scan Settings Configuration

Configuring accuracy, alignment, object type, color, base removal, and exposure.

Miraco Distance Adjustment and Scan Completion

Adjusting distance and initiating/completing the scanning process.

Editing Scanned Models in Miraco

Miraco Model Processing Options

Options for automatic or manual processing of scan data (Fusion, Mesh, Texture).

Miraco Software Update Procedure

Advanced Miraco Scanning Skills

Miraco Single Shot Mode Usage

How to use the Single Shot mode for capturing individual frames.

Miraco Marker Mode Usage

Scanning objects with simple geometry using markers for alignment.

Miraco File Transfers via USB Cable

Connecting Miraco to an External Screen

Overview

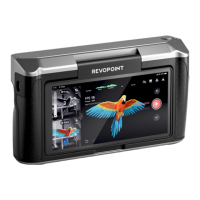
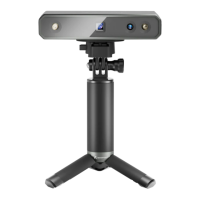
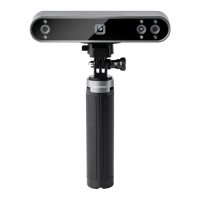
The Miraco 3D Scanner is a versatile, all-in-one 3D scanner designed for professionals, offering robust quad-depth camera system for detailed and accurate scans. It features a high-resolution RGB camera for realistic color scans, making it suitable for a wide range of 3D scanning applications.

Technical Specifications:

  • Accuracy: Single-frame accuracy up to 0.05 mm.
  • Camera System: Quad-depth camera system with two Far-mode Depth Cameras and two Near-mode Depth Cameras.
  • Illumination: Two White Flash LEDs and eight Infrared Fill Lights.
  • Display: AMOLED Screen.
  • Connectivity: USB Type-C Port, Wi-Fi.
  • Power: 65W Dual USB Type-C Port Power Adapter.
  • Memory (Miraco Pro): 32 GB RAM.
  • Mounting: 1/4" Threaded Hole for tripod mounting.

Usage Features:

Unboxing and Setup:

  1. Charging: For first use, charge the Miraco to over 60%.
  2. Power On: Long-press the Power Button (5s) to turn on the device.
  3. Language Selection: Select the desired language (English, Deutsch, 日本語, 中文 (简体)).
  4. Wi-Fi Connection: Connect to a Wi-Fi network for project transfers and software updates.
  5. Date and Time: Adjust and confirm the date and time.
  6. Scan Interface: Tap "Next" to enter the scan interface.

Scan Interface Elements:

  • Depth Display Window: Shows depth information.
  • RGB Display Window: Shows color information.
  • Distance Display: Indicates scanning distance.
  • Far & Near Mode Switching: Allows toggling between far and near scanning modes.
  • 3D Display Window: Displays the 3D model being scanned.
  • Base Removal / Scanning Distance / Color Display / 3D Coordinates: Provides options for base removal, distance display, color display, and 3D coordinates.
  • Continuous & Single-shot Switch: Toggles between continuous and single-shot scanning modes.
  • Scan Settings: Accesses detailed scan parameters.
  • Scan Control Buttons: Start/Pause and Complete scan buttons.
  • Model Hub: Accesses saved models.

Helpful Screen Gestures:

  • Swipe Down from Top: Displays the Quick Settings menu (Storage, WLAN, Screen Rotation, Settings, Screenshot, Screen Recording, Shut Down).
  • One-finger Swipe (Home/Post-processing): Rotates the model on the screen.
  • Two-finger Drag (Home/Post-processing): Moves the model.
  • Pinch to Zoom (Home/Post-processing): Zooms out (together) or zooms in (apart).
  • One-finger Drag (Model Selection): Selects a model.

Scanning Process:

  1. Instructions: Read instructions for Scan Settings and Exposure Adjustment upon first activation.
  2. Environment Setup: Place the Sample Bust (included) on a turntable on a clutter-free tabletop, ensuring no unwanted objects are in the scanning area. For Near-mode, the distance should be about 18 cm.
  3. Scanning Mode Selection: Select "Continuous" and "Near" modes for scanning the Sample Bust.
  4. Scan Settings:
    • Recommended Settings for Sample Bust: High Accuracy, Feature alignment, General object type, Color toggled off.
    • Base Removal: It's recommended to turn "Base Removal Off."
    • Depth Cameras' Exposure Adjustment: Disable "Auto" exposure and manually adjust the exposure bar to minimize red or blue areas in the preview, ensuring correct exposure.
  5. Scan Distance Adjustment: Move the Miraco to adjust the distance between the scanner and the target object until the scanning distance indicator bar displays green.
  6. Start Scanning: Tap the Start button to begin scanning, and tap it again to pause as needed.
  7. Complete Scanning: Tap the "Complete" button to finish the scan once all data is captured.

Model Edit:

  1. Access Model Edit: After scanning, tap the "Model" icon to edit.
  2. One-tap Edit: Automatically performs point cloud Fusion, Mesh, and Texture (if Color mode is enabled). Recommended for beginners.
  3. Manual Edit: Tap "Fusion," "Mesh," and "Texture" sequentially to adjust parameters and process the scan. Refer to the Revopoint Official Website for the User Manual for detailed parameter adjustment.

Skills:

Using Single Shot Mode:

  1. Tap "Single Shot" to switch to this mode.
  2. Adjust exposure and other scan parameters.
  3. Tap the capture button to record a single frame.

Using Marker Mode:

  • Purpose: For scanning objects with simple geometric features (e.g., football, wine bottle) or reference objects.
  • Settings: Adjust Scan Settings to "Marker" alignment.
  • Placement: Place markers (or Magic Mat under the object) irregularly on or around the object's surface. Ensure at least 5 markers are visible per frame to prevent loss of tracking.

Maintenance Features:

Software Update:

  1. Connect to Wi-Fi: Swipe down from the top of the screen, tap "Settings" > "WLAN," and connect to a network.
  2. Check for Updates: Tap "Software Update" to check for new versions.
  3. Download and Install: If an update is available, tap "Download and Install."
  4. Restart: The update will install automatically, and the Miraco will restart.

File Transfers Via USB Cable:

  1. Connect: Connect the Miraco to a computer using the USB Type-C Cable.
  2. Data Transfer: On Miraco's screen, tap "Data Transfer."
  3. Find Files:
    • Export Projects (Windows/macOS): Open Revo Scan 5 (V 5.4.1 or later) on your PC, check target projects, and click "Export." A project includes scanning configuration, raw data, processed data, and user operation history.
    • Screen Recording and File Transfers (Windows ONLY): Right-click the Windows icon on the toolbar, click File Explorer, expand "This PC," locate your hard drive, find "MIRACO," and copy data from "Internal shared storage" to your PC.

Connecting to an External Screen:

  • Method 1 (DisplayPort): Connect a monitor or TV to Miraco's DisplayPort (DP) via its USB Type-C port.
  • Method 2 (HDMI Adapter): Use the DP to HDMI Adapter (included with Miraco Pro) to connect Miraco to an HDMI cable on a TV or monitor.

Online Support:

  • Scan the provided QR code to contact support for help.
  • Follow Revopoint on social media platforms (Facebook, Instagram, X, YouTube, Discord, LinkedIn, TikTok, Forum).
  • Visit the official support page (www.revopoint3d.com/pages/support-miraco) to download the latest Quick Start Guide if software functions are updated.

Revopoint MIRACO Specifications

General IconGeneral
BrandRevopoint
ModelMIRACO
CategoryScanner
LanguageEnglish

Related product manuals