4
Assembly and adjustment instructions RF-KIT Power Amplifier RF2K-S
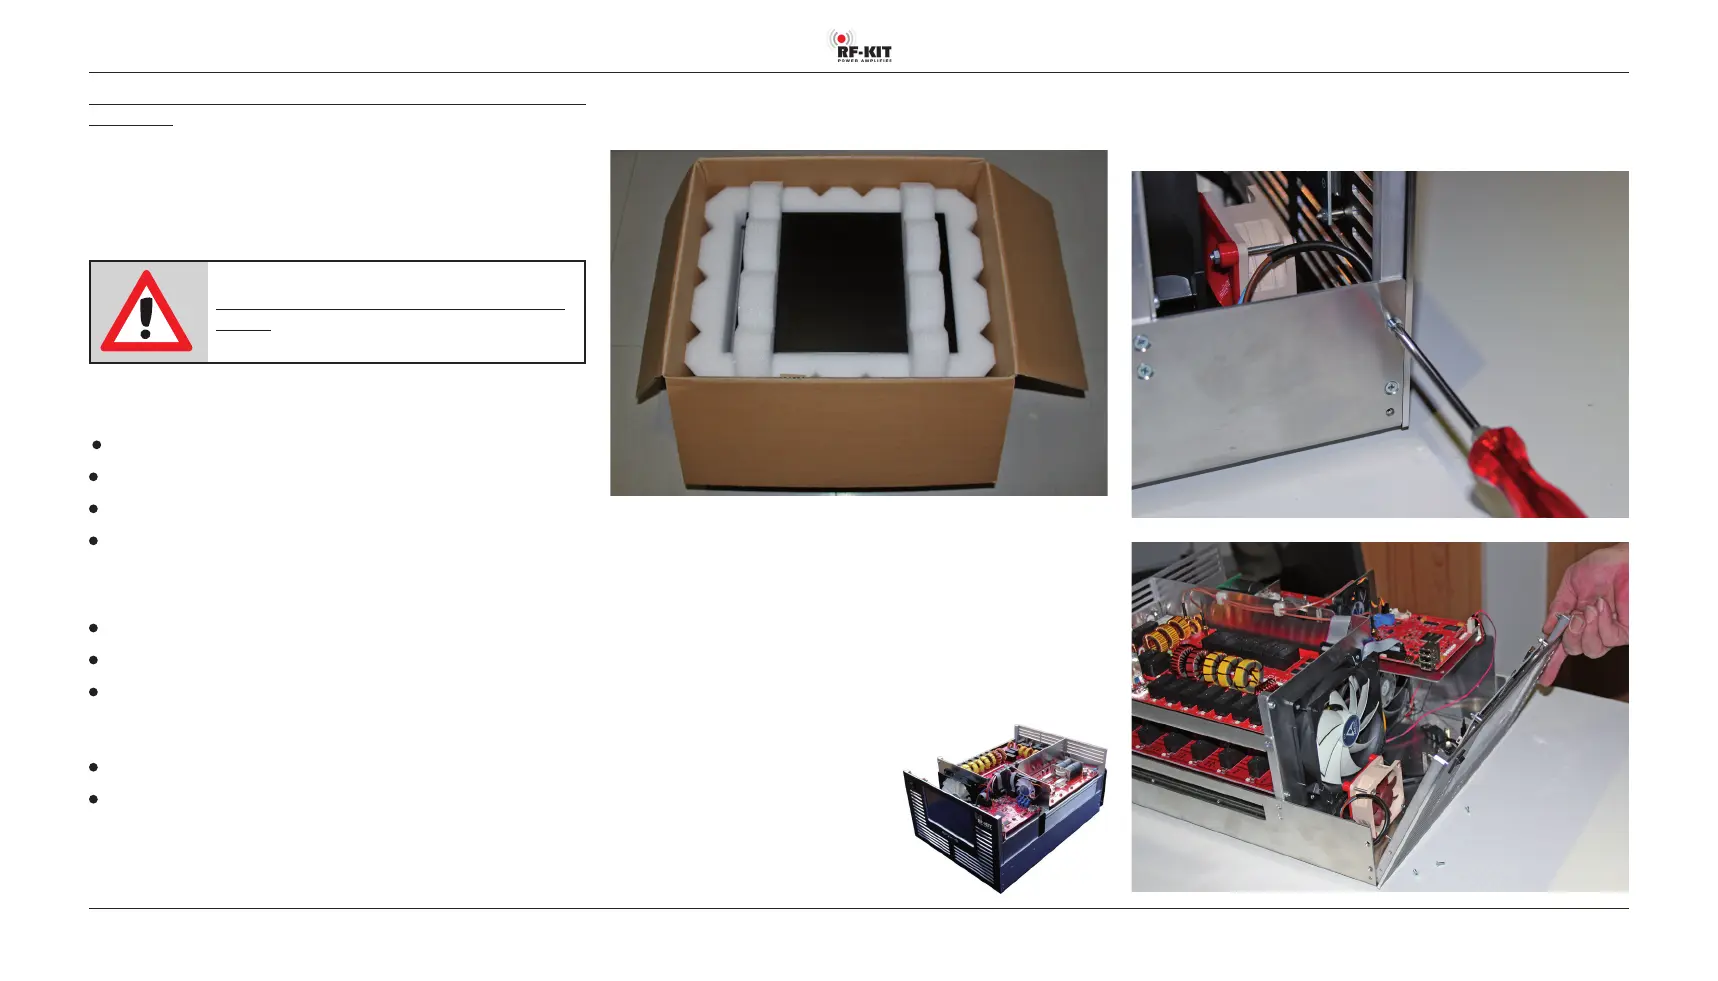
Step 1: Unpacking the device
► Open the shipping carton carefully and remove the device.
► After unpacking the device, inspect it for shipping damage.
► Report any damage immediately to the shipping company or dealer.
Keep the shipping carton.
► Place the device on a stable work surface and have ready the required
tools.
Step 2: Removing the housing cover
► Loosen 4 lateral countersunk screws and then
remove the housing cover.
Step 3: Removing the front panel
► Loosen 2 countersunk screws each on the left and right to detach the
front panel from the device frame.
Before the device can be used, any necessary adjustments must be
carried out!
A Raspberry Pi® 4 Model B must also be installed (not supplied).
In order to prevent the device from being put into operation without these
adjustments and installation works having been carried out, suitable mea
-
sures have been taken which must be reversed for operation within the
scope of the adjustment and installation works.
Note:
The device is not ready for operation when de-
livered! Although it can be switched on, it will not
generate any HF-power.
To carry out the adjustments you need some tools and measuring instru
-
ments:
Phillips screwdriver and small screwdriver
Reference wattmeter
Digital Multimeter
Soldering station
In addition, the device must be connected to a control transmitter and an
dummy load:
Control transmitter (TRX) with adjustable output power
2 coaxial cables (approx. 1 m) with correctly fitted connectors PL-259
50 Ω dummy load; load capacity min. 1 kW
For the internal cabling you need:
2x USB-cable (USB-Mini to USB; approx. 0.5 m)
1x HDMI-cable (HDMI-Micro to HDMI; approx. 0.5 m)
These 3 cables are included in the delivery, in addition to a power plug and
a piece of coaxial cable with SMA plug.