7
Assembly and adjustment instructions RF-KIT Power Amplifier RF2K-S
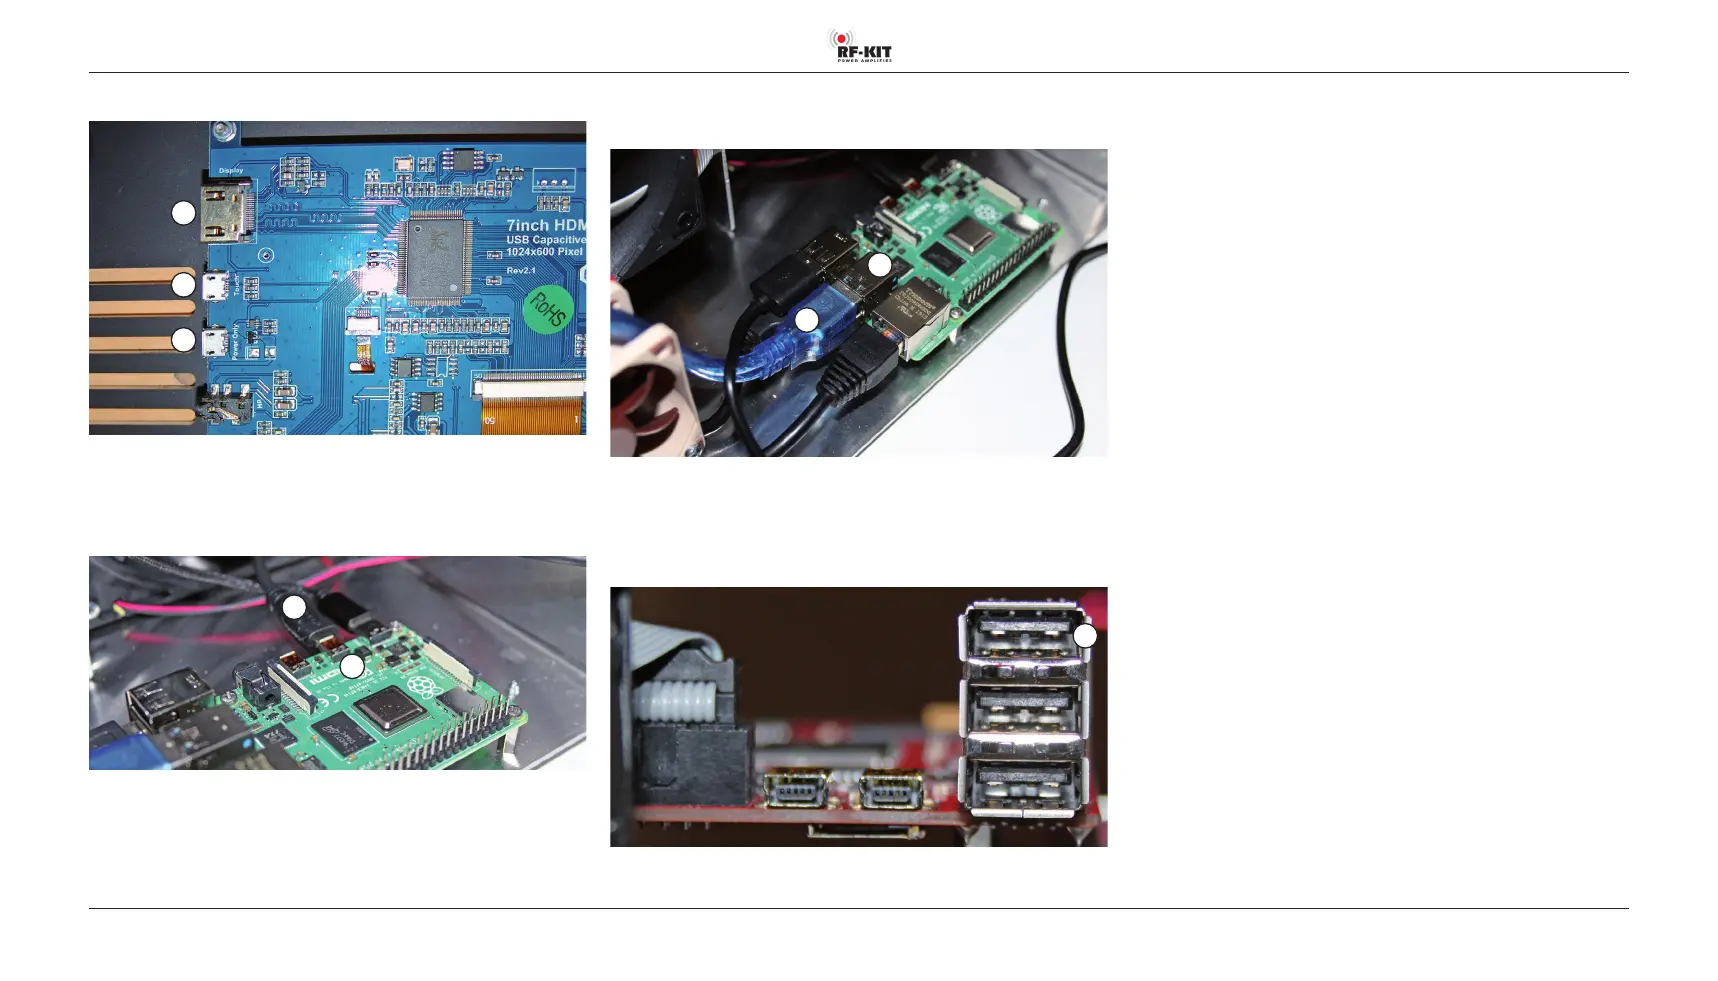
► Connect “H - USB“ of the Touch screen (2) to “E - USB“ on the
Raspberry Pi® 4 Model B.
E
H
Step 8: Connection Touch screen (2) to Controller board
► Connect “K - Power supply“ of the Touch screen (2) to “3 - USB“ on the
Controller board.
3
Step 7: Connection Touch screen (2) to Raspberry Pi® 4 Model B
G
H
K
Touch screen: “G - HDMI“ / “H - USB“ / “K - Power supply“
► Connect “G - HDMI“ of the Touch screen (2) to “B - Micro HMDI“ on the
Raspberry Pi® 4 Model B.
B
G
Socket “A - Micro HMDI“ on the Raspberry Pi® 4 Model B will not be used
and therefore remains free.