Do you have a question about the Ricoh SP 210 and is the answer not in the manual?
Details the required space and clearance for installing the machine.
Instructions for safely removing the machine and its components from the packaging.
Guide to connecting the telephone handset to the machine for fax operations.
Procedure for selecting the appropriate telephone line type for the machine.
Procedure for choosing the network connection type for fax functionality.
This document serves as a comprehensive setup guide for the SP 210, SP 210S, SP 210SU, SP 210SF, SP 212Nw, SP 212SNw, and SP 212SFNw series of machines. It provides essential information for initial installation, basic operation, and troubleshooting, ensuring users can quickly and correctly set up their device. The guide emphasizes safety and correct usage, directing users to the full User Guide on the supplied CD-ROM for more detailed information.
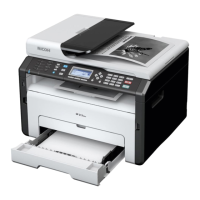
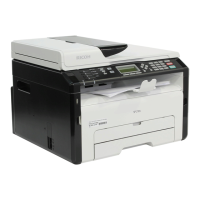
The devices covered by this manual are multi-functional machines designed for various office tasks, primarily focusing on printing, and for certain models, scanning and faxing capabilities. They are intended for use in environments requiring reliable document output and, where applicable, digital document management. The setup guide focuses on the physical installation of the machine, including unpacking, loading paper, and connecting the device to a computer either via USB or a network. For models with fax functionality (SP 210SF and SP 212SFNw), the guide also details the connection of a handset and basic fax operation. The software installation section covers the necessary drivers and utilities for both USB and network connections, ensuring the machine integrates seamlessly with the user's computer system.
The setup process is broken down into logical steps, starting with the physical placement of the machine. The guide provides clear diagrams illustrating the minimum space requirements for different models (SP 210S/SP 210SF/SP 212SNw/SP 212SFNw, SP 210SU, and SP 210/SP 212Nw), ensuring proper ventilation and accessibility. It also specifies the recommended operating temperature and humidity ranges, as well as power source requirements (220-240 V, 50/60 Hz, 5A), to ensure optimal performance and longevity of the device.
Unpacking the machine involves a series of steps to remove protective materials and install the toner cartridge. This includes opening various covers, removing tape and packing materials, and inserting the toner cartridge correctly. The illustrations are detailed, showing the exact locations of protective elements and the proper orientation for cartridge insertion.
Loading paper into the main tray (tray 1) and the bypass tray is also clearly explained. For tray 1, the steps involve opening the paper tray, adjusting the paper guides, fanning the paper, loading it, and then closing the tray. For the bypass tray, the process is similar, ensuring that paper is loaded correctly to prevent jams and ensure proper feeding.
For models equipped with fax functionality (SP 210SF/SP 212SFNw), the guide provides instructions for connecting the handset, which is crucial for making and receiving calls via the machine. It also details how to select the appropriate telephone line type (e.g., PSTN, PBX) and network connection type through the control panel, ensuring compatibility with the user's telephone service. Basic fax operation, such as sending a fax, is outlined, including placing originals, entering fax numbers, and initiating the transmission.
Software installation is a critical part of setting up the device. The guide differentiates between USB and network connections and provides flowcharts to help users navigate the installation process. For USB connections, it describes how to use the "Quick Install for USB" option, which installs the necessary printer driver and Smart Organizing Monitor (or TWAIN/WIA driver for certain models). For network connections, the "Quick Install for Network" option is covered, which also installs the relevant drivers and utilities. The guide highlights the importance of not connecting the USB cable or turning on the machine until prompted by the installer to avoid installation issues.
The guide also explains how to configure IP addresses for network connections, distinguishing between automatic (DHCP) and manual settings. It clarifies what an IP address is, the difference between IPv4 and IPv6, and how DHCP works. Instructions are provided for printing a configuration page to check network information, which is essential for troubleshooting and manual IP address configuration.
While primarily a setup guide, the document touches upon aspects that contribute to the ongoing maintenance and smooth operation of the device. By providing clear instructions for correct paper loading and toner cartridge installation, it helps prevent common issues like paper jams and print quality problems, which often arise from improper setup. The emphasis on using the correct power source and operating within specified environmental conditions also contributes to the machine's long-term reliability.
The troubleshooting section addresses common installation problems for both USB and network connections. For USB, it advises checking the CD-ROM, CD-ROM drive, USB cable connection, and ensuring no other applications are running during installation. It also suggests reinstalling the driver if issues persist. For network connections, it recommends checking the CD-ROM, CD-ROM drive, network cable, machine's IP address, network configuration, and DHCP server status. These troubleshooting steps empower users to resolve minor issues independently, reducing the need for external support.
The appendix provides detailed instructions for configuring the machine's IPv4 address manually, both via the control panel and the Web Image Monitor. This advanced configuration is crucial for network administrators or users in specific network environments. For SP 212Nw models, it also covers configuring IPv4 address settings using the Smart Organizing Monitor. These detailed instructions ensure that the machine can be properly integrated into various network infrastructures, which is a key aspect of its ongoing functionality and "maintenance" in a broader sense. The guide also notes that network settings cannot be configured while the machine is actively operating (printing, receiving faxes), which is an important operational consideration.
In summary, this setup guide provides a foundational understanding of the device's functions, detailed steps for initial usage, and essential information for basic troubleshooting and configuration, all contributing to the overall ease of use and long-term maintenance of the machine.
| Color | No |
|---|---|
| Duplex printing | - |
| Print technology | Laser |
| Maximum resolution | 1200 x 600 DPI |
| Time to first page (black, normal) | 10 s |
| Print speed (black, normal quality, A4/US Letter) | 22 ppm |
| Printing colors | Black, White |
| Maximum duty cycle | 22000 pages per month |
| Number of print cartridges | 1 |
| Page description languages | GDI |
| AC input voltage | 220 - 240 V |
| AC input frequency | 50 - 60 Hz |
| Power consumption (printing) | - W |
| Internal memory | 128 MB |
| Standard interfaces | USB 2.0 |
| USB 2.0 ports quantity | USB 2.0 ports have a data transmission speed of 480 Mbps, and are backwards compatible with USB 1.1 ports. You can connect all kinds of peripheral devices to them. |
| Paper input type | Paper tray |
| Total input capacity | 50 sheets |
| Maximum input capacity | 151 sheets |
| Maximum print size | 210 x 297 mm |
| Paper tray media types | Plain paper, Recycled paper, Thick paper, Thin paper |
| Paper tray media weight | 60 - 105 g/m² |
| Maximum ISO A-series paper size | A4 |
| Product color | Grey, White |
| Depth | 360 mm |
|---|---|
| Width | 402 mm |
| Height | 165 mm |
| Weight | 7200 g |