EasyManua.ls Logo

Ricoh SP 3400N - User Manual

Ricoh SP 3400N
288 pages
To Next Page IconTo Next Page
Loading...
Place to Install
Installationsort
Emplacement de l'installation
Posizione di installazione
Lugar de instalación
Plaatsen voor de installatie
Local de instalação
Local de instalação
BXG007
Power Source
120 V, 60 Hz, 10 A or more
220 - 240 V, 50/60 Hz, 5 A or more
Stromversorgung
120 V, 60 Hz, 10 A oder mehr
220 - 240 V, 50/60 Hz, 5 A oder mehr
Source d'alimentation
120 V, 60 Hz, 10 A ou plus
220 - 240 V, 50/60 Hz, 5 A ou plus
Alimentazione
120 V, 60 Hz, 10 A o maggiore
220 - 240 V, 50/60 Hz, 5 A o maggiore
Fuente de alimentación
120 V, 60 Hz, 10 A o más
220 - 240 V, 50/60 Hz, 5 A o más
Voeding
120 V, 60 Hz, 10 A of meer
220 - 240 V, 50/60 Hz, 5 A of meer
Fonte de alimentação
120 V, 60 Hz, 10 A ou mais
220 - 240 V, 50/60 Hz, 5 A ou mais
Fonte de alimentação
120 V, 60 Hz, 10 A ou mais
220 - 240 V, 50/60 Hz, 5 A ou mais
BXG013
BXG014
BXG100
BXG101
BXG102
BXG017
BXG018
BXG204
BXG205
Guia de Instalação Rápida
Guida di installazione rapida
Guía de Instalación Rápida
Verkorte Installatiehandleiding
Quick Installation Guide
Kurzanleitung zur Installation
Guide d'installation rapide
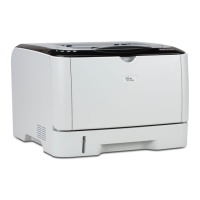
Unpacking
Auspacken
Retrait de l'emballage
Disimballaggio
Desembalaje
Verpakking verwijderen
Desembalar
Desembalar
BXG201
BXG011
BXG012
Read this manual carefully before you use the product and keep it handy for future reference.
For safe and correct use, please be sure to read the Safety Information before using the machine.
This manual briefly describes the procedure for installing this machine.
For more details about installation and other information, see Hardware Guide in the CD-ROM.
Lesen Sie das Handbuch vor der Verwendung dieses Geräts sorgfältig durch. Bewahren Sie das
Handbuch sicher auf.
Vor der Verwendung des Geräts sollten Sie die Sicherheitshinweise lesen, um eine sichere und
korrekte Verwendung zu gewährleisten.
Dieses Handbuch bietet eine Kurzbeschreibung des Vorgangs der Geräteinstallation.
Weitere Informationen zur Installation und zu weiteren Themen finden Sie in der Hardware-Anleitung
auf der CD-ROM.
Lisez attentivement ce manuel avant d'utiliser le produit et n'hésitez pas à vous y reporter
ultérieurement.
Pour exploiter pleinement les fonctionnalités du périphérique et l'utiliser dans les meilleures
conditions de sécurité possibles, lisez Consignes de sécurité avant de vous en servir.
Ce manuel décrit brièvement la procédure à suivre pour installer le périphérique.
Pour plus de détails sur l'installation et d’autres informations, reportez-vous au Manuel du matériel
sur le CD-ROM.
Leggere attentamente il presente manuale prima di utilizzare il prodotto e tenerlo a portata di
mano per riferimenti futuri.
Per un utilizzo corretto e sicuro, leggere le Informazioni sulla sicurezza prima di usare la
periferica.
Il presente manuale descrive brevemente la procedura di installazione della periferica.
Per maggiori dettagli sull’installazione e per altre informazioni, vedere la Guida per l'hardware
all’interno del CD-ROM.
Lea este manual atentamente antes de usar el producto y guárdelo en un lugar a mano para poder
consultarlo en el futuro.
Para hacer un uso correcto y seguro de la máquina, lea el apartado Información de seguridad
antes de utilizar la máquina.
Este manual describe las instrucciones para instalar esta máquina.
Para obtener más detalles sobre la instalación e información adicional, consulte el Manual de
hardware en el CD-ROM.
Lees de handleiding zorgvuldig door voordat u het product gebruikt en houd deze bij de hand. U
kunt dan de handleiding zo nodig altijd raadplegen.
Lees met het oog op een veilig en juist gebruik van het apparaat ook de Veiligheidsinformatie
door voordat u het apparaat gaat gebruiken.
In deze handleiding wordt de installatieprocedure voor dit apparaat kort beschreven.
Voor meer informatie over de installatie en andere informatie, raadpleeg de Hardwarehandleiding
op de cd-rom.
Leia o presente manual com atenção antes de utilizar este produto e guarde-o para futura
referência.
Para uma utilização correcta e em segurança, leia as Informações de Segurança antes de utilizar
o equipamento.
O presente manual descreve brevemente o procedimento para instalar este equipamento.
Para mais informações acerca das instalações e outras informações, consulte o Guia de Hardware
no CD-ROM.
Leia o presente manual com atenção antes de utilizar este produto e guarde-o para futura
referência.
Para uma utilização correta e segura, leia a Informação de segurança antes de utilizar o
equipamento.
O presente manual descreve brevemente o procedimento para instalar este equipamento.
Para mais informações sobre as instalações e outras informações, consulte o Guia de Hardware
no CD-ROM.
PrintM0128609.indd1PrintM0128609.indd1 2009/10/2010:52:462009/10/2010:52:46

Table of Contents

Questions and Answers:

Ricoh SP 3400N Specifications

General IconGeneral
Print TechnologyLaser
Print Speed (Black)30 ppm
Print Resolution1200 x 1200 dpi
Paper Capacity250 sheets
First Print Out Time (Black)8.5 seconds
Paper Input (Standard)250 sheets
Operating System CompatibilityWindows, macOS, Linux
ConnectivityUSB 2.0, Ethernet
Supported Paper SizesA4, A5, A6, B5, Letter, Legal

Summary

1 Place to Install

Power Source

Specifies the required power source for the printer.

2 Unpacking

3 Loading Paper

4 Connection

5 Installing the Software

1. Guide to the Printer

Exterior: Front View

Details and labels for the front view of the printer.

Exterior: Rear View

Details and labels for the rear view of the printer.

Interior

Identification of internal components of the printer.

Control Panel

Explanation of the keys and indicators on the printer's control panel.

2. Installing the Printer and Options

Installing the Printer

Step-by-step instructions for setting up the printer hardware.

Where to Put the Printer

Guidance on selecting an appropriate and safe location for the printer.

Installing the Printer

Optimum Environmental Conditions

Recommended temperature and humidity ranges for optimal printer operation.

Environments to Avoid

Locations and conditions that should be avoided for printer placement.

Power Source

Specifications for connecting the printer to a power source.

Unpacking

Installing the Optional Paper Feed Unit

3. Connecting the Printer

Network Connection

Steps to connect the printer to a network via Ethernet.

USB Connection

Steps to connect the printer to a computer using a USB cable.

4. Paper and Other Media

Supported Paper for Each Tray

Details on paper types and sizes compatible with each printer tray.

Paper Recommendations

Guidelines and advice for selecting and using paper.

Paper Recommendations

Loading Paper

Instructions on how to correctly load paper into the printer trays.

Types of Paper and Other Media

Setting the paper type

How to specify the paper type via printer driver or software.

Print Area

Loading Paper

Loading Paper in Tray 1

Detailed steps for loading paper into the standard paper tray (Tray 1).

Loading legal size paper

Instructions for loading legal size paper and similar formats.

Loading Paper

Loading Paper in Tray 2

Detailed steps for loading paper into the optional paper tray (Tray 2).

Loading Paper in the Bypass Tray

Loading envelopes

5. Replacing Consumables

Replacing the Print Cartridge

Step-by-step instructions for replacing the printer's print cartridge.

6. Cleaning the Printer

Cautions to Take When Cleaning

Important safety warnings and general cleaning guidelines.

Cleaning the Friction Pad and the Paper Feed Roller

7. Troubleshooting

Error & Status Messages on Smart Organizing Monitor

Explanation of error messages and status indicators from the monitoring software.

Panel Indicator

Printer Does Not Print

When the Printer is Directly Connected to a Computer via USB Cable

Other Printing Problems

Common Printing Problems

Troubleshooting common issues like toner smears, paper jams, and stacking problems.

Printing Feed and Quality Issues

Printing Alignment and Performance Issues

Print Quality and Toner Issues

8. Removing Misfed Paper

When Paper is Jammed

General steps and warnings for handling paper jams.

When Paper is Jammed

Removing Jammed Paper from the Inner;Tray 1;Tray 2

Steps to remove paper jams from the printer's internal trays.

Removing Jammed Paper from the Bypass Tray

Removing Jammed Paper from the Exit Area;Duplex Unit

9. Appendix

Moving and Transporting the Printer

Guidelines for safely moving and transporting the printer.

Moving and Transporting the Printer

Moving the printer in a short distance

Steps for moving the printer over short distances.

Moving over a Long Distance

Instructions for packing and moving the printer over long distances.

Consumables

Specifications

Main Unit

Specifications for the main printer unit.

Paper sizes

List of supported paper sizes for various trays.

Specifications

Paper weight

Supported paper weights for different trays.

Power source

Electrical power requirements for the printer.

Dimensions (Width × Depth × Height)

Physical dimensions of the printer.

Weight (printer body with consumables)

The overall weight of the printer with consumables.

Printing speed (600 dpi)

The printer's printing speed at 600 dpi resolution.

Resolution

The printer's supported printing resolutions.

First print speed

The time it takes for the first page to print.

Interface

Details on the printer's connectivity interfaces (Ethernet, USB).

Related product manuals