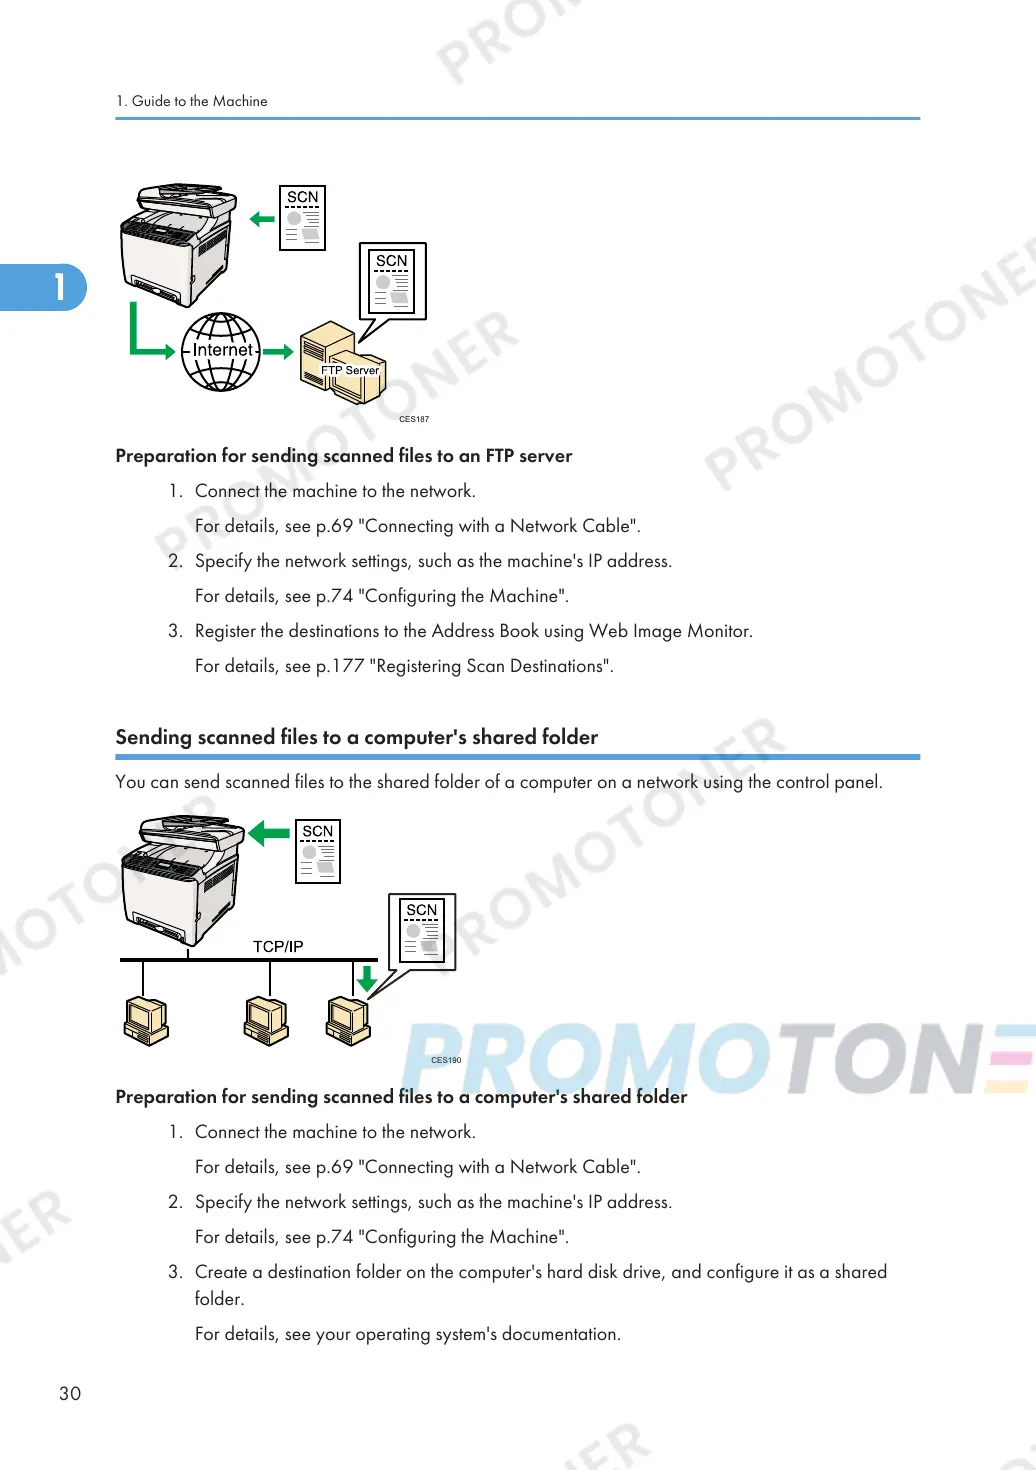
Preparation for sending scanned files to an FTP server
1. Connect the machine to the network.
For details, see p.69 "Connecting with a Network Cable".
2. Specify the network settings, such as the machine's IP address.
For details, see p.74 "Configuring the Machine".
3. Register the destinations to the Address Book using Web Image Monitor.
For details, see p.177 "Registering Scan Destinations".
Sending scanned files to a computer's shared folder
You can send scanned files to the shared folder of a computer on a network using the control panel.
Preparation for sending scanned files to a computer's shared folder
1. Connect the machine to the network.
For details, see p.69 "Connecting with a Network Cable".
2. Specify the network settings, such as the machine's IP address.
For details, see p.74 "Configuring the Machine".
3. Create a destination folder on the computer's hard disk drive, and configure it as a shared
folder.
For details, see your operating system's documentation.
1. Guide to the Machine
30

 Loading...