9
OPERATION
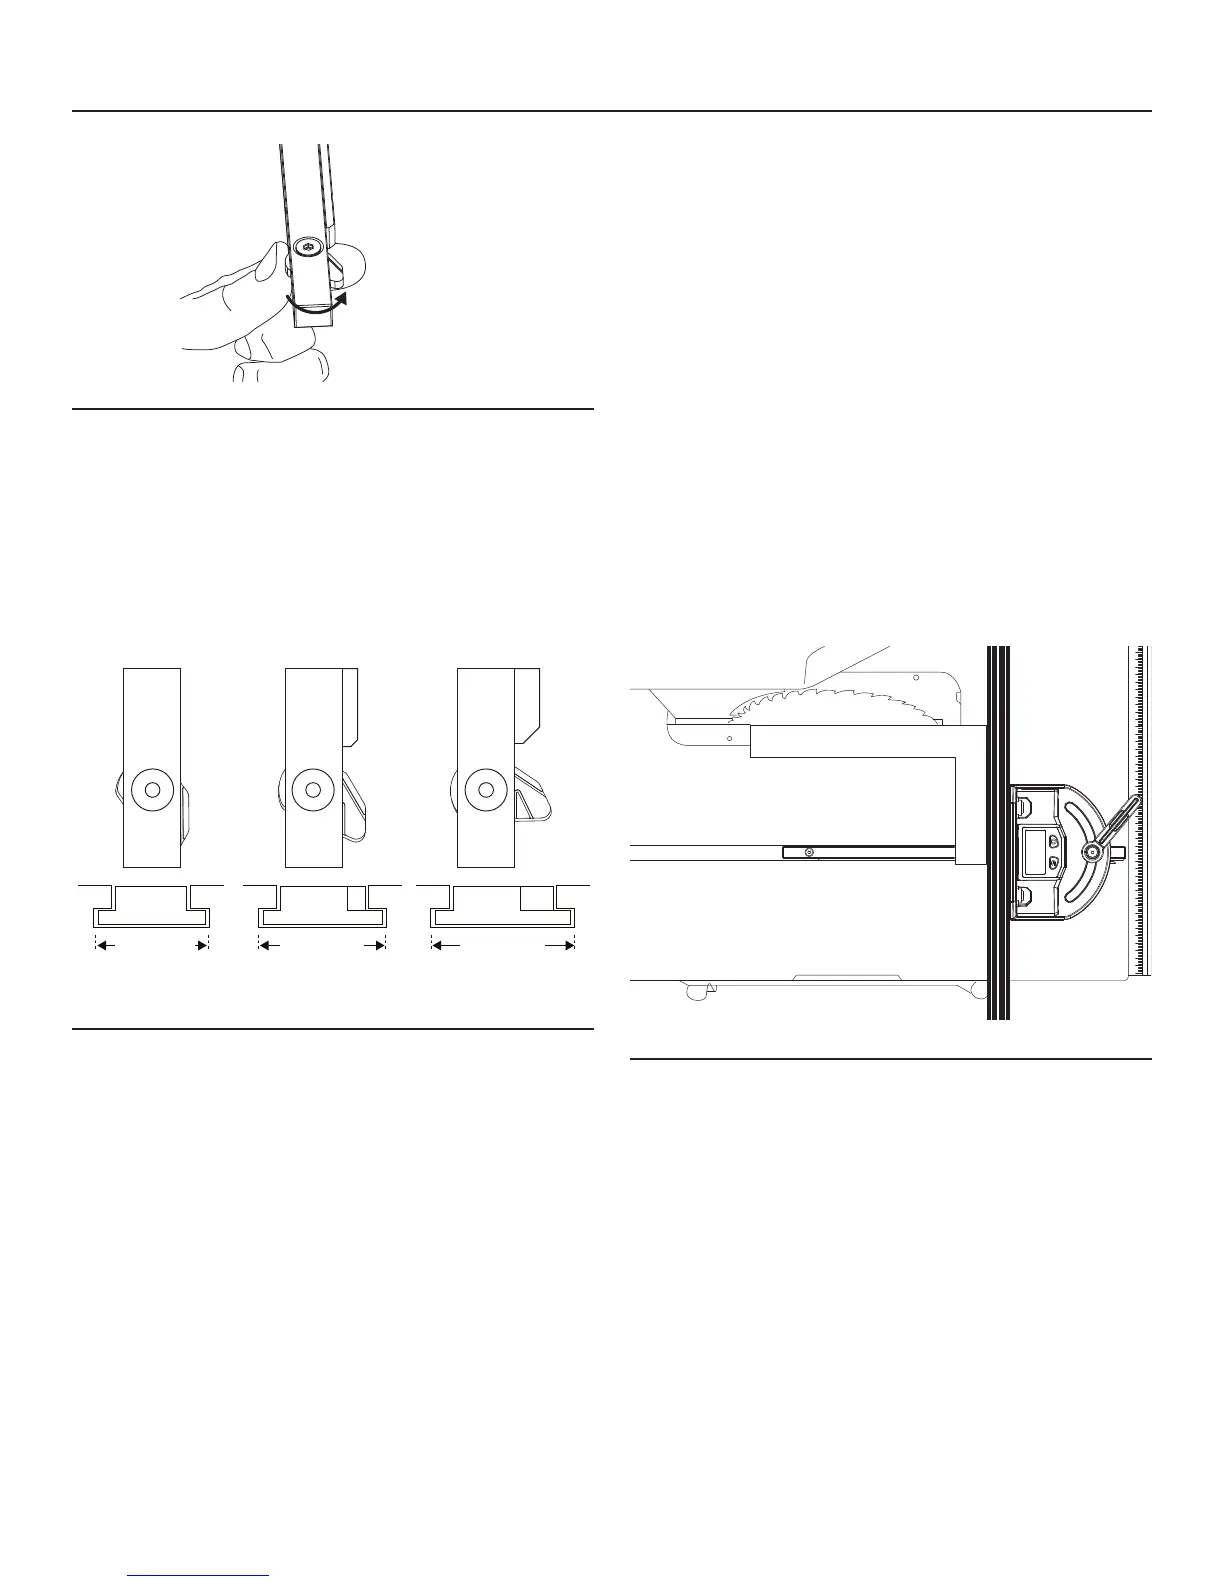
Fig.10
2. Turn the T-slot washer counter-clockwise and align the
indicating line with the edge of the gauge bar (Fig. 10 and
Fig. 11).
Fig. 11(a) shows the position of the T-slot washer to t a
standard 5/8” T-slot table.
Fig. 11(b) shows the position of the T-slot washer to t a
standard 3/4” T-slot table.
Fig. 11(c) shows the position of the T-slot washer to t a
standard 7/8” T-slot table.
Fig.11
3. Tighten the screw again with the hex wrench.
TURN THE DIGITAL MITER GAUGE ON AND
OFF
1. Press the Power button to turn on the tool.
2. Press the Power button for about 3 seconds to turn off
the tool.
3. The digital miter gauge will automatically turn itself off 5
minutes after the user stops moving the miter gauge
head.
FLIP THE DISPLAY
After the digital miter gauge is turned on, briey press the
Power key to ip the display.
CALIBRATE THE DIGITAL MITER GAUGE TO
THE TABLE-SAW BLADE ASSEMBLY
(Carpenter’s square, available separately, required)
NOTE:
•Alwayscalibratethedigitalmitergaugetoyourtablesaw
before using this miter gauge to guide a cut. Failure to
perform the calibration may result in an inaccurate cut-
ting.
•Oncethedigitalmitergaugehasbeencalibratedtoyour
table saw, no additional calibration is needed with subse-
quent use on the same table saw, unless the miter gauge
was calibrated to other table saws or carpenter’s square
after the rst calibration.
1. Slide the gauge bar into the groove on the T-slot in the
table or place the bar in the groove on a non T-slot table.
2. Fully raise the table-saw blade.
3. Loosen the locking handle.
4. Turn the miter gauge on.
Fig.12
5. Place a carpenter’s square rmly against the blade and
the miter fence (Fig. 12).
6. Press the Zero button for 2 seconds; the LCD will display
0.0º. The miter gauge is now calibrated to your table saw.
You may proceed to use the digital miter gauge for angle
cutting.
AUDIO FEEDBACK
During operation, the digital miter gauge produces an audi-
ble “click” as it swivels to the left or to the right. This feature
alerts the operator that the digital miter gauge is working
properly.
7/8” T-slot3/4” T-slot5/8” T-slot
a b c

 Loading...