EasyManua.ls Logo

RIDGID R4092 User Manual

RIDGID R4092
116 pages
To Next Page IconTo Next Page
Page #1 background imageLoading...
Page #1 background image
Cette scie a été conçue et fabriquée conformément aux
strictes normes de fiabilité, simplicité d’emploi et sécurité
d’utilisation. Correctement entretenu, cet outil vous donnera
des années de fonctionnement robuste et sans problème.
AVERTISSEMENT :
Pour réduire les risques de blessures, l’utilisateur
doit lire et veiller à bien comprendre le manuel
d’utilisation avant d’employer ce produit.
Su sierra ha sido diseñado y fabricado de conformidad con
nuestras estrictas normas para brindar fiabilidad, facilidad de
uso y seguridad para el operador. Con el debido cuidado, le
brindará muchos años de sólido funcionamiento y sin problemas.
ADVERTENCIA:
Para reducir el riesgo de lesiones, el usuario debe
leer y comprender el manual del operador antes de
usar este producto.
CONSERVER CE MANUEL POUR
FUTURE RÉFÉRENCE
GUARDE ESTE MANUAL PARA
FUTURAS CONSULTAS
SAVE THIS MANUAL FOR FUTURE REFERENCE
Your saw has been engineered and manufactured to our high standard for dependability, ease of operation, and operator
safety. When properly cared for, it will give you years of rugged, trouble-free performance.
WARNING:
To reduce the risk of injury, the user must read and understand the operator’s manual before using this product.
To register your RIDGID
product, please visit:
http://register.RIDGID.com
Pour enregistrer votre
produit de RIDGID, s’il vous
plaît la visite: http://register.
RIDGID.com
Para registrar su producto
de RIDGID, por favor visita:
http://register.RIDGID.com
OPERATOR’S MANUAL
MANUEL D’UTILISATION
MANUAL DEL OPERADOR
10 in. TILE SAW
SCIE À CARREAUX
DE 254 mm (10 po)
SIERRA DE LOSAS
DE 254 mm (10 pulg.)
R4092
Question and Answer IconNeed help?

Do you have a question about the RIDGID R4092 and is the answer not in the manual?

RIDGID R4092 Specifications

General IconGeneral
Motor/Amperage15 Amp
Blade Diameter/Size10 inches
Arbor Size5/8 inches
Dust PortYes
Electric BrakeNo
Spindle LockYes
No Load Speed4, 000 RPM

Summary

General Safety Rules

Specific Safety Rules

California Proposition 65 Warning

Warning regarding chemicals in product dust and potential health risks.

Symbols

Electrical

Extension Cords

Guidelines for selecting and using appropriate extension cords.

Electrical Connection

Specifications for connecting the tool to a power supply.

Grounding Instructions

Procedures for ensuring the tool is properly grounded to prevent electric shock.

Position of the Tile Saw

Recommended placement of the tile saw relative to the power outlet.

Features

Product Specifications

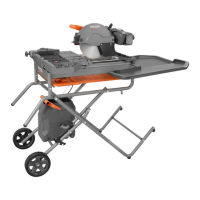
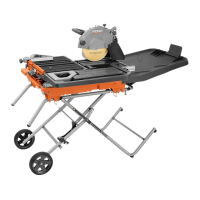
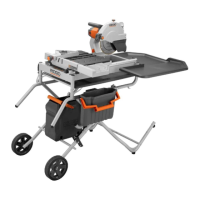
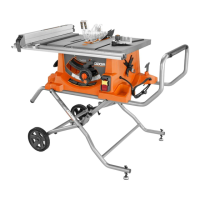
Technical details and dimensions of the tile saw.

Know Your Tile Saw

Familiarization with the saw's operating features and safety rules.

Tools Needed

List of tools required for assembly and alignment.

Assembly

Unpacking

Instructions for carefully removing parts from the carton and inspecting them.

Installing Motor Head Assembly to Base

Step-by-step guide for attaching the motor head to the saw base.

Assembling WSUV™ Stand

Procedure for assembling the WSUV™ stand for the tile saw.

Attaching Water Tray to WSUV™ Stand

How to secure the water tray onto the WSUV™ stand.

Installing Water Filter and Water Pump

Steps for installing the water filter and connecting the water pump.

Installing Motor Head and Base to Water Tray

Connecting the motor head and base assembly to the water tray.

Installing/Removing the Frame and Sliding Table

Guide to attaching and detaching the frame and sliding table.

Installing the Cutting Wheel

Procedure for safely installing the tile cutting wheel.

Installing Splash Guard Assembly

Instructions for attaching the two-part splash guard assembly.

Installing the Rear Water Tray Extension

How to attach the rear water tray extension to the saw.

Installing Sliding Table Extension

Procedure for attaching the sliding table extension.

Installing the Miter Guide

How to attach and adjust the miter guide for cuts.

Filling/Changing the Water Tray

Instructions for filling the water tray and procedures for changing the water.

To Close/Open the WSUV™ Stand

Steps to fold and unfold the WSUV™ stand.

Operation

Applications

List of intended uses and types of cuts the saw is designed for.

Using the Pump Switch

Explanation of the three positions for the water pump switch.

On/Off Switch

How to operate the on/off switch and its locking feature.

Locking/Unlocking the Motor Head for Plunge Cuts

Procedure for unlocking and adjusting the motor head for plunge cuts.

Making Cuts

General advice and techniques for making accurate cuts on tile.

Using the Laser Guide

How to use the laser guide for precise cutting alignment.

To Make a Cross Cut/Rip Cut

Instructions for performing straight 90° cross and rip cuts.

To Make a Diagonal Cut

Procedure for making diagonal cuts on tile materials.

To Make a Miter Cut

Steps for making angled cuts on material using the miter guide.

To Make an L-Cut

Procedure for making two separate cuts to form an L-shape.

To Make a Bevel Cut

Guide to making angled cuts by adjusting the motor head.

To Make a Plunge Cut

Procedure for making cuts from the center of the material.

Making Garden Paver Cuts

Instructions for cutting garden pavers of various thicknesses.

Adjustments

To Square the Cutting Wheel to the Table

Procedure to ensure the cutting wheel is perpendicular to the table.

To Adjust the Frame

How to adjust the frame for smooth rolling and stability.

To Adjust the Sliding Table

Procedure to adjust the sliding table for smooth movement.

Depth Stop Adjustments

How to adjust the depth stop for desired cutting depth.

Positive Stop Adjustments

Adjusting the 0° and 45° positive stops for accurate angles.

Aligning the Laser Guide Line

Steps to align the laser guide with the cutting line for precision.

Maintenance

Brush Replacement

Procedure for checking and replacing worn motor brushes.

Cleaning the Rails

How to clean the table rails for smooth operation.

Cleaning the Saw

Steps for cleaning the saw, including flushing debris and drying.

Cleaning the Pump

Instructions for cleaning the water pump and its intake screen.

Storing the Saw

Procedure for properly storing the tile saw and its components.

Warranty

RIDGID® Hand Held and Stationary Power Tool 3 Year Limited Service Warranty

Details of the 3-year limited warranty for the tool.

How to Obtain Service

Instructions on how to get warranty service or repairs for the tool.

What Is Not Covered

Exclusions from the product warranty coverage.

Related product manuals