7
INSTALLATION
BOILER PLATE (A)
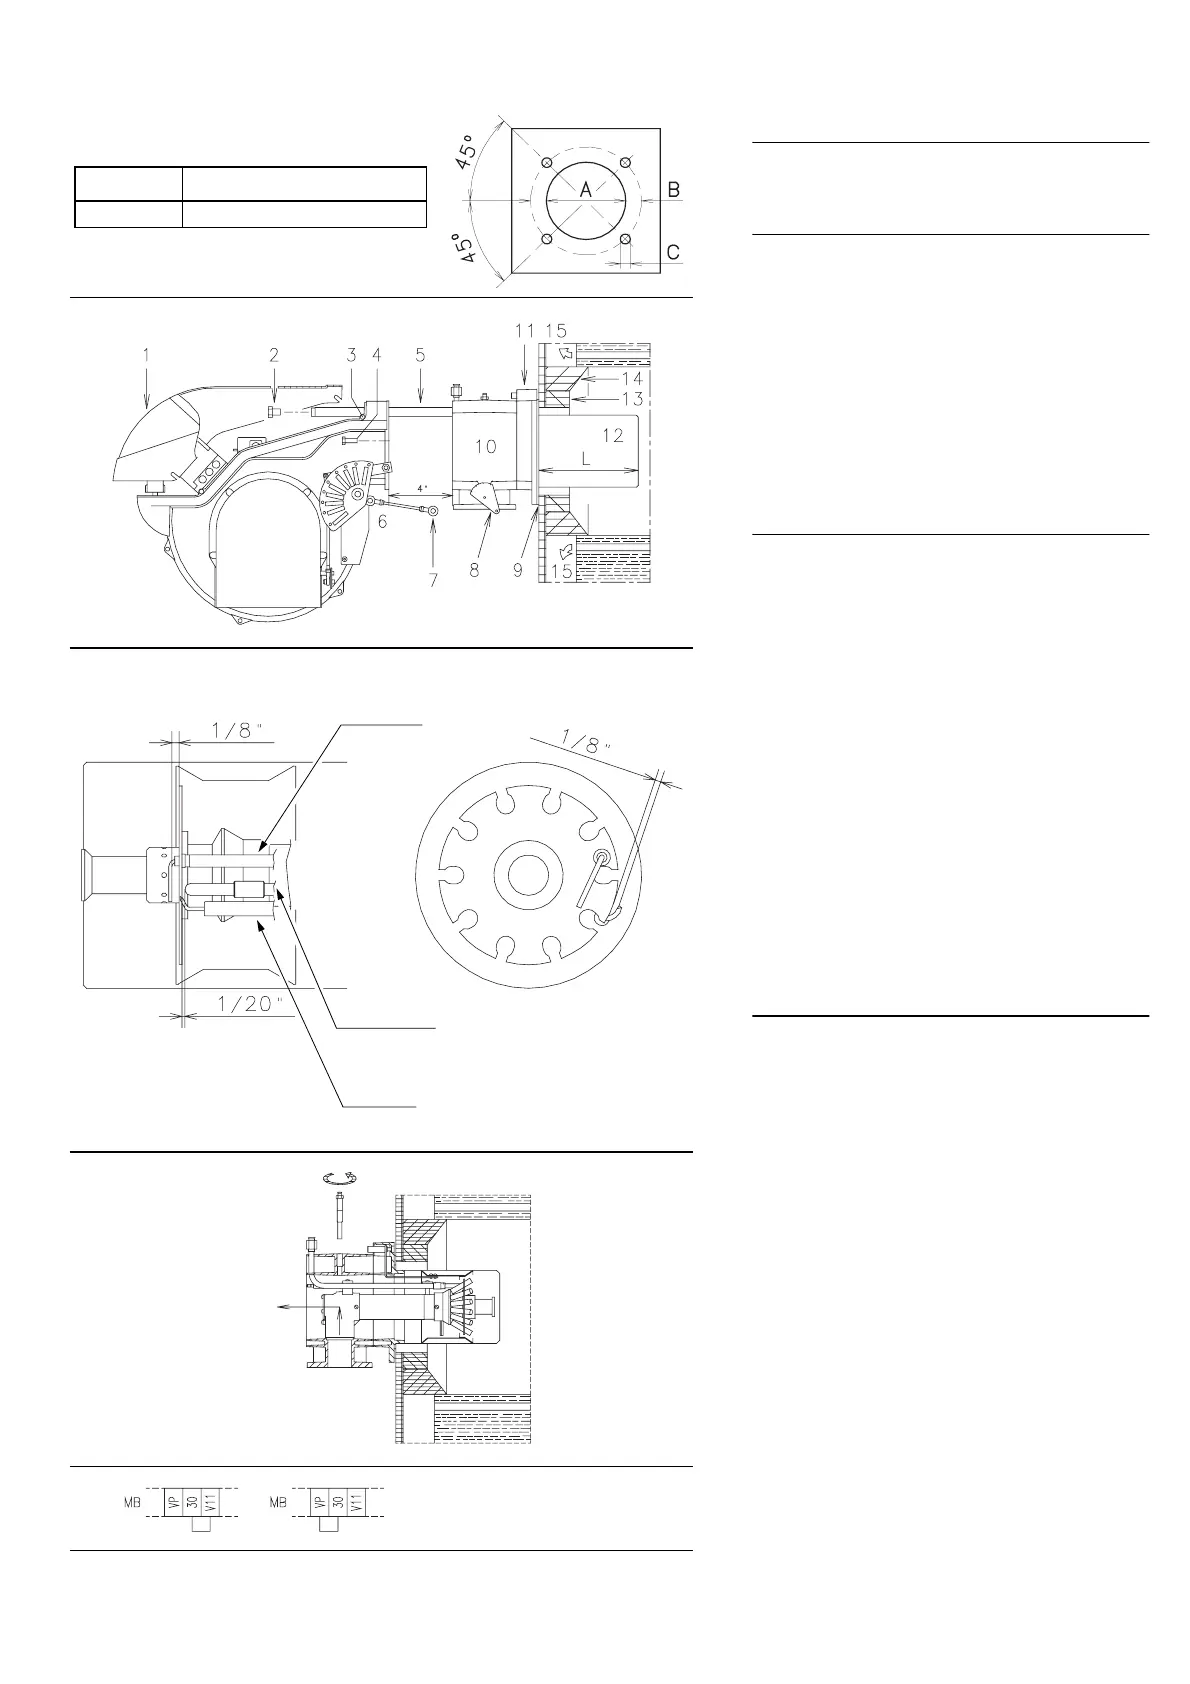
Drill the combustion chamber mounting plate as shown
in (A). The position of the threaded holes can be marked
using the burner head gasket supplied with the burner.
BLAST TUBE LENGTH (B)
The length of the blast tube must be selected according
to the indications provided by the manufacturer of the
boiler, and in any case it must be greater than the thick-
ness of the boiler door complete with its insulation. The
length available, L (inches), is 14
21
/
32
“.
For boilers with front flue passes 15) or flame inversion
chambers, protective insulation material 13), must be
inserted between the boiler's refractory 14) and the blast
tube 12).
This protective insulation must not compromise the
extraction of the blast tube.
For boilers having a water-cooled front, the insulation
13)-14)(B) is not required unless it is required by the
boiler manufacturer.
SECURING THE BURNER TO THE BOILER (B)
Before securing the burner to the boiler, check through
the blast tube opening to make sure that the flame sen-
sor probe is correctly set in position, as shown in (C).
Now detach the combustion head from the burner, fig.
(B):
- Loosen the four screws 3) and remove the cover 1).
- Disengage the swivel joint 7) from the graduated sec-
tor 8)
- Remove the screws 2) from the two slide bars 5).
- Remove the two screws 4) and pull the burner back on
slide bars 5) by about 4”.
- Disconnect the wires from the probe and the electrode
and then pull the burner completely off the slide bars.
Secure the flange 11)(B) to the boiler plate, inserting the
gasket 9)(B). Use the 4 screws, also supplied with the
unit, after first protecting the thread with an anti-locking
product.
The seal between burner and boiler must be airtight.
If you noticed any irregularities in the positions of the
probe or ignition electrode during the check mentioned
above, remove screw 1)(D), extract the internal part
2)(D) of the head and proceed to set up the two compo-
nents correctly.
IGNITION PILOT ADJUSTMENT
Place the pilot and electrode as shown in fig. (C).
The pilot works correctly at pressures ranging from 5 -
12” WC.
Important
To set the pilot without main burner operation, proceed
as follows:
- Move the jumper from terminals "
30-V11
" to terminals
"
30-VP
", as given in fig. (E), this way the main valve is
cut out.
- With the burner in the manual position, hold the air
damper in the minimum position and make the setting.
- When the setting is correct, replace the jumper on “
30-
V11
”.
(C)
inch A B C
RS 190/M
9
1
/
16
“12
25
/
32
“ - 14
1
/
2
“
5
/
8
W
D455
(A)
(E)
Probe
Electrode
(B)
D2436
Ignition pilot
D2435
(D)
MB - Burner terminal strip
D2434
D2317
1
2




 To Next Page