Install steps:
. Connect
When the app prompts you, pull out the battery
tab to power it on.
. Configure
In the Ring app, choose the Sensor placement
(Main Door, Secondary Door, or Window), give
it a unique name describing the location, and
assign it to a room.
Door and Window Settings
If you’re using the Contact Sensor on a door,
remember to choose Main Door or Secondary
Door. Main doors have Entry and Exit Delays to
help prevent false alarms.
For more on Entry and Exit Delays, see page 19.
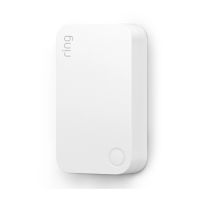
Contact Sensors.
Contact Sensors can be installed on any door
or window. It doesn’t matter which direction or
orientation you install them, as long as the Sensor
and magnet line up and are no more than .cm
(/") apart.
We recommend installing Contact Sensors on every
door and window that oers easy access to your
home, such as ground floor windows, or upper floor
windows near obstacles an intruder can climb.
TIP
If you have multiple Contact Sensors to add
to your Ring Alarm, remember to connect,
configure, and install them one at a time.
. Install.
Choose where you’d like to install your
Sensor and magnet. If you have a narrow
doorway, use the included Slim Magnet instead.
Line them up with no more than
.cm (/") between them (see image).
If installing it on a door, choose a side without
hinges (see image).
Peel the backing from the attached tape and
press the Sensor and magnet into place.
"Tampering" a Sensor
When you slide the battery cover o of a
Sensor to change the batteries, it will show as
“tampered” in the Ring app. It will return to
normal once you slide the cover back on.
If you need to arm your Alarm while a Sensor is
in this "tampered" state, you will be prompted to
bypass it to continue arming.
For more on Bypassing Sensors, see page 18.
1110