6 Rinnai I-Series Boiler Conversion Manual
2. Replace the Orice
1. Conrm that the inlet gas pressure is between the minimum and maximum pressures allowed for this boiler.
2. Disconnect electrical power to the boiler.
3. Turn o the boiler’s gas supply by turning o the gas control valve.
4. Remove the boiler’s front panel by removing the four screws that secure the panel.
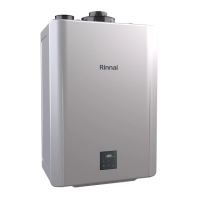
5. Locate the orice cover plate on top poron of gas valve (Figure 1).
6. Remove the three screws securing the orice cover plate (Figure 1).
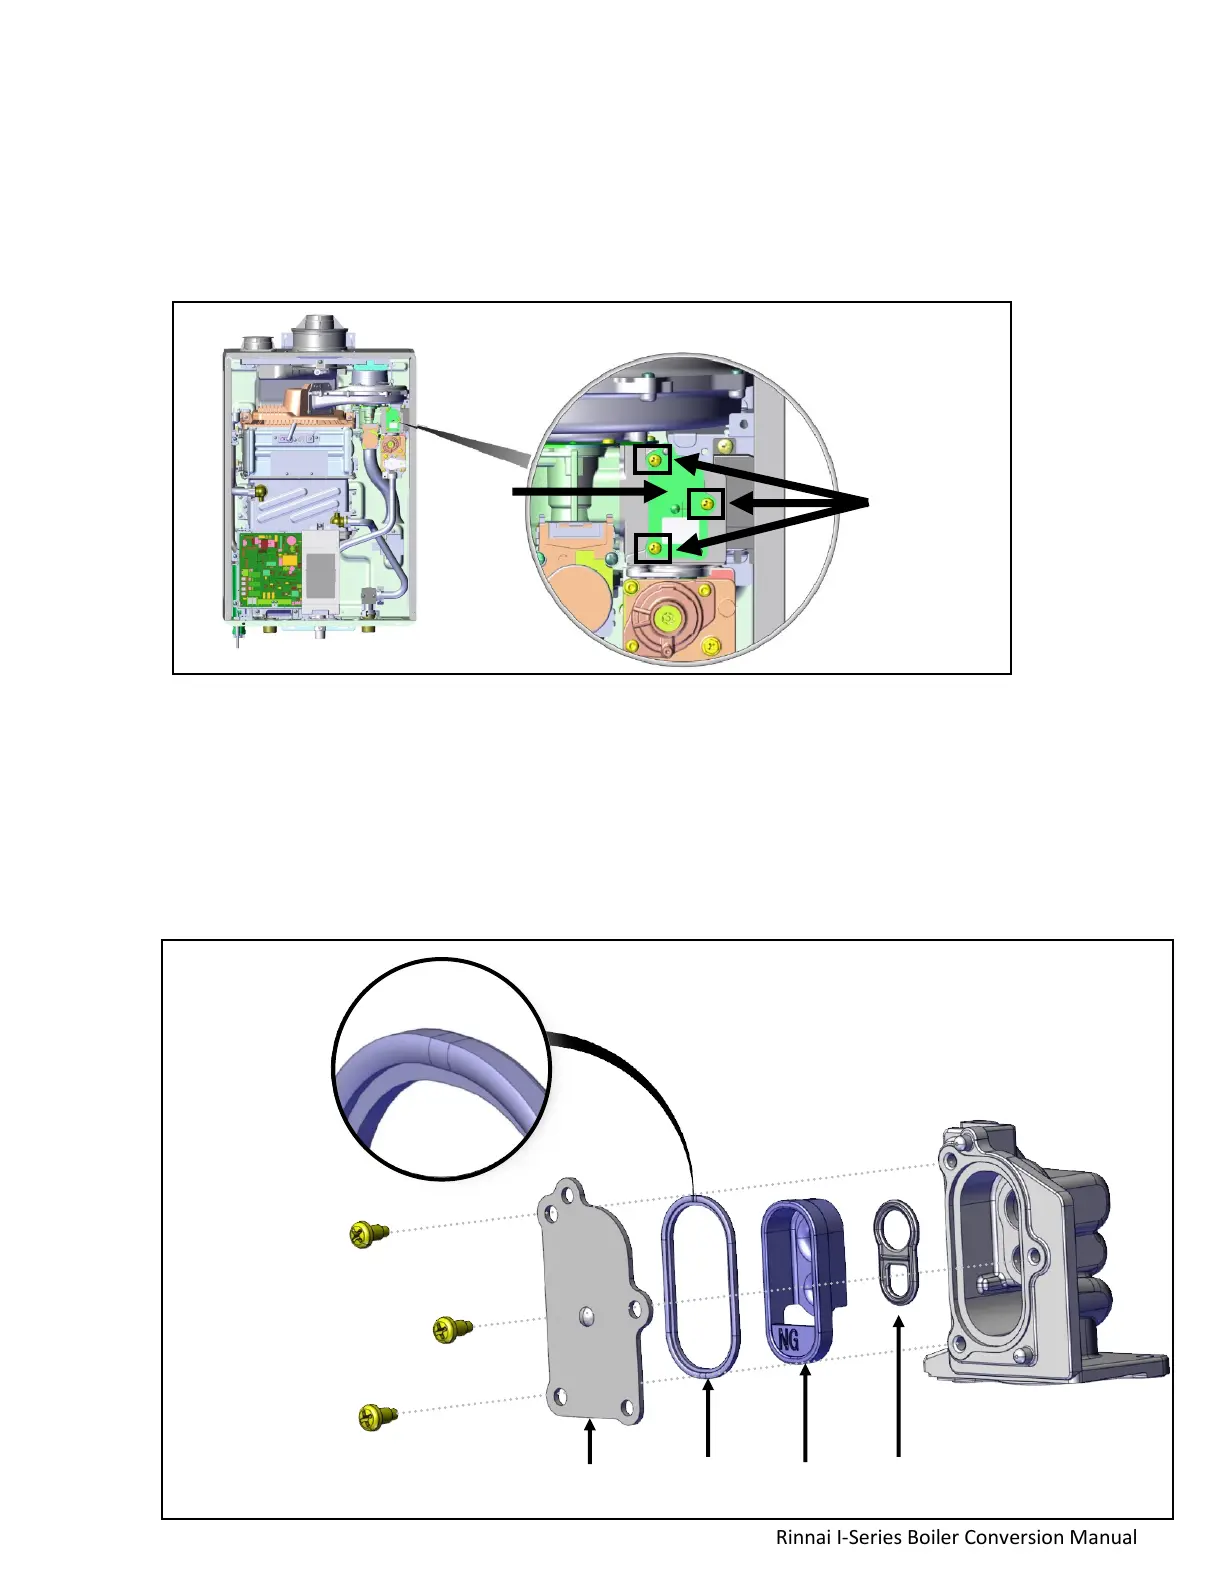
7. Remove the plasc orice from the housing (Figure 2).
8. Install the new inner and outer gaskets onto the new orice (Figure 2).
9. Install new orice into housing (check the gas type displayed on the orice: Red orice is LPG; Blue orice is NG).
10. Conrm gasket is correctly in place (the groove side of gasket must be facing outwards) (Figure 2).
11. Reinstall the orice cover plate using the three screws to secure it to the gas valve.
12. Turn on the power and gas. Inspect for gas leaks.
13. Proceed to the next secon (Adjust Parameter Sengs).
Figure 1
Grooved side
of outer gasket
MUST be facing
outwards.
Cover
Plate
Orice
Outer
Gasket
Inner
Gasket
Figure 2
Orice
Cover
Plate
Three screws
 Loading...