Rinnai Australia - 25 - Solar Split Systems Operating / Installation Manual - Version 8 - 18/10/10
STANDARD INSTALLATION CONTINUED
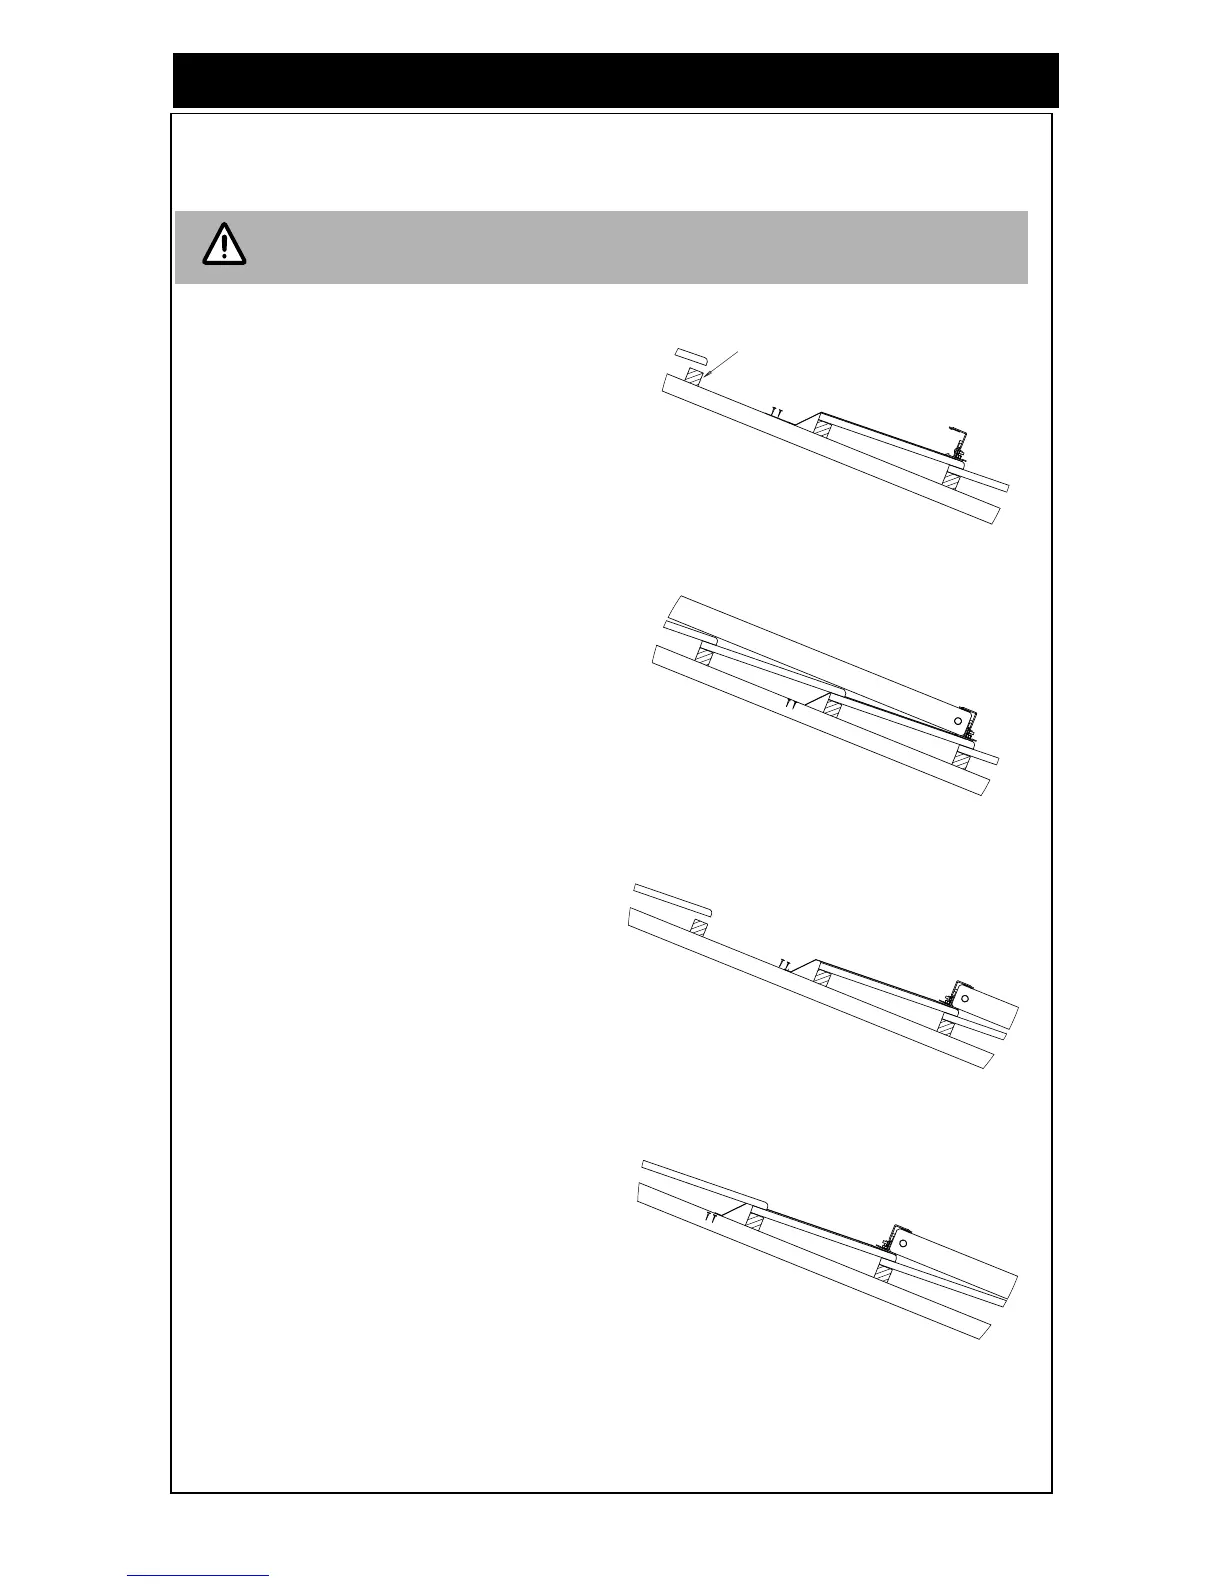
Fastening (Collectors to a Tiled Roof)
This installation is not suitable for in cyclonic areas. For further details, please
contact your local Rinnai Solar distributor.
• Position the lower collector mounting rail
assembly so that the rail is angled to ensure
the collectors have an 8 mm / collector rise.
• For aesthetic reasons it is best to mount as
close as possible to the gutter.
• Attach the collector mounting straps to the
rafter or truss under the tiles as shown in
Figure 19.
Figure 19 - Mount Lower Collector Rail
• Place the collector(s) onto the roof above the
lower rail. If more than one collector is being
installed then join them together using the
compression fittings supplied.
• Push down on the collector retainers to clamp
the collector and tighten the nuts as shown in
Figure 20.
Figure 20 - Mount collector on Roof
• Position the upper collector rail above the
collectors. Push down on the retainers to
clamp the collector and tighten the nuts.
• Attach the collector mounting straps to the
rafter or truss under the tiles as shown in
Figure 21.
Figure 21 - Attach Mounting Straps
• Replace the tiles and ensure the collector is
secure as shown in Figure 22.
Figure 22 - Replace Tiles