22
4.3.4 Using Sub-Zones as Remote Starting Points
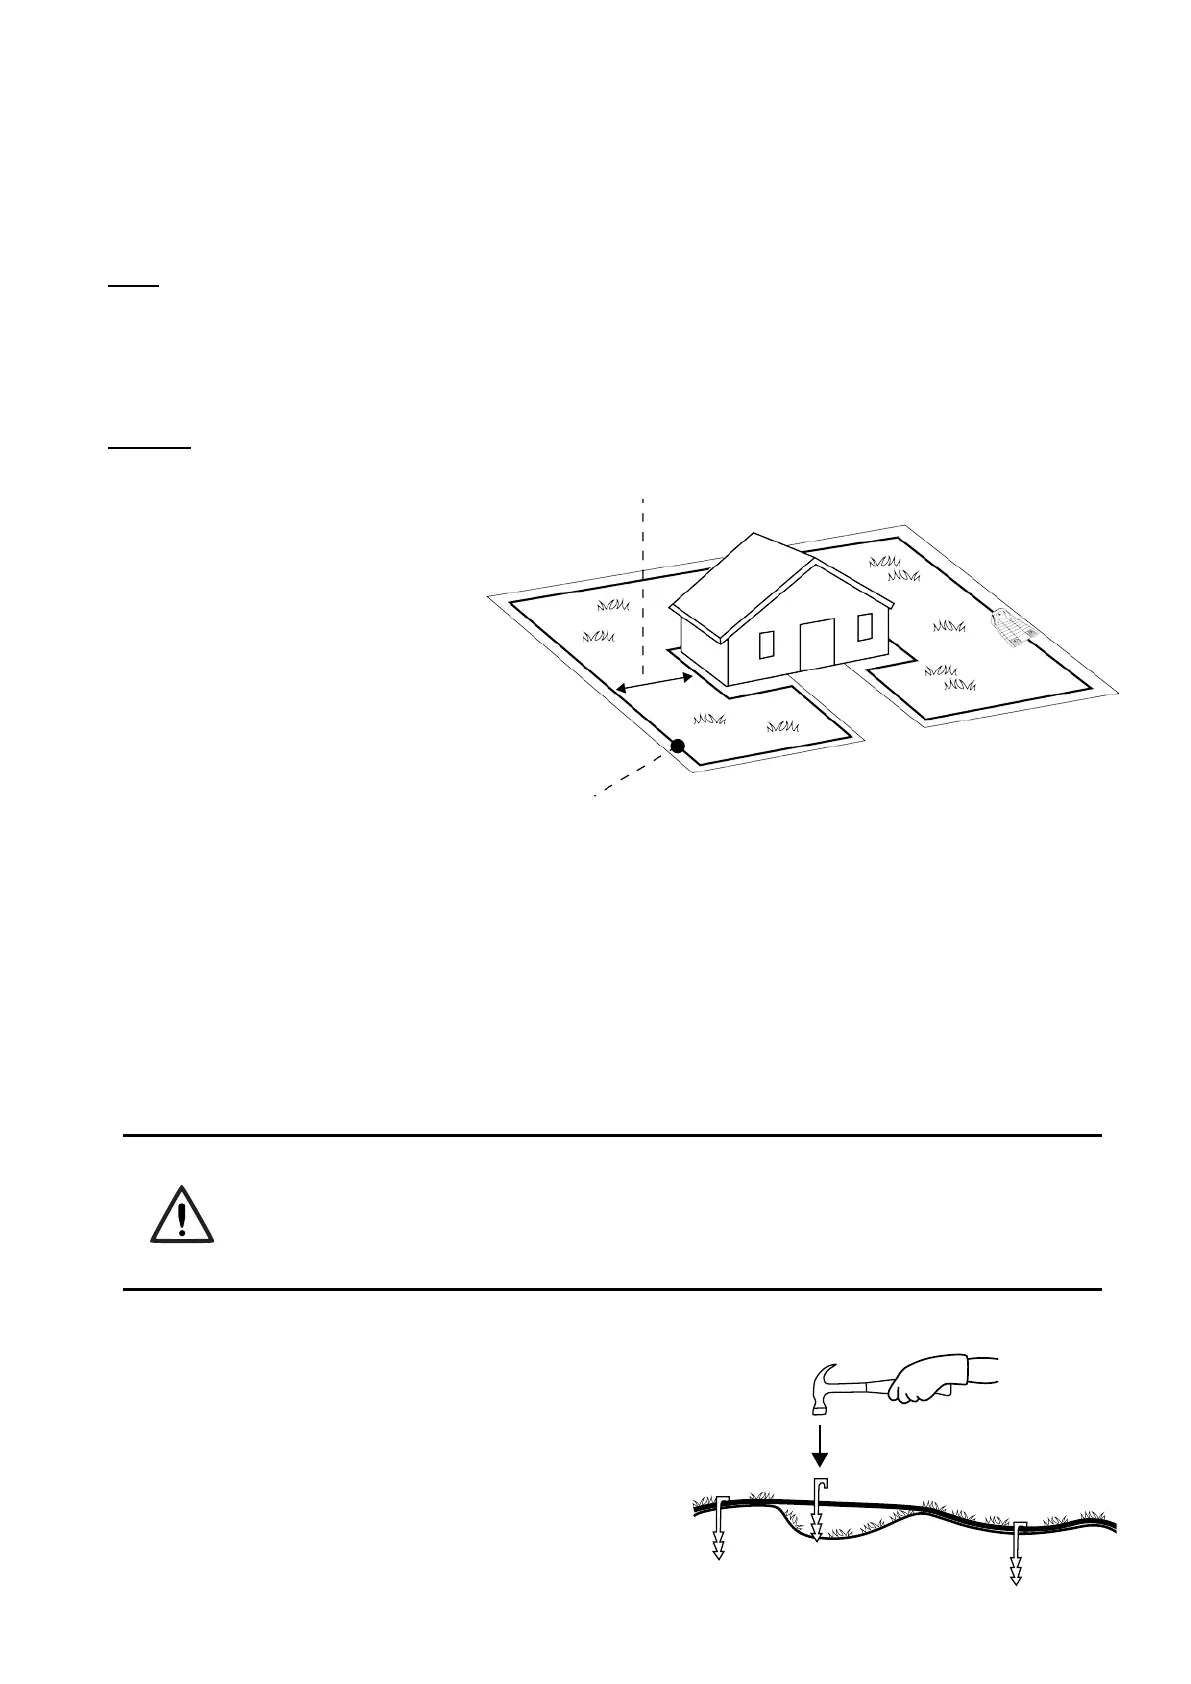
There are cases when a Main Zone has two or more big parts connected by a wide (more than 2 meters) passage,
like a front and a back yards.
In order to ensure proper coverage of all Main Zone’s parts in such cases, you may want the mower to occasionally
startmowingatsomespecicpoint(otherthantheBaseStation)alongtheperimeterwire.Wecallthesepoints
–RemoteStartingPoints.SettingaRemoteStartingPointcanbedonebydening(adding)aSub-Zoneatthe
desired place (see section 6.4.2, P022-P023).
Note:
DuringtheSub-Zonedenitionprocessyouareaskedtospecifytheareaofanewlyaddedsub-zone.Incaseof
a Remote Starting Point, this area should be the area of the remote part of the Main Zone. You need to reduce
MainZone’sareasettingaccordingly(seesection6.4.1).Seetheexamplebelow.Thisprocessactuallydenes
the probability (or the frequency) of departures from each starting point (when for the Main Zone the Base Station
itself is a starting point).
Example:
Let’s say your Main Zone is 1000m
2
. It
has a back yard (400m2), where the
Base Station is installed, and a front yard
(600m2). In order to dene a Remote
Starting point for the front yard, start a
process of adding a Sub-Zone. Once
well inside the front yard, set the area of
the newly added Sub-Zone to 600 and
immediately reduce (see section 6.4.1)
the area of the Main Zone to 400m2.
Thus, we now have 40% probability for
the mower to start from the Base Station
to cover the back yard, 60% probability
to start from the Remote Starting point in
favor of the front yard, as demonstrated
in the following drawing:
4.4 Fastening Perimeter Wire to the
Ground
o Before starting to lay the Perimeter Wire, it is recommended to cut the grass where the wire is to be laid.
It will then be easier to attach the wire to the ground. The risk that the mower will damage the wire during
the operation is reduced.
o It is not necessary to bury the Perimeter Wire, though you may do so, up to 5 cm (2 inches) deep.
o Pull the wire tight while hammering the peg all the way into the ground.
o Considerburyingthewireatexposedareas,suchaspavementsorotherareaswithafrequentfoottrafc.
WARNING !
Protect your eyes! Protect your hands!
Use proper eye protection and wear appropriate work gloves when hammering the pegs.
Hard or dry ground may cause pegs to break when driving them in.
o Use a hammer to insert the pegs into the ground.
o Insert the pegs at distances that will keep the wire
down below the grass level and prevent the wire from
becoming a tripping hazard (approximately 75 cm /
30” between pegs).
• The wire and the pegs will gradually become
invisible under the growth of new grass.
Remote Starting Point
Main Zone
At least 2 meters (6.5 ft.)
wide