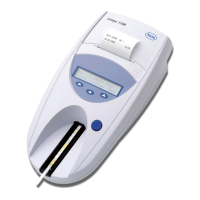
Urisys - Operator’s Manual V.
CAUTION: Regular calibration is necessary to ensure the quality of the results obtained. Roche
Diagnostics cannot warrant the correctness of results if the system is not calibrated regularly.
ATTENTION: You can recalibrate the system at any time, even if a week has not elapsed since the last
calibration, for example if a Combur
Test
®
UX test strip has returned an implausible result. Start the
calibra tion procedure by pressing the left function key (“Calibr.”) with the analyzer in Ready-to-Measure
mode. The message “START CALIBRATION !” appears. Follow the calibration procedure described above.
ATTENTION: If you reply with “No” to the weekly “REPEAT CALIBRATION !” reminder, for example
because you have used up your supply of Control-Test M calibration strips, the message “Repeat
calibration” is printed together with each patient report from subsequent readings. Obtain a new pack of
Control-Test M and recalibrate immediately.
Calibration printout
Figure
If the new calibration results are within the permitted range, the message
“CALIBRATION O.K.” is automatically printed with a date and timestamp and also
a list of reflectance values for measuring positions – for the orange LED
(middle column) and green LED (right column) (see Figure ).
Calibration errors
If the results obtained for the reference pad or the calibration strip are outside the programmed tolerances, the following
messages appear: “REFERENCE PAD ERROR !”, “CALIBRATION INVALID !” or “CALIBRATION ERROR !”.
In the event of a calibration error or if the calibration was invalid, repeat the calibration procedure with a fresh Control-Test
M calibration strip. Press the START button to return to the “START CALIBRATION” menu. Follow the same calibration
procedure as above. When the message “CALIBRATION O.K.” has been printed, proceed with the reading of test strips. If
you continue to receive an error message, see Section .
If the analyzer is switched off when one of the above-mentioned calibration status messages is displayed and then
switched on again, it reverts to Ready-to-Measure status following a successful self check, provided that the most recent
calibration was carried out not more than a week ago. Otherwise, the message “REPEAT CALIBRATION !” appears (see
above).

 Loading...