Urisys - Operator’s Manual V.
. Press the START button (see Figure ). An acknowledging beep sounds. After
warming up time, the test strip tray advances slightly, the retaining bar closes,
and the grey reference pad on the test strip tray is read (see Figure ).
Figure
Figure
ATTENTION: Ensure that the retaining bar is locked into place and
that the test strip is in the correct position. If the test strip is not
correctly located in the middle of the test strip tray, move it gently
to the side until it is properly aligned (see Figure ). Be careful not
to move the test strip tray.
Figure
. Fifty-five seconds after the START button is pressed, the first test pad is measured, followed by the others. After that, the
test strip tray returns to the start position and the retaining bar opens.
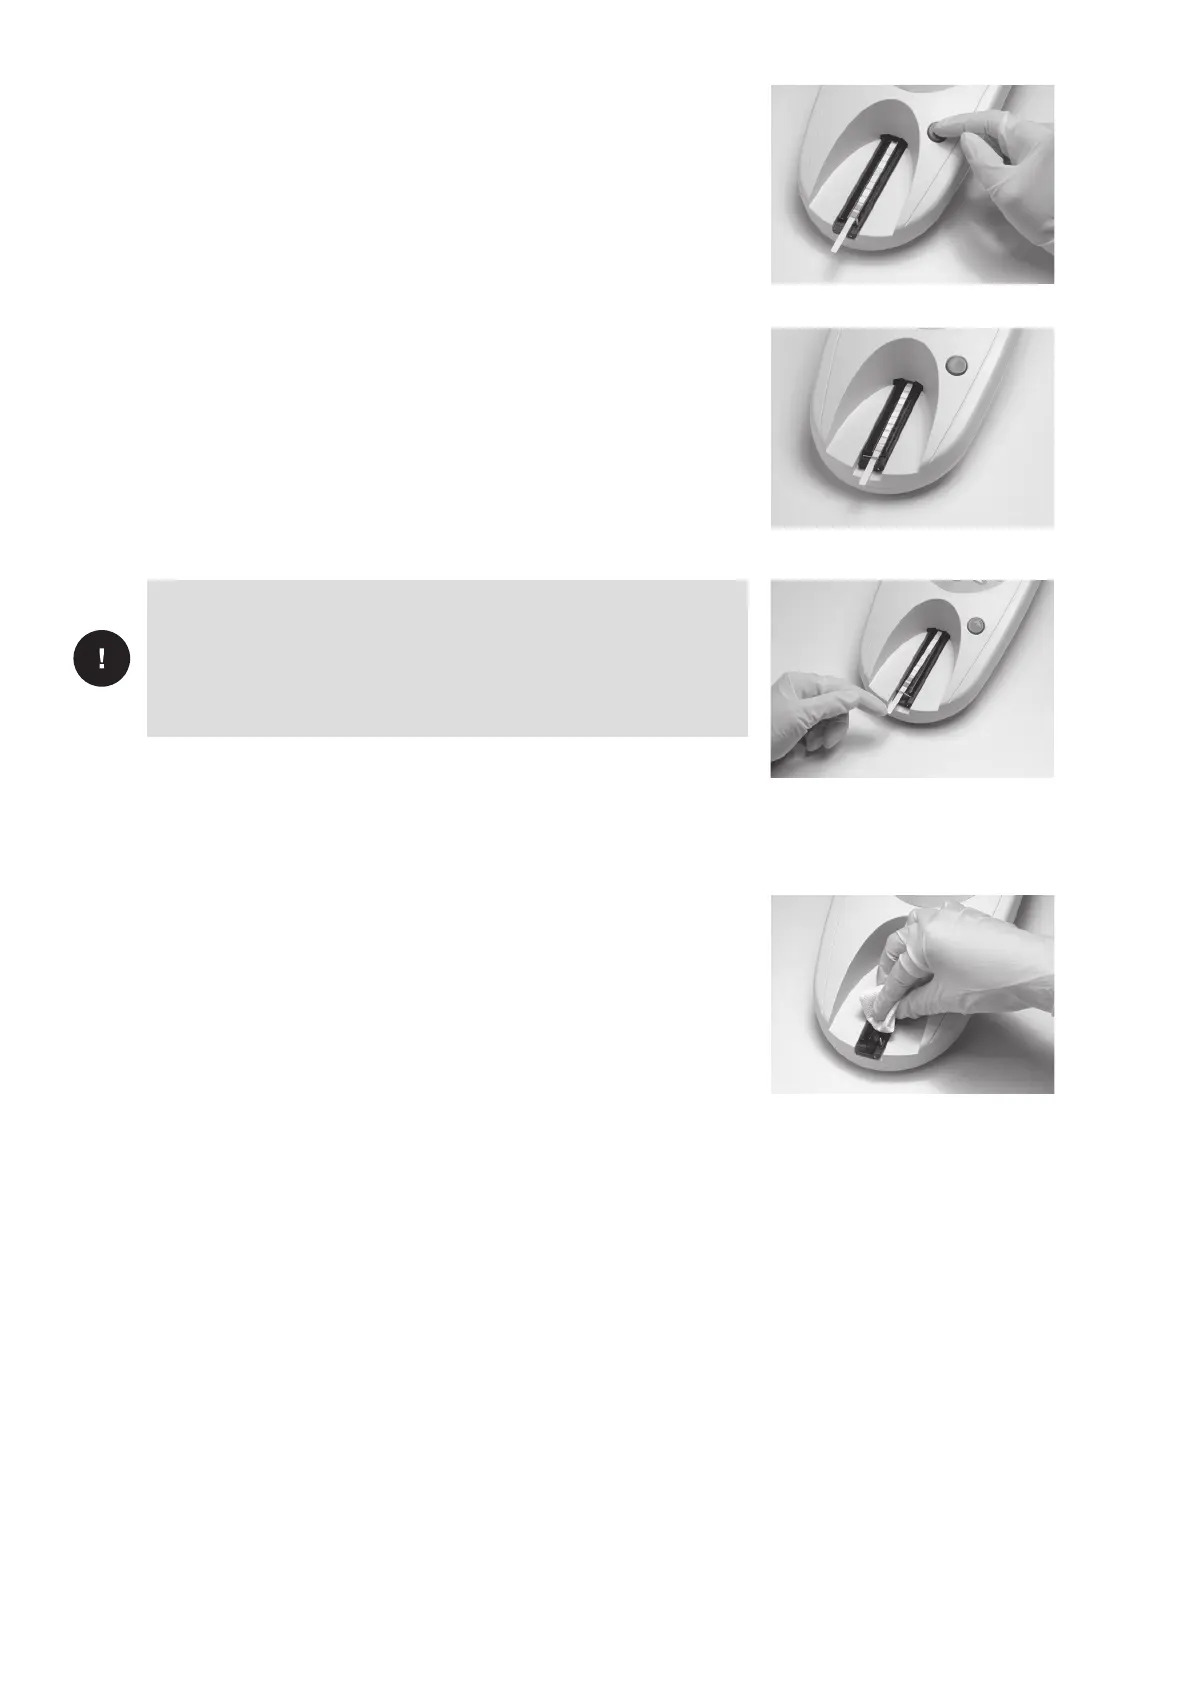
. Remove and dispose of the test strip. Wipe any urine residues from the test
strip tray with a lint-free cloth (see Figure ).
Figure
. The result will be printed out and the next sample number will be displayed. The next test strip can be dipped, wiped off,
placed in the test strip tray and read by pressing the START button. Refer to Section . for details of what must be
observed when working with patient identification numbers.

 Loading...


