32
R9V
6 - MACHINE OPERATION
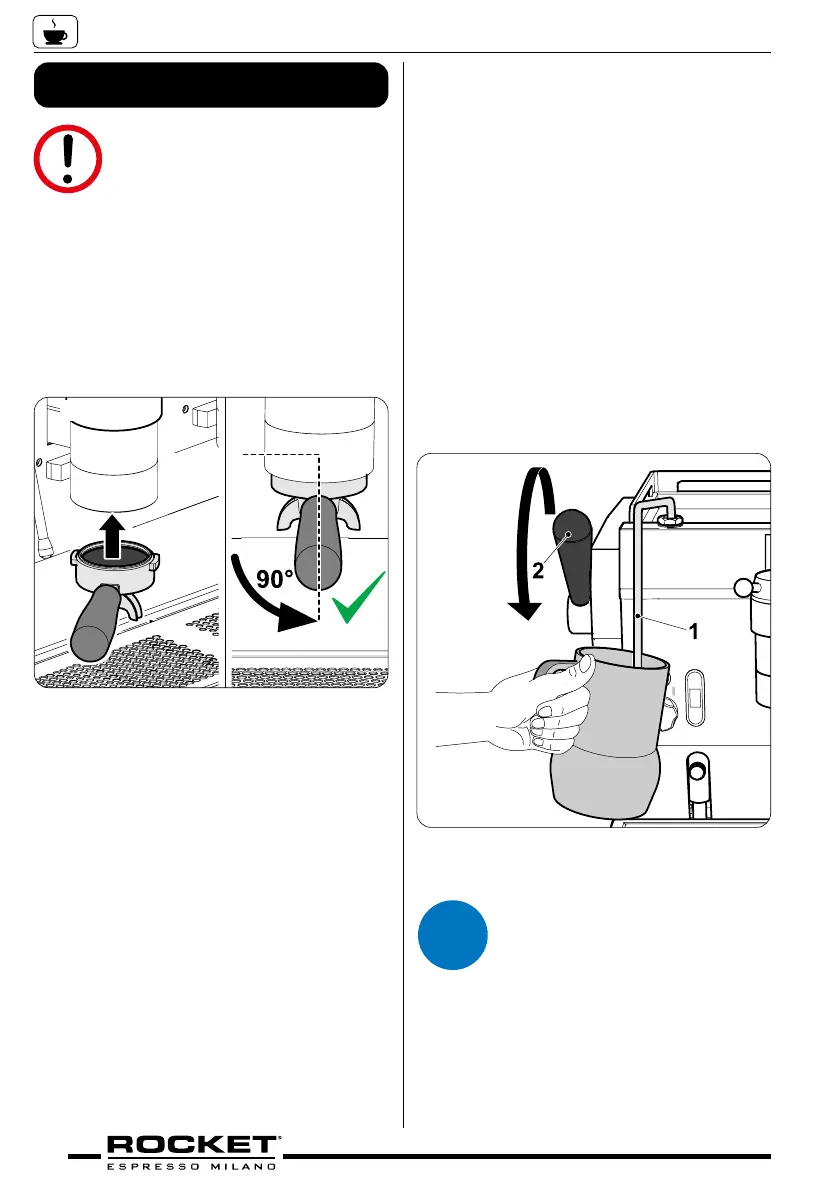
1. Install the portalter by inserting it into the
group head and rotate the portalter handle
from left to right. The portalter is inserted
properly once it is rmly inside the group
head and the portalter handle is sitting at
90 degrees from the face of the machine
(1 - g._6.1)
Make sure that the machine is
ready for full safety operation
as described in the previous
chapters
g_6.1
2. You can now turn the group control paddle to
start the water owing through the portalter.
3. It is important to leave the portalter in-
stalled in the group head when not in use.
The portalter must remain heated for a
successful brew process. It will also prevent
the head seal inside the group head from
drying out prematurely.
4. Single (with one spout) and double (with
two spouts) portalter handles come ready
assembled with single and double baskets
tted.
5. You are now ready to start brewing coee
by removing the portalter and placing
ground coee inside the lter basket. Press
down on the coee with the supplied tam-
per and install the portalter in the group
head. Turn the paddle (or operate automat-
ically through the display) to release heated
water and start the brewing process.
6. To stop the brewing process return the
group control paddle to the starting position
so that the water stops owing.
7. To heat milk dip the steam tip (1 - g._6.2)
under the surface of the milk which is con-
tained in a stainless milk jug. Release heat
into the milk by pulling the steam handle 2
forwards so the valve is fully open. Once
the milk is at a good temperature for con-
sumption push the lever back to the upright
position. Remove jug from under the steam
wand.
g_6.2
8. In order to prevent heated
milk from being sucked into
the boiler it is recommended
that you purge the steam wand
after heating milk. Purge by
releasing steam for a few sec-
onds into the atmosphere.
9. To dispense hot water press the hot water
symbol 3 on the touch screen and release
the required amount of water into a cup or