Rockwell Automation Publication PFLEX-AP005A-EN-P - October 2010 19
Drive Selection Considerations Chapter 1
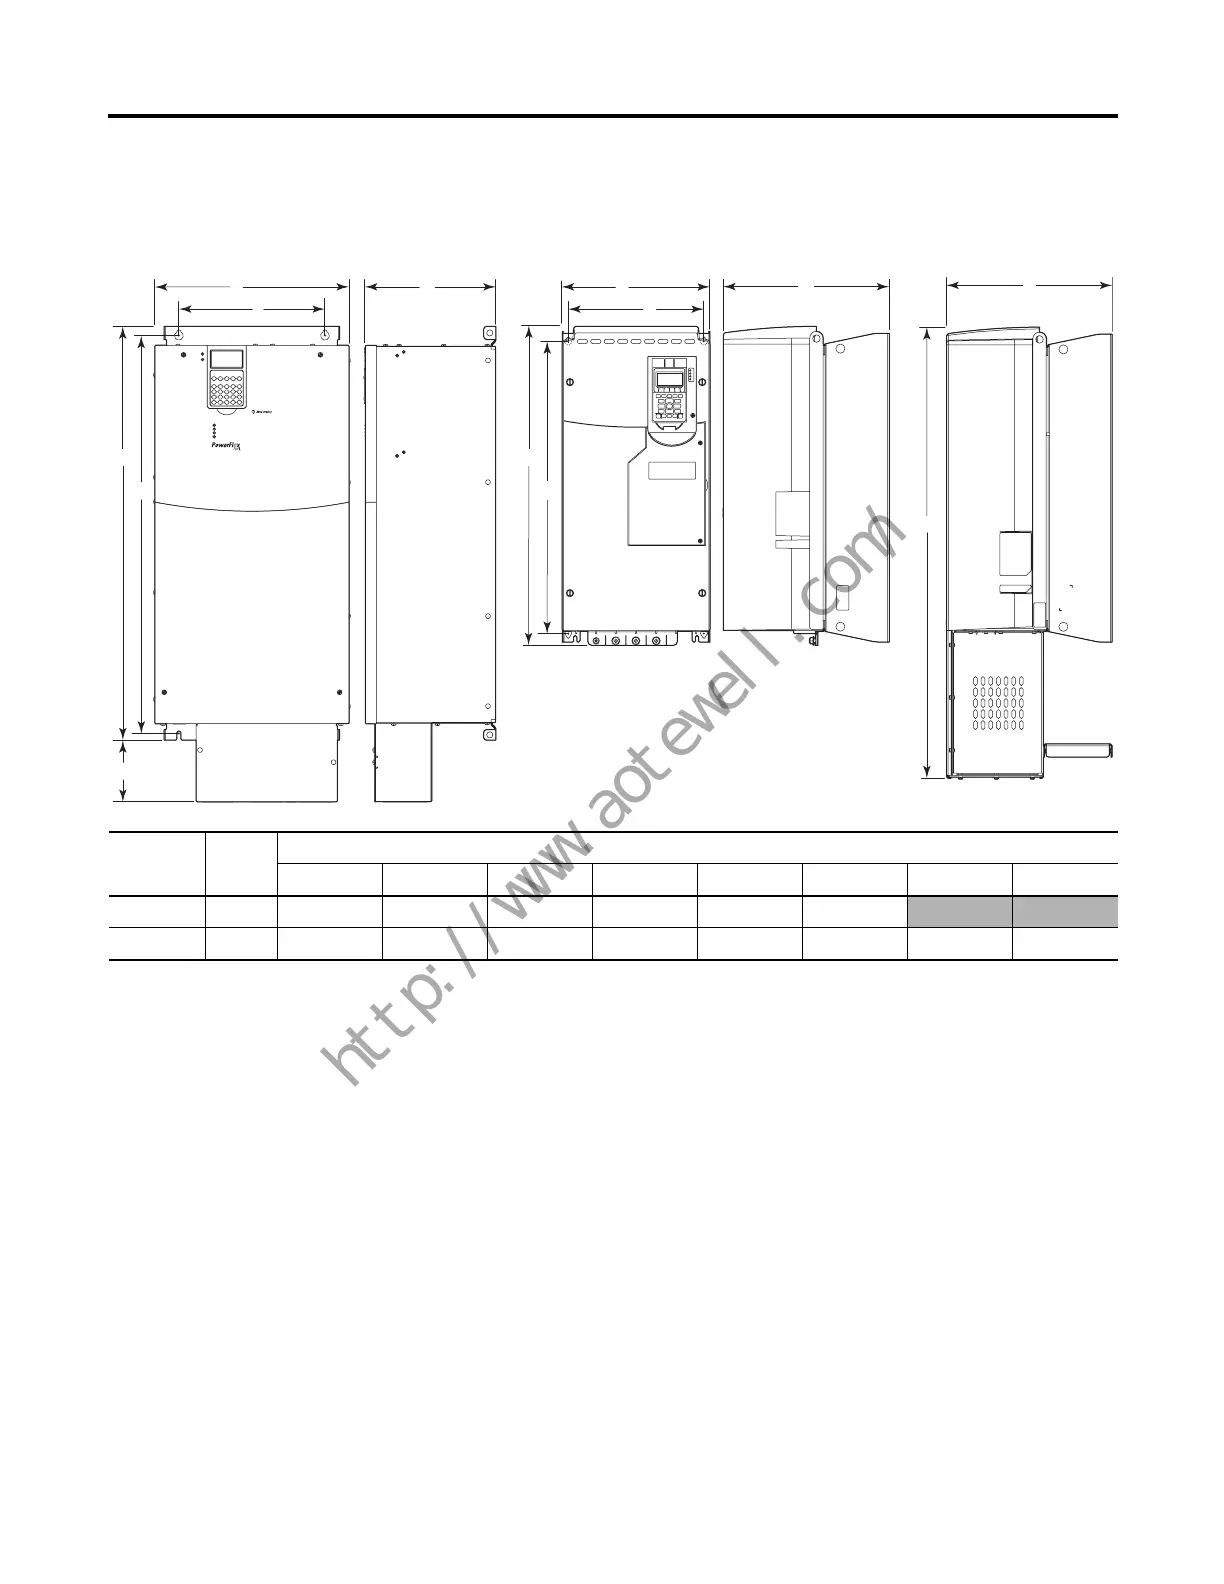
Figure 7 - PowerFlex 700 Frame 6 to PowerFlex 750-Series Frame 6
Dimensions mm (in.)
DriveFrameABCDE FGH
700 6 403.9 (15.90) 300.0 (11.81) 275.5 (10.85) 850.0 (33.46) 825.0 (32.48) 126.3 (4.97)
750-Series 6 308.0 (12.13) 283.0 (11.14) 346.4 (13.64) 665.5 (26.20) 609.0 (23.98) 346.7 (13.65 945.1 (37.21) —
C
A
B
E
D
F
C
A
B
E
D
F
G
PowerFlex 700 Frame 6 PowerFlex 750-Series Frame 6 PowerFlex 750-Series
Frame 6 w/NEMA 1 Kit
 Loading...


