Do you have a question about the Rockwell Automation FlexPak 3000 OIM and is the answer not in the manual?
Lists other relevant manuals for drive installation, startup, parameter descriptions, and troubleshooting procedures.
Provides contact information for questions or problems with the products described in the manual.
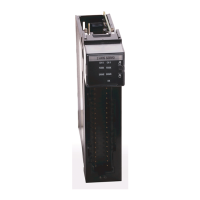
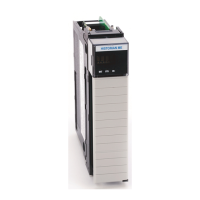
Details the OIM keys, grouped by programming and control functions, with descriptions of programming and control keys.
Explains the OIM display areas: drive status indicators, program/monitor mode information, and key indicators.
Describes the OIM power-up sequence, communication establishment, and indicator status during startup.
Provides steps to adjust the OIM display contrast for better readability, especially with ambient temperature changes.
Explains how to change the OIM display language, including options like CODE for parameter numbers.
Details how to scale speed, load, and outer control loop units to match application requirements for display purposes.
Guides users through changing the scaling units for speed, load, and outer control loops, using the OIM.
Explains how to define custom units for speed and outer control loops, including naming tags and setting full scale values.
Defines parameter types: Input, Output, Tunable, Configurable, Retentive, and Non-retentive.
Explains how to navigate OIM menus and access parameters in program mode for configuration.
Details how to access the Main Menu and navigate through various menus to reach parameters.
Describes how to use the HELP key to get information on menus, parameters, and their attributes.
Guides users on how to locate and select specific parameters within the OIM menu structure.
Explains how parameter values are displayed in parameter lists and how output parameters are updated.
Details the procedure for changing input parameter values through the OIM parameter entry screens.
Identifies situations where parameter values cannot be changed, such as when the drive is running or protection is enabled.
Explains how to use software-based password protection to prevent unauthorized changes to drive parameters.
Covers saving parameter values, restoring from previous saves, and restoring factory defaults using OIM memory operations.
Provides steps for performing Memory Save, Memory Restore, and Restore Defaults operations.
Describes the prompt to save parameter changes when exiting program mode, allowing users to save or discard modifications.
Lists prerequisites and required motor data before performing the Quick Start configuration process.
Explains the Quick Start Exit Menu options for returning to a previous step or exiting the process with or without changes.
Details the step-by-step procedure to configure the drive using the Quick Start menu for rapid setup.
Explains the process of self-tuning the drive's current minor and speed loops for optimal performance.
Guides users on preparing the OIM and drive for self-tuning, including parameter configuration and drive setup.
Details the steps to perform self-tuning, including selecting loop types and starting the tuning process via the OIM.
Provides instructions on how to exit the self-tuning process before it is completed, including potential fault implications.
Outlines actions to take if a fault occurs during self-tuning, including motor coasting and fault log handling.
Provides descriptions for self-tune parameters (P.220, P.218, P.219) used in configuring the tuning process.
Offers brief descriptions of parameters encountered during the Quick Start procedure, in the order they appear.
Explains how to use the OIM in monitor mode to view drive outputs like motor speed, armature voltage, and load.
Details the specific outputs that can be monitored, including Motor Speed, Arm Volt, Motor Load, and Reference.
Describes how to switch between the two OIM monitor mode screens to view different output configurations.
Explains how to access help information for drive status indicators while in monitor mode.
Defines the control source for drive signals, including keypad, terminal block, serial, and network.
Lists possible control sources and explains how the OIM keypad/display reflects settings made by other control sources.
Provides steps to select the drive's control source from the OIM interface, affecting reference settings.
Details how to change the manual reference (setpoint) when the control source is set to KEYPAD.
Explains how to control the drive (run, jog, change direction, stop) using the OIM when the control source is KEYPAD.
Provides instructions for starting the drive by running or jogging the motor using the OIM keypad.
Details how to stop the drive using the STOP/RESET key, noting its active status when the OIM is communicating.
Explains how to change the motor's direction of rotation using the FORWARD/REVERSE keys on the OIM.
Explains how the OIM identifies drive problems as faults (stop drive) or alarms (do not stop drive).
Details how to use the Fault or Alarm Menu to review, reset, and clear faults, alarms, and their logs.
Guides users on reviewing fault and alarm logs to identify problems, view details, and determine occurrence times.
Provides procedures for resetting faults/alarms and clearing entire fault/alarm logs.
Explains how to use the Diagnostics Menu to identify reasons for the drive not being ready or having stopped.
Describes how to clear programming error messages that occur when selecting invalid options.
Helps diagnose issues when the OIM stops communicating with the drive, covering link failures and fatal errors.
Provides instructions for replacing the entire OIM or its circuit board, including preparation and physical steps.
Details necessary equipment and the initial step of disconnecting power before replacing the OIM.
Guides users through accessing the OIM assembly, disconnecting the communication cable, and removing it from the drive.
Provides specific steps for replacing only the OIM circuit board within the assembly.
Provides specific steps for replacing the complete OIM assembly.
Explains how to reset the drive's elapsed time clock, which is primarily used for tracking fault/alarm occurrences.
Lists the main menu options accessible from the OIM, providing an overview of the navigation structure.
Presents a detailed hierarchical view of the OIM menus and parameters, showing parameter codes.
| Series | FlexPak 3000 |
|---|---|
| Product Type | Operator Interface Module (OIM) |
| Input Voltage | 24V DC |
| Communication Protocols | EtherNet/IP |
| Operating Temperature | 0°C to 50°C (32°F to 122°F) |
| Humidity | 5…95% noncondensing |
| Dimensions | Varies by model |
| Weight | Varies by model |