63
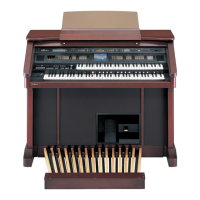
AT-80SL
fig.test-serial-midi
Computer interface operation check
A. Mac
1. Set the computer switch to Mac.
2. Connect a computer test cable (P/No.17049906) to the Computer
connector.
3. Check both ends of the white conductor (signal) and black conductor
(ground) of the test cable by oscilloscope, and confirm that a 1 MHz
square wave is present.
4. Turn on the switch of the computer test cable.
5. When the following display will appear, the result is “OK”.
fig.test-serial-mac
B. PC1
1. Set the computer switch to PC1.
2. Connect a computer test cable (P/No.17049906) to the Computer
connector. 3. 3. Turn on the switch of the computer test cable.
3. When the following display will appear, the result is “OK”.
fig.test-serial-pc1
C. PC2
1. Set the computer switch to PC2.
2. Connect a computer test cable (P/No.17049906) to the Computer
connector
3. Turn on the switch of the computer test cable.
4. When the following display will appear, the result is “OK”.
fig.test-serial-pc2
5. Press the [Drums/SFX] button to advance to the next item.
8.Video Check
fig.test-video
1. Connect the video monitor to AT-80SL/90SL with a video pin cable.
2. In each mode (NTSC mode and PAL mode), confirm whether the
indication of the video monitor is the same as that of LCD.
3. Press the [Drums/SFX] button to advance to the next item.
9.Floppy Disk Drive check
fig.test-disk
1. Insert a 720kB formatted 2DD disk (protect ON) to the drive.
When there is no problem, “Protected” will appear in the LCD.
2. Insert a 720kB formatted 2DD disk (protect OFF) to the drive.
When there is no problem, “2DD: OK” will appear in the LCD.
3. Check about 1.44MB disk similarly.
4. Press the [Drums/SFX] button to proceed to the next item.
 Loading...