Manual
Weld Seam Detection System R4000 SND40
for Tubes, Cans and Drums
B0059001 / Rev. 2.3
Operation
ROLAND ELECTRONIC GmbH · Otto-Maurer-Str. 17 · DE 75210 Keltern · Phone +49 (0)7236-9392-0 · Fax +49 (0)7236-9392-33
77
7.7.1 Modifying of system parameters
If system parameters need to be changed, proceed as follows:
• Press the <System> key when being in the measurement mode.
• Press the <modify setup> key.
• If a password is existing, the password inquiry appears.
Then type-in the valid password and confirm with <Enter>. Only then access to the system
settings is permitted.
If no password is existing, the password inquiry will not be called up.
• With the <arrow> keys access the entry to be changed from the parameter list to the right
and change with the <+> / <-> keys.
• With the <save> key store the entry or dismiss with <cancel>.
• If a restart is required, the system will perform it automatically ( systems following serial
number 400059 / SW version 1.16 ).
It is recommended to note down all changes, in order to enable easy return to the previous settings
in case of doubt.
Pos: 58 /Schweissnaht/Geräte/SND40/8 Betrieb/Rundkörper/Erstellen und Bearbeiten Messprogramme @ 0\mod_11 6599383345 3_501.docx @ 2407 @ 2 @ 1
7.8 Creating and editing of measuring programs
In the measuring programs the parameters for detecting and positioning the weld seam are stored.
We recommend to create product specific / tool specific measuring programs, in order to consider
all variables (material, wall thickness, width of weld seam, etc.) which are important for optimal
detection.
For creating / editing a measuring program first insert a sample tube into the turn drive and with the
<Program> key change over to the ”Setup – Program selection” mode. There select an empty
program place or the program to be edited.
Creating of new programs can be simplified by copying of existing programs and
modifying them, if they are intended for similar tubes.
1. With the key <Edit program> change over to the “Setup – Test operation“.
2. Enter parameter ”Description“ and ”Diameter“ (only for initial editing).
3. Enter parameter “Rotation“ or “Speed“ (coarse value).
4. Enter parameter ”Sensor signal“:
When using the sensors NS9S, NS12S or the NSL sensors, select “Leakage flux”;
when using the sensors NS9-EC…, select ”Leakage flux“ or “Eddy current”;
when using the sensors EC…, select “Eddy current”.
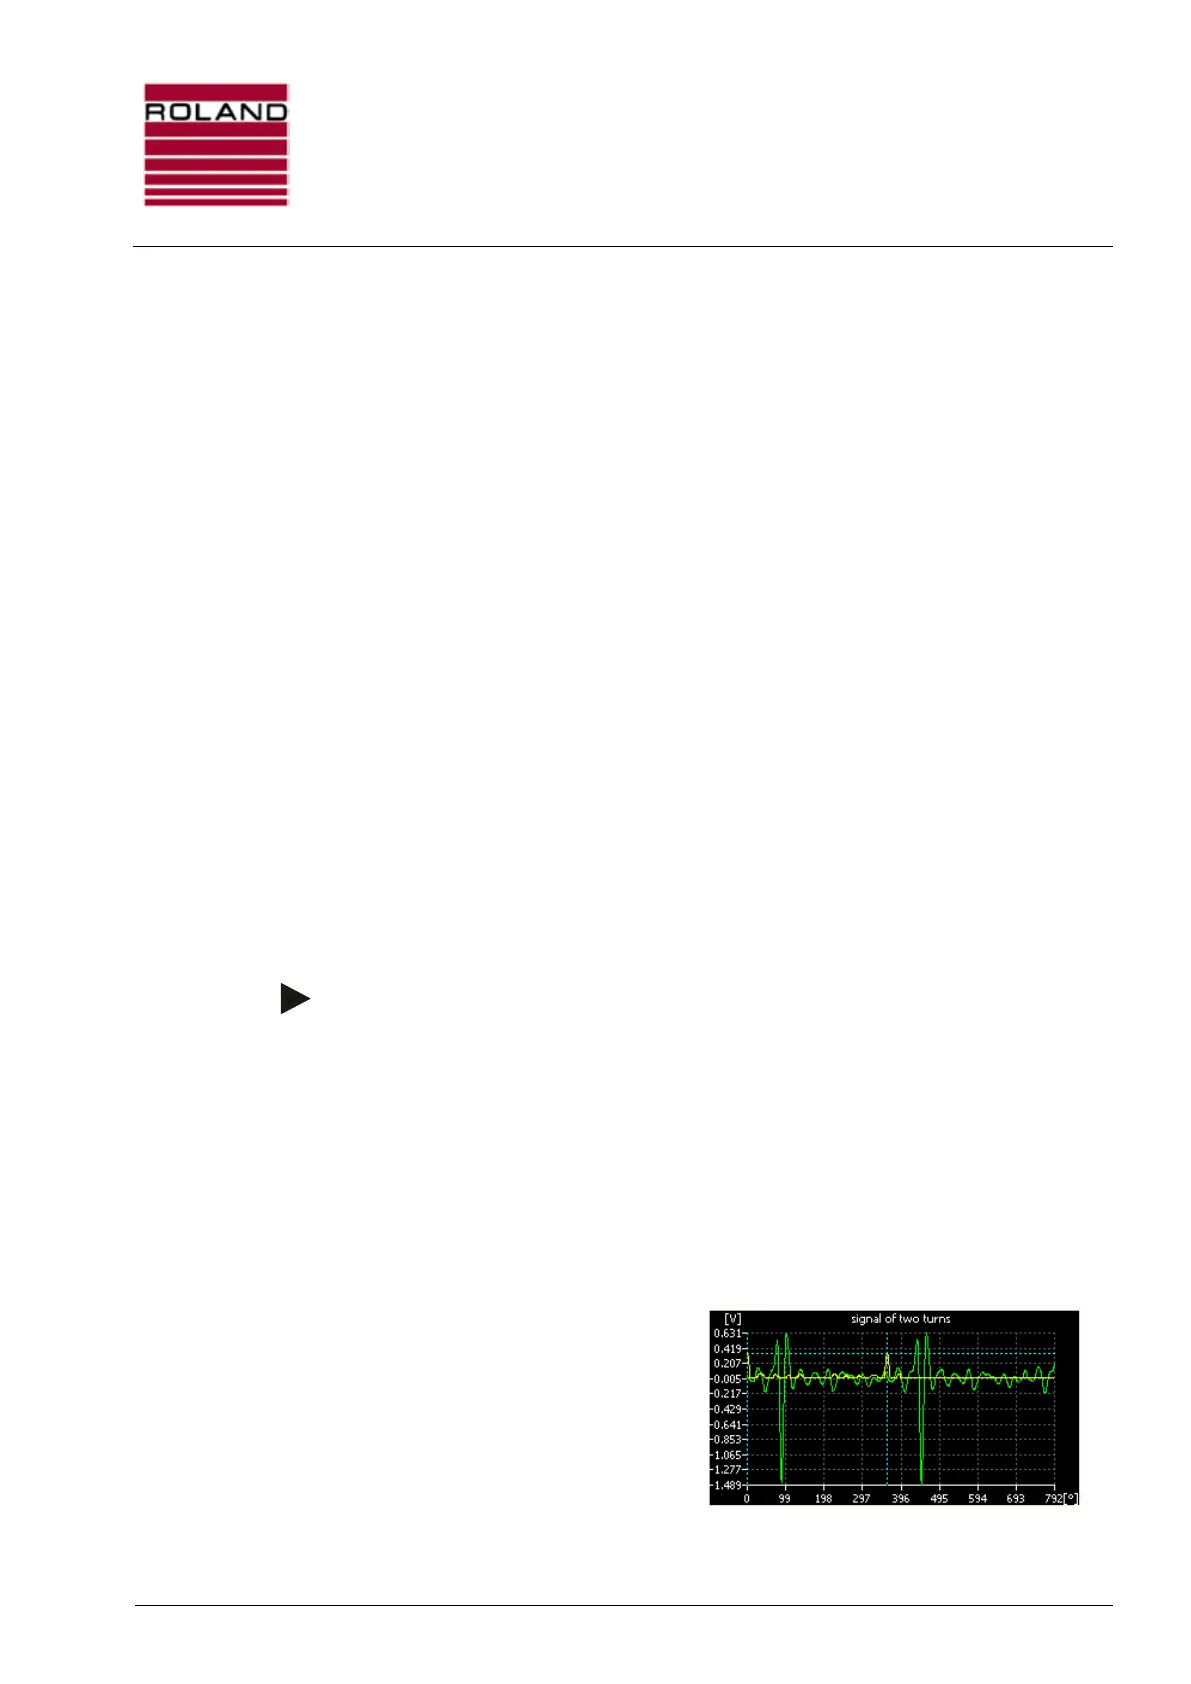
5. Press the <Speed measurement> key:
When measuring the speed, the parameter
„Rotation“ or “Speed“ should have a plausible
value.
In the visualisation of the signal there should
be 2 weld seam signals visible:
Fig. 43: Speed measurement
6. Press the <Start test job> key.
 Loading...