29—Expanding the VS-2480
380 www.rolandus.com Roland VS-2480 Owner’s Manual
Installation Procedure
1. Before installing the VS8F-2, turn off the power of the VS-2480 (Page 80) and all
connected devices, and disconnect all cables from the VS-2480.
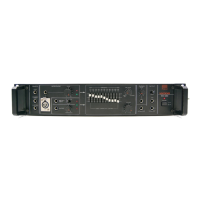
2. Turn the VS-2480 over onto its back, and remove only the screws shown in the
following diagram.
3. Inside the VS-2480, there are four connectors and 12 plastic pins. Insert the
connectors of the VS8F-2 into the internal connectors, and simultaneously insert
the plastic pins into the holes of the VS8F-2 to fasten the unit in place.
4. Use the screws that you removed in Step 2 to re-fasten the bottom cover.
5. Connect the cables that you disconnected earlier.
6. Turn on the power, as described on Page 63.
7. After powering up the VS-2480, press EFFECT and confirm that you see effect patch
symbols for Effects 1 and 2. If you’ve installed one VS8F-2, make sure that effect
patch symbols for Effects 3 and 4 are also visible. If you’ve installed two VS8F-2s,
you should see Effects 5 and 6 as well. Finally, if you’ve installed three VS8F-2s, you
should see effect patch symbols for all eight effect processors.
If the effect produced by an installed VS8F-2 is missing—and the screen shows “No
EFFECT Board” instead—the VS-2480 is not correctly recognizing the VS8F-2. Re-install
the VS8F-2.
EFFECT A
EFFECT B
EFFECT D
EFFECT C
When turning the unit
upside-down, handle with
care to avoid dropping it, or
allowing it to fall or tip over.
In this illustration, we’ve
installed two VS8F-2 effect
expansion boards.
Effects 7 and 8, therefore,
show “No EFFECT Board.”
VS2480OMUS.book 380 ページ 2006年2月7日 火曜日 午後4時16分

 Loading...