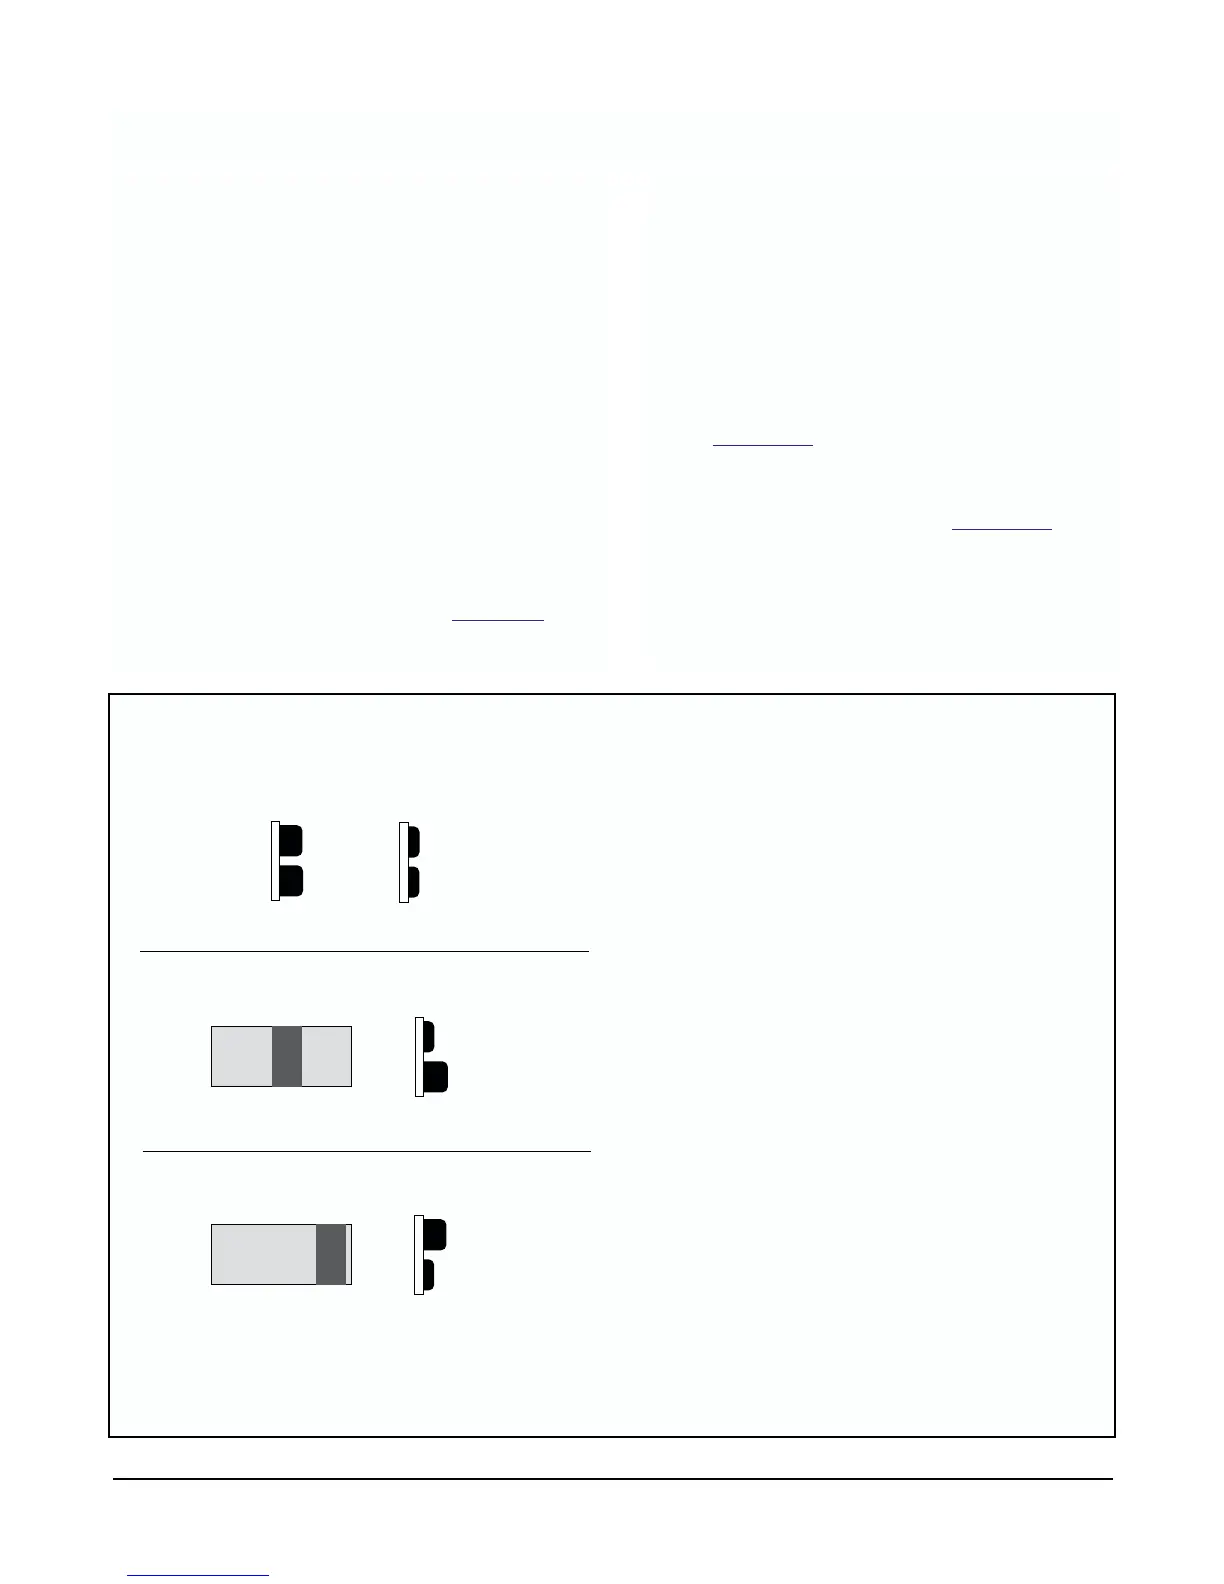
FIGURE 2-2. Button Use.
12
2.3.3 Access the temperature adjustment feature of
the 2081 by pressing both push buttons at the same
time. Display will scroll through the menu selections.
2.3.4 When “tAdj” appears on the display, release
both buttons. Display will show the current tempera-
ture read by the RTD built into the sensor connected
to the transmitter.
1. If this reading matches your standardized
measuring device within your tolerances, go on
to Section 2.4
(Two-Point Calibration).
2. If this reading is not close enough to your stan-
dardized temperature measuring instrument,
refer to steps 1 through 4 in Section 5.2
Temp -
erature Calibration, to set the temperature read-
ing of the sensor to your standard temperature
measuring instruments value.
Both buttons in:
1. Scrolls through menu if held.
2. Enters new value into memory if only held
momentarily.
Number one in, to scroll through digit values.
Number two in, to select digit position.
2.3 Temperature Calibration. Since pH value is related
to the temperature of the process, the 2081 transmitter
temperature readings should be checked for matching
with your standardized temperature measuring sensor.
To do so:
2.3.1 Place your sensor connected to the 2081 transmit-
ter in a beaker of process material. Place your stan-
dardized temperature measuring instrument (ther-
mometer) into the same solution.
2.3.2 Allow a minimum of 10 to 15 minutes for the trans-
mitters sensors to acclimate to the solutions tempera-
ture.
NOTE
The 2081 has two pushbuttons on its side for
manual operation. Keypress combinations
allow you to activate software menus to dis-
play and enter information. See Figur
e 2-2.
Push Buttons (side view)
OUT
IN
➡
➡
➡
2081 Display
02
02
5
5
.
.
C
C
5
IN
➡
2081 Display
025
025
.
.
C
C
C
IN
1
2
1
2
MODEL 2081 pH SECTION 2.0
QUICK START-UP PROCEDURE