2
NOTE
For RFI/EMI protection, the power
supply/signal wiring and sensor wiring must
be shielded, preferably in metal conduit,
and the shields terminated to earth ground.
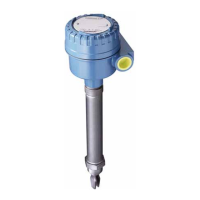
1.3.1 Sensor Wiring. The sensor wiring terminals are
located on the side of the housing opposite of the LCD
meter. Remove the housing cover to gain access to the
terminals. Pass the sensor cable through the transmitter’s
conduit opening. Connect the sensor wiring to TB1 ter-
minals 1 through 12 as shown on Figure 1-1.
NOTE
Sensors are supplied with a standard
cable length of 10 feet (3.0 m) or 15 feet
(4.5 m). If the standard cable length is not
sufficient for the planned installation, the
use of a junction box with extension cable
is strongly recommended. Do not exceed
1000 feet (305 m) total cable length from
the sensor to the transmitter.
1.3.2 Integral Preamplifier Jumper. If direct input
from a sensor without a preamplifier is used, refer to
Figure 1-1 and Figure 1-2 for sensor wiring. The sen-
sor cannot be more than 15 (4.5m) feet from the trans-
mitter for this option.
Many pH sensors without preamps come with BNC
connectors, but the Model 2081 pH only takes bare
wire connections. To make the sensor compatible, cut
off the BNC and terminate it according to Figure 1-2.
1.3.3 Power and Signal Wiring. The power and signal
wiring terminal is TB2 terminals 1 through 4 as shown
in Figure 1-1.
1.4 JUMPER SETTINGS.
1.4.1 General This section describes how to set the
jumpers on the CPU board for the following:
CAUTION
The circuit board is electrostatically sensi-
tive. Be sure to observe handling pre-
cautions for static-sensitive components.
1. Output value in fault (alarm) mode
2. 50/60 Hz operation
3. Security
1.4.2 Fault Mode Output. The default output of the
transmitter during a fault condition is determined by
the position of the default current output jumper locat-
ed on [JP3] (refer to Figur
e 1-3). The output can be set
to default either:
- below 4mA - JP3 with jumper
- above 20mA - JP3 without jumper (factory setting).
Place jumper on one post only to prevent misplacing
it. The following are possible faults. See Section 8.0
for
further information.
Fault Mnemonics
“SLP – FAIL” - Electrode slope out of limits
“ELEC – FAIL” - Transmitter electronics failure
“rngE – LOOP” - pH value outside 4-20 mA range
points
“tEnP – Lo” - Temperature too low or RTD shorted
“tEnP – Hi” - Temperature too high or RTD open
1.4.3 Fifty Hz Operation. See Figur
e 1-3. Although
the 2081 uses direct current, a jumper selection may
be made to help reduce electrical noise from the oper-
ating environment. North America uses 60 Hz ac
power, while Europe uses 50 Hz ac power.
– 50 Hz - JP1 with jumper
– 60 Hz - JP1 without jumper (factory setting).
Place jumper on one post only to prevent mis-
placing it.
1.4.4 Security. Also explained in Section 6.0
. See
Figur
e 1-3.
– Disable 2081 push buttons - JP4 without jumper.
Place jumper on one post only to prevent mis-
placing it.
– Enable 2081 push buttons - JP4 with jumper (fac-
tory setting).
MODEL 2081 pH SECTION 1.0
INSTALLATION