5 x Control
32
FA ROTEX A1 B0 - 10/2007
5.2 Changing the central unit
Removing the central unit
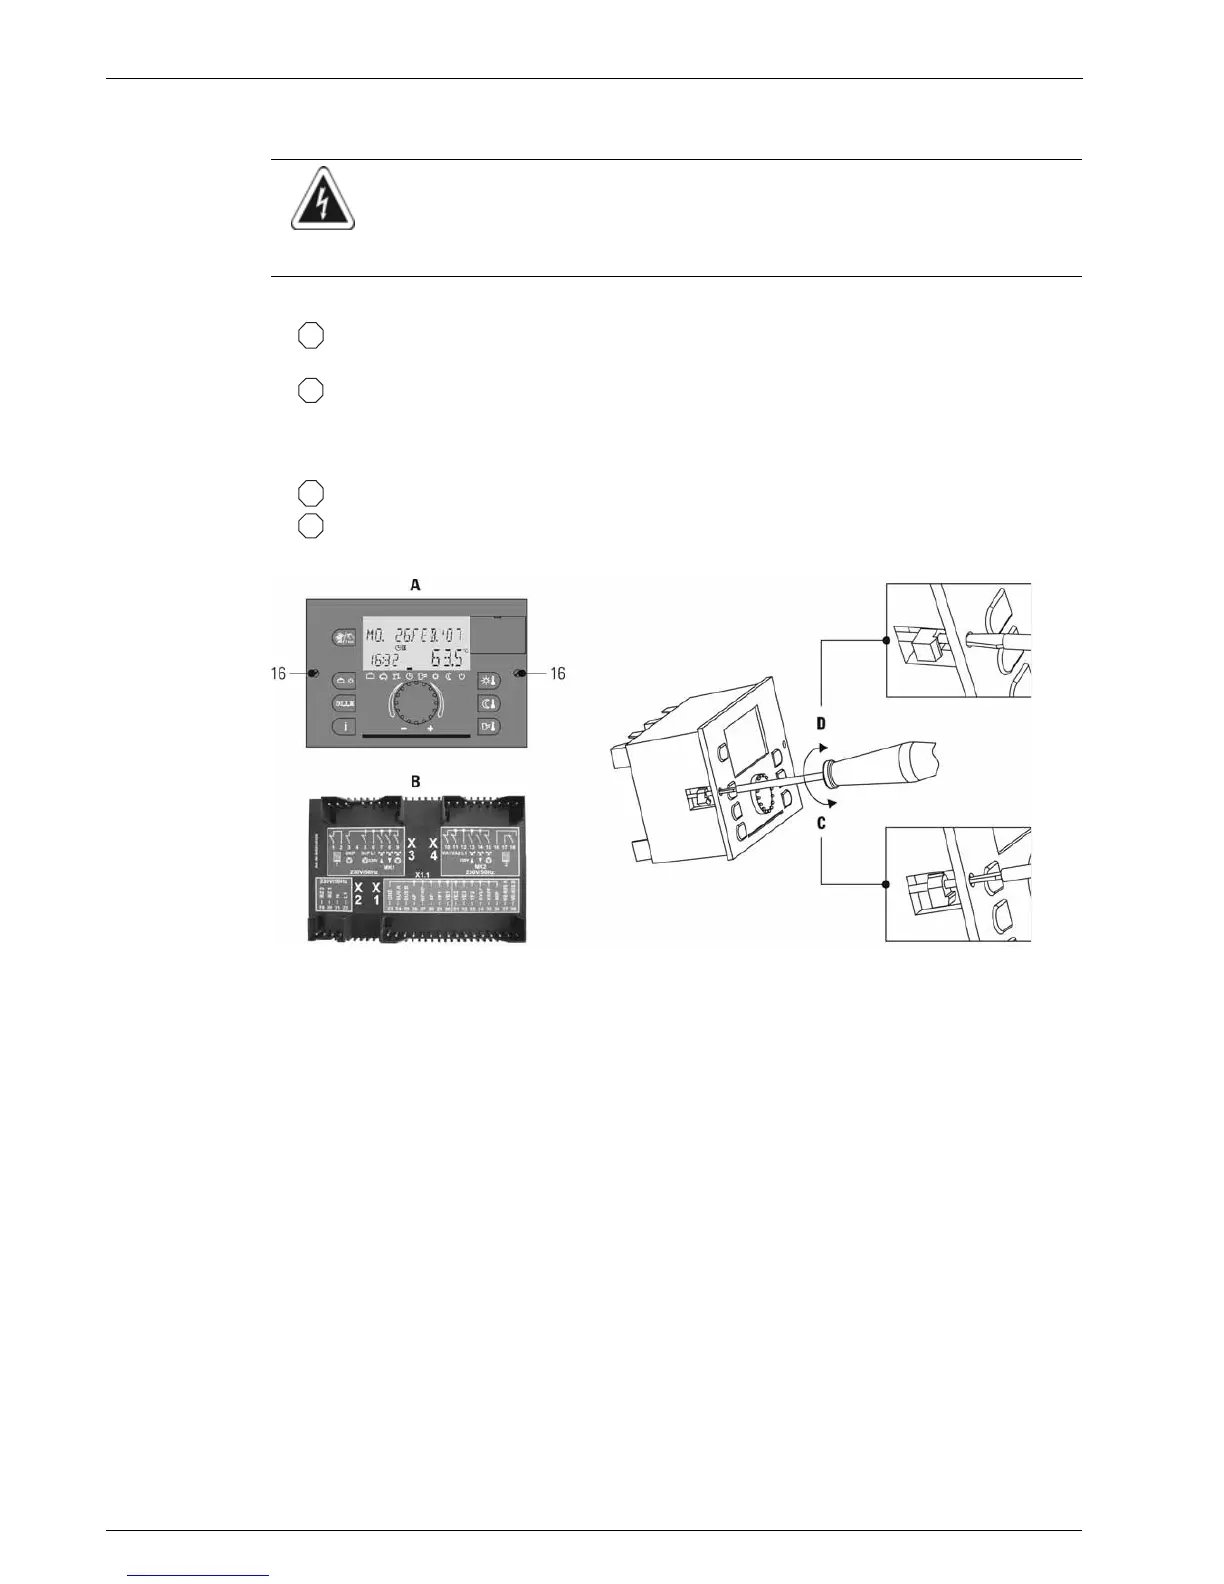
• Loosen fixing screws (fig. 5-3, pos. 16)
(anticlockwise rotation), pull out central unit from front.
• Release bayonet lock, pull out the central unit forward.
Installing the central unit
• Push the central unit carefully into the boiler control panel. Ensure that the connecting pins are not damaged.
• Tighten the fixing screws (right handed threads).
• Close the bayonet lock (90° rotation).
WARNING!
Live parts can cause an electric shock on contact and cause life-threatening burns and injuries.
• Before beginning work on live parts, disconnect them from the power supply (switch of fuse, main switch)
and secure against unintentional restart.
A Front view
B Rear view
16 Fixing screws
C Loosen fixing screws
D Tighten fixing screws
Fig. 5-3 Install/remove central unit (shown in THETA 23R control)
q
a
q
a