3 x Installation
15
FA ROTEX Solaris RPS3 P2 - 06/2012
3.4 Installing plate heat exchanger
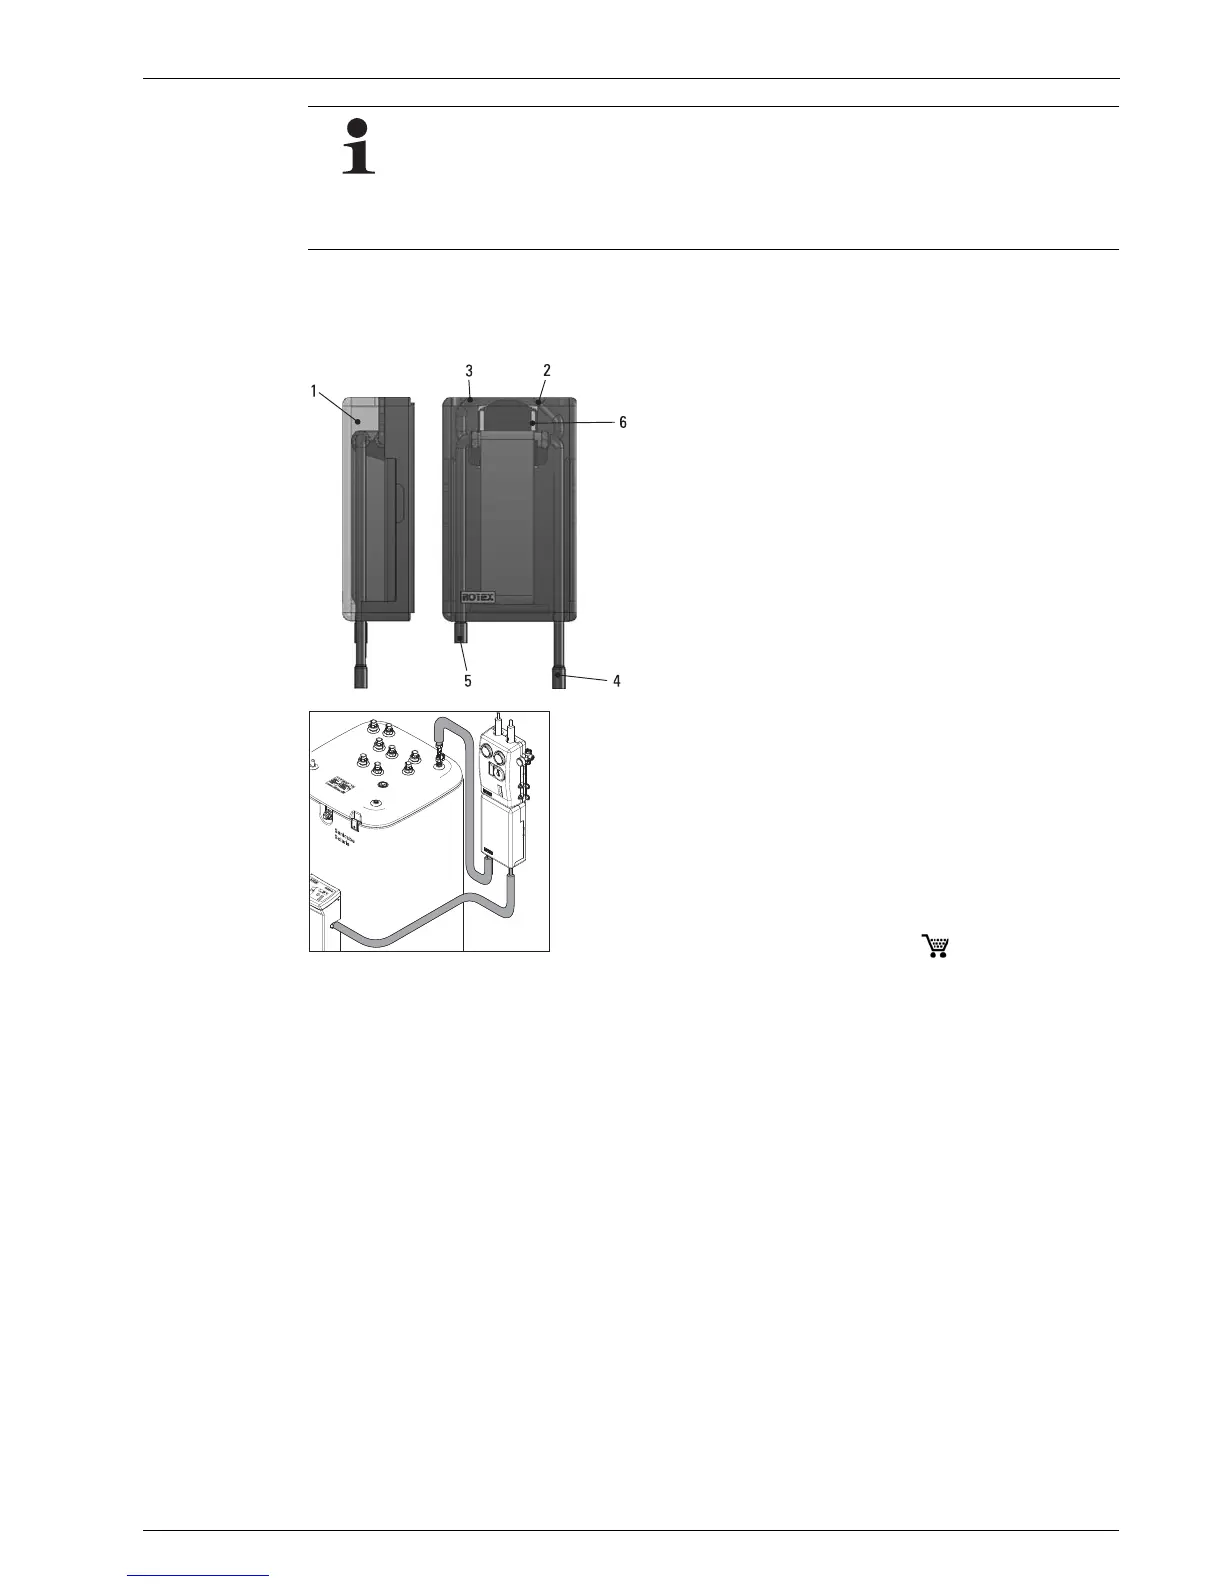
• Remove outside cover (1).
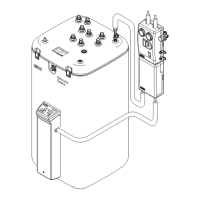
• Install the RPWT1 plate heat exchanger under the RDS1 pressure station.
• Connect feed and return line from RDS1 pressure station to connections (2) and (3) on the RPWT1 plate heat exchanger.
• Flow and return line (VA 15 Solar / VA 18 Solar), install from Solaris RPS3 P2 control and pump unit and domestic hot water
storage tank to plate heat exchanger.
• Connect the feed and return line (VA 15 Solar / VA 18 Solar) to the RPWT1 the APWT1 plate heat exchanger (connections 4
and 5) with the APWT1 plate heat exchanger connection set.
• Replace outside cover (1).
Installing the clamping ring bolt:
• Cut off the pipe end at right angles and debur.
• Place swivel nut and clamping ring on the pipe.
• Lightly oil threads.
• Push pipe into the clamping ring bolt to the stop and tighten swivel nut by hand.
• Tighten swivel nut with open-ended spanner.
1 External cover
2 Connection pressure station solar return line (Ø 22 mm)
3 Connection pressure station solar flow line (Ø 22 mm)
4 Connection plate heat exchanger flow line to solar flow of
Solaris RPS3 P2 (Cu Ø 22 mm plug-in fitting)
5 Connection plate heat exchanger return line to solar return flow
HybridCube (Cu Ø 22 mm plug-in fitting)
6 Bore holes for wall fixture of plate heat exchanger
Fig. 3-15 Connections and dimensions for RPWT1 plate heat
exchanger
Fig. 3-16 APWT1 connection set ( 16 20 32)
 Loading...