3 x Installation
18
FA ROTEX Solaris RPS3 P2 - 06/2012
3.5.3 Installing temperature sensor
Fig. 3-30 Work step 7 Fig. 3-31 Work step 8 Fig. 3-32 Work step 9
10. Fasten housing front to the tank
connection bracket below. To do
this, carefully screw the self-
tapping fixing screw (scope of
supply) over the depression in the
lower section of the front of the
housing and then place the
protective cap in position.
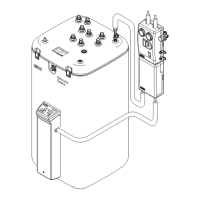
Fig. 3-33 Work step 10 Fig. 3-34 Assembled Solaris RPS3 P2
CAUTION!
The storage temperature sensor of the boiler control must never be immersed more than 75 cm into the sensor
immersion sleeve. If the storage temperature sensor is immersed any deeper, the hot water zone may overheat
and cause the boiler control to "stick" in the tank heating phase.
Fig. 3-35 Work step 1 Fig. 3-36 Work steps 2 + 3 Fig. 3-37 Work steps 2 + 3
1. Bend contact springs around the two sensors (tank and return sensor and also
storage tank sensor of boiler control) and insert into the probe tube.
2. Align return flow sensor in the probe tube to approx. 130 cm insertion depth
(cable ties).
3. Align storage tank sensor in the probe tube to approx. 70 cm insertion depth
(cable ties).
4. Insert the plug in the probe tube and lay the cable.
Fig. 3-38 Work step 4
 Loading...