3 x Installation
14
FA ROTEX Solaris RPS3 P2 - 06/2012
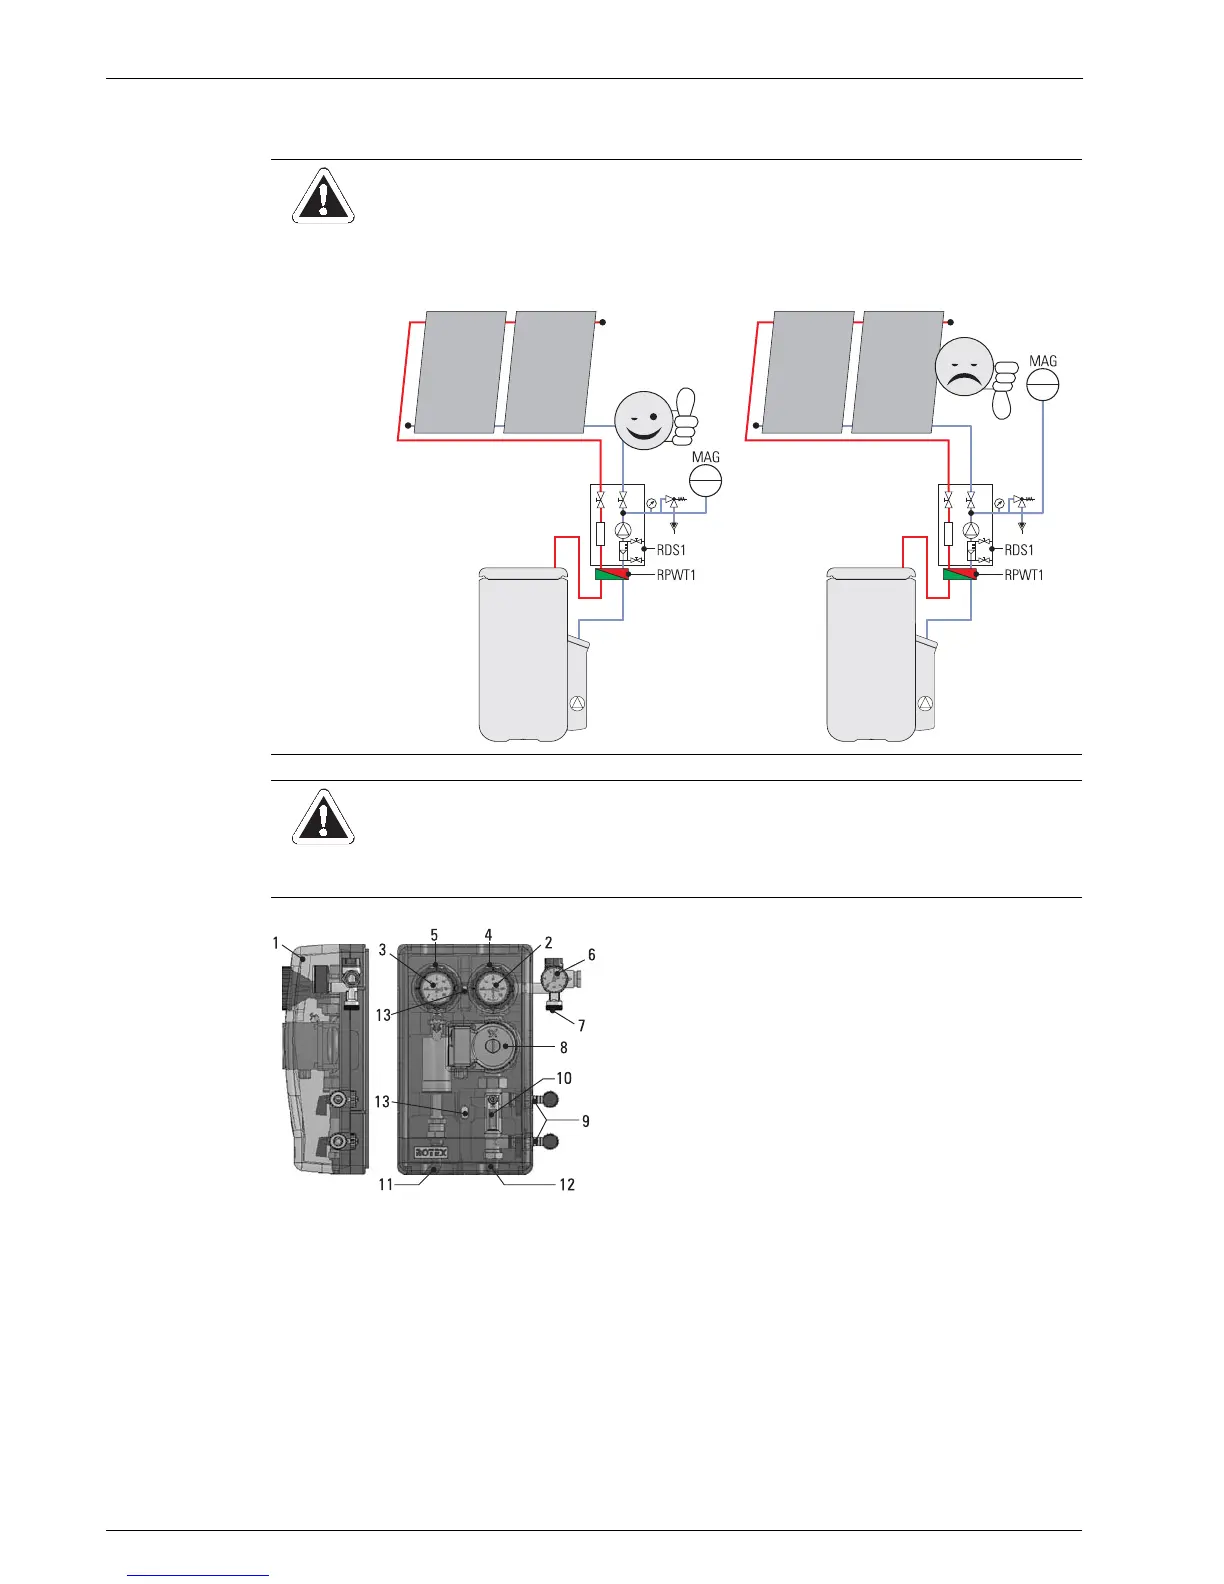
3.3 Installing pressure station
• Remove outside cover (1).
• Install the RDS1 pressure station close to the hot water storage tank.
• Connect feed and return line from the solar panels to connections (4) and (5) on the RDS1 pressure station in accordance
with the system plan (see chapter 3.1).
• Connect diaphragm expansion vessel (MAG) to the connection (7) on the RDS1 pressure station.
CAUTION!
If the circulation in the solar panels comes to a standstill, steam may be formed and may damage the
diaphragm expansion vessel (MAG).
• Always install the RDS1 pressure station and the diaphragm expansion vessel (MAG) lower than the solar
panels.
CAUTION!
Danger of scalding if incorrect connection pipes are used.
• Use only connection pipes made of pressure-resistant metal (Cu Ø 22 mm recommended) between the
solar panels and the hot water storage tank. Plastic pipes must not be used.
1 External cover
2 Temperature display Solar return line
3 Temperature display Solar flow line
4 Connection Solar return line (Ø 22 mm)
5 Connection Solar flow line (Ø 22 mm)
6 Safety valve with pressure gauge (solar panel circuit)
7 Connection Diaphragm expansion vessel (MAG) (Ø 22 mm)
8 Circulation pump (solar panel circuit)
9 Filling and draining cock (solar panel circuit)
10 Flow meter (solar panel circuit)
11 Connection pressure station solar flow line to plate heat
exchanger (Ø 22 mm)
12 Connection pressure station solar return line to plate heat
exchanger (Ø 25 mm)
13 Bore holes for wall fixture of pressure station
Fig. 3-14 Connections and dimensions for RDS1 pressure station
 Loading...