3 x Installation
22
FA ROTEX Solaris RPS3 P2 - 06/2012
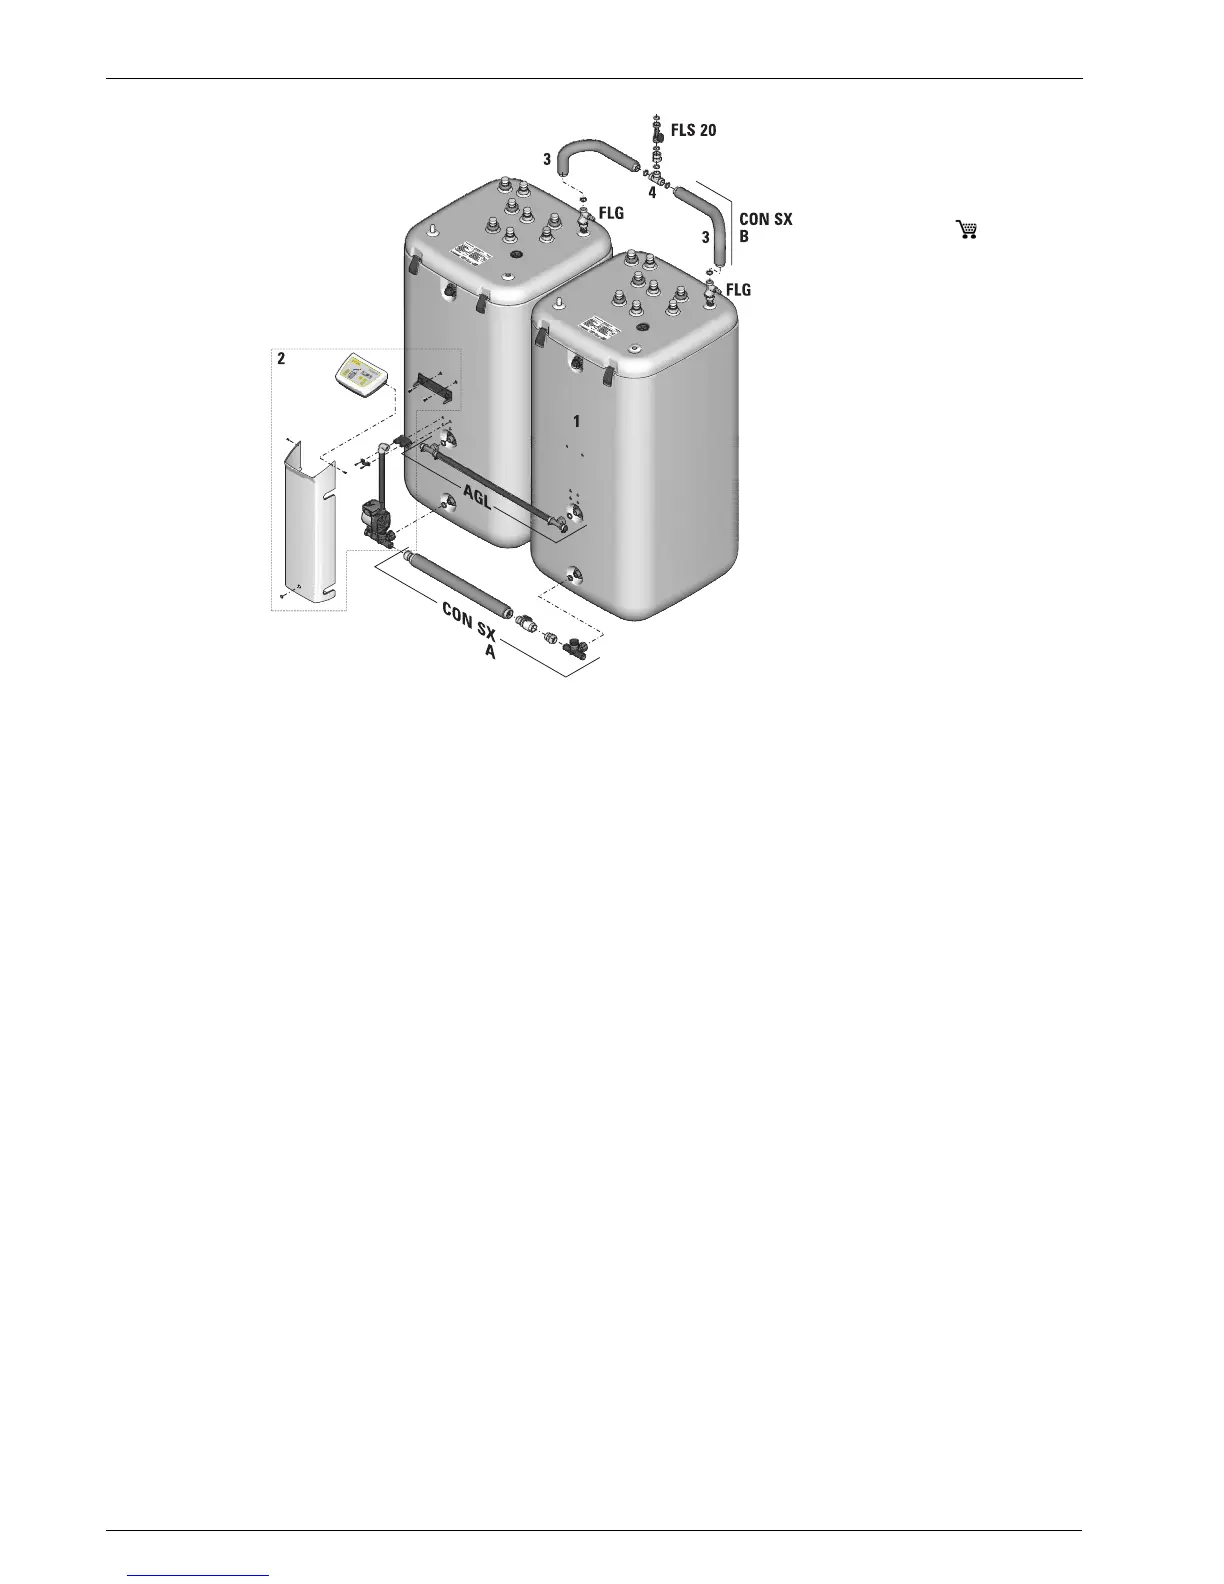
7. Fasten return line to the return connection on the second storage tank with the swivel nut. Place the flat gasket (included)
in the swivel nut first.
8. Remove the bottom plug on the corresponding side of the cover.
9. Install cover on the storage tank.
10. Install solar flow connections with one FlowGuard each (optional) (see chapter 3.6.2).
11. Install the inflow connection pipes (left/right) on the connecting t-piece.
12. Position the flat gaskets on the two FlowGuards and fasten both FlowGuards to the inflow connection line with the swivel
nut.
13. Position seal on the connecting t-piece and screw on the double swivel nut (1").
14. Position seal in double swivel nut (1").
15. Screw in FlowSensor in double swivel nut (1") (see chapter 3.6.1).
1 ROTEX SCS, GSU
2 Solaris RPS3 P2 control and pump unit
3 Solaris - flow manifold
4 Connecting T-piece
AGL Compensation line ( 16 01 07)
CON SX A
Storage tank extension set (bottom)
CON SX B
Storage tank extension set (top)
FLS20
FlowSensor
FLG FlowGuard
Fig. 3-44 Installing the storage tank
connection
 Loading...