Do you have a question about the rotork CMQ-500 and is the answer not in the manual?
Lists hazardous area certifications, including ATEX and IECEx ratings.
Details critical flamepath dimensions for ATEX and IECEx approved actuators.
Provides safety warnings related to the Reserve Power Pack assembly.
Warns about electrical shock hazards and requires qualified personnel for servicing.
Advises on protecting internal components from electrostatic discharge.
Outlines the steps for commissioning the Rotork CMA Range actuators.
Warns about potential actuator shaft movement after power supply removal for RPP units.
Warns against moving the actuator or adjusting the drive shaft while the display is illuminated.
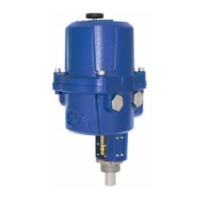
Provides general instructions for installing Rotork actuators.
Advises ensuring the actuator is suitable for the intended application before installation.
Warns about electrical shock hazards and requires qualified personnel for servicing.
Advises on protecting internal components from electrostatic discharge.
Details the Reserve Powerpack (RPP) feature and its operation on power failure.
Provides detailed instructions for mounting CML Linear actuators to valves.
Warns against moving the actuator while the display is illuminated during mounting.
Stresses the importance of correct alignment between actuator shaft and valve stem.
Provides detailed instructions for mounting CMQ Quarter-Turn actuators.
Warns about potential actuator shaft movement after power supply removal for RPP units.
Provides instructions for mounting CMR Rotary actuators for non-thrust applications.
Covers essential aspects of electrical installation for CMA units.
Guides on connecting wiring to the actuator terminals using the wiring diagram.
Provides precautions for removing the top cover assembly safely.
Discusses electrical installation, including power supply isolation and protection devices.
Warns to isolate all power supplies before removing actuator covers.
Provides instructions for routing and terminating cabling for installation.
Warns to verify that the actuator supply voltage matches the nameplate.
Outlines the steps required for basic setup after mounting the actuator.
Emphasizes that settings can only be changed when the actuator is in Local operation mode.
Provides a visual flowchart outlining the steps for basic actuator setup.
Details how to set the actuator to Local operation mode for configuration.
Continues the procedure for selecting Local operation mode via the interface.
Explains how to adjust the actuator's output torque or thrust settings.
Continues the procedure for setting output torque and thrust values.
Finalizes the procedure for setting output torque and thrust values.
Details how to configure the actuator's action at the end of travel.
Continues the procedure for selecting the action at the end of travel.
Guides on setting the closed limit of travel for the actuator.
Guides on setting the open limit of travel for the actuator.
Explains how to calibrate the command signal zero setpoint.
Details calibrating the zero setpoint using an external 4-20 mA signal.
Details calibrating the span setpoint using an external 4-20 mA signal.
Explains how to set the command signal invert function (ON/OFF).
Explains how to set the transmitter signal invert function (ON/OFF).
Guides on setting the deadband value for control response.
Outlines the final steps to complete the basic setup procedure.
Crucial warning to set the actuator to remote operation before refitting the cover.
Continues the procedure for completing the basic setup and refitting the cover.
Explains how to monitor the actuator status in Local and Remote control modes.
Explains how alarms and faults are stored and listed by event number and type.
Explains how to access and load customer or factory default settings.
Procedure to load the actuator's stored customer default settings.
Procedure to save current settings as the actuator's customer default memory.
Procedure to restore the actuator's factory default settings.
Explains how to gain access to the advanced menu parameters for configuration.
Details the process of navigating and modifying advanced menu parameters.
Configures the command source for the actuator (Analogue, Digital, Bus).
Configures the actuator's action when an ESD command is active.
Configures control setup parameters like algorithm and damping.
Sets the timeout period for loss of command signal.
Configures split range operation, defining minimum and maximum command signals.
Configures actuator type, size, and encoder initialization.
Re-initializes the encoder after component replacement or disassembly.
Configures actions for the Reserve Power Pack on power loss.
Configures timer interrupts for pulsed stop/start operation.
Configures communication settings for bus option cards.
| Power Supply | 24 VDC |
|---|---|
| Actuator Type | Electric |
| Control Type | Modulating |
| Network Protocol | Modbus, Profibus, Foundation Fieldbus |
| Ingress Protection | IP66 |
| Protection Rating | IP66 |
| Control Signal | 4-20 mA |
| Housing Material | Aluminum |