Do you have a question about the rotork CMR-100 and is the answer not in the manual?
Essential safety warnings before installation and operation, including suitability and protection.
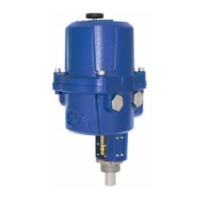
Highlights safety related to static discharge, enclosure materials, handwheel, and local controls.
Detailed safety instructions for handling the Reserve Power Pack, including capacitor discharge and ventilation.
Outlines the simple, safe, and rapid commissioning process for Rotork CMA actuators.
Step-by-step instructions and warnings for installing the actuator, including handwheel operation.
Details on optional local controls and the external LCD display for operation and status.
Explains the function of the Reserve Powerpack for electrical operation during power failure.
Step-by-step guide for mounting CML linear actuators to valves, including alignment and coupling.
Overview of the essential setup procedures required after actuator mounting.
Guides on setting the actuator to Local Operation mode before configuring travel limits.
Instructions for adjusting the output torque or thrust settings for proper valve operation and seating.
Configuration of how the actuator stops at end of travel, either by position limit or applied torque/thrust.
Procedure for setting the actuator's closed end of travel limit position.
Procedure for setting the actuator's open end of travel limit position.
Explains automatic calibration of the 4-20 mA signal for closed position.
Steps to manually calibrate the zero setpoint using a 4-20 mA external signal.
Steps to manually calibrate the span setpoint using a 20 mA external signal.
Configuration option to invert the command signal for 4-20mA input.
Configuration option to invert the transmitter signal for feedback.
Adjustment of the deadband to prevent hunting or overshoot in control response.
Final steps for completing basic setup, including refitting the top cover and setting operation mode.
| Brand | rotork |
|---|---|
| Model | CMR-100 |
| Category | Controller |
| Language | English |