16 M0416-1 version 3.2
4 DISMOUNTING AND REPLACEMENT
4.1 Replacement of tool changer
Read the safety section 1.2.
Leave tool, with tool attachment
mounted, in tool stand.
Place the robot in service position.
NOTE! The tool change function shall
be in locked position.
Switch the power off and lock the circuit
breaker.
NOTE! Read the safety chapter for the
robot.
NOTE! The pressure in the pneumatic
system must be released before
dismounting begins.
Dismount the air hoses from the tool
changer.
NOTE! Make sure that no dirt enters
the air hoses.
Release electrical connectors
NOTE! Handle the contact with care, as
it is sensitive to mechanical damage.
Make sure that no dirt enters the
contacts.
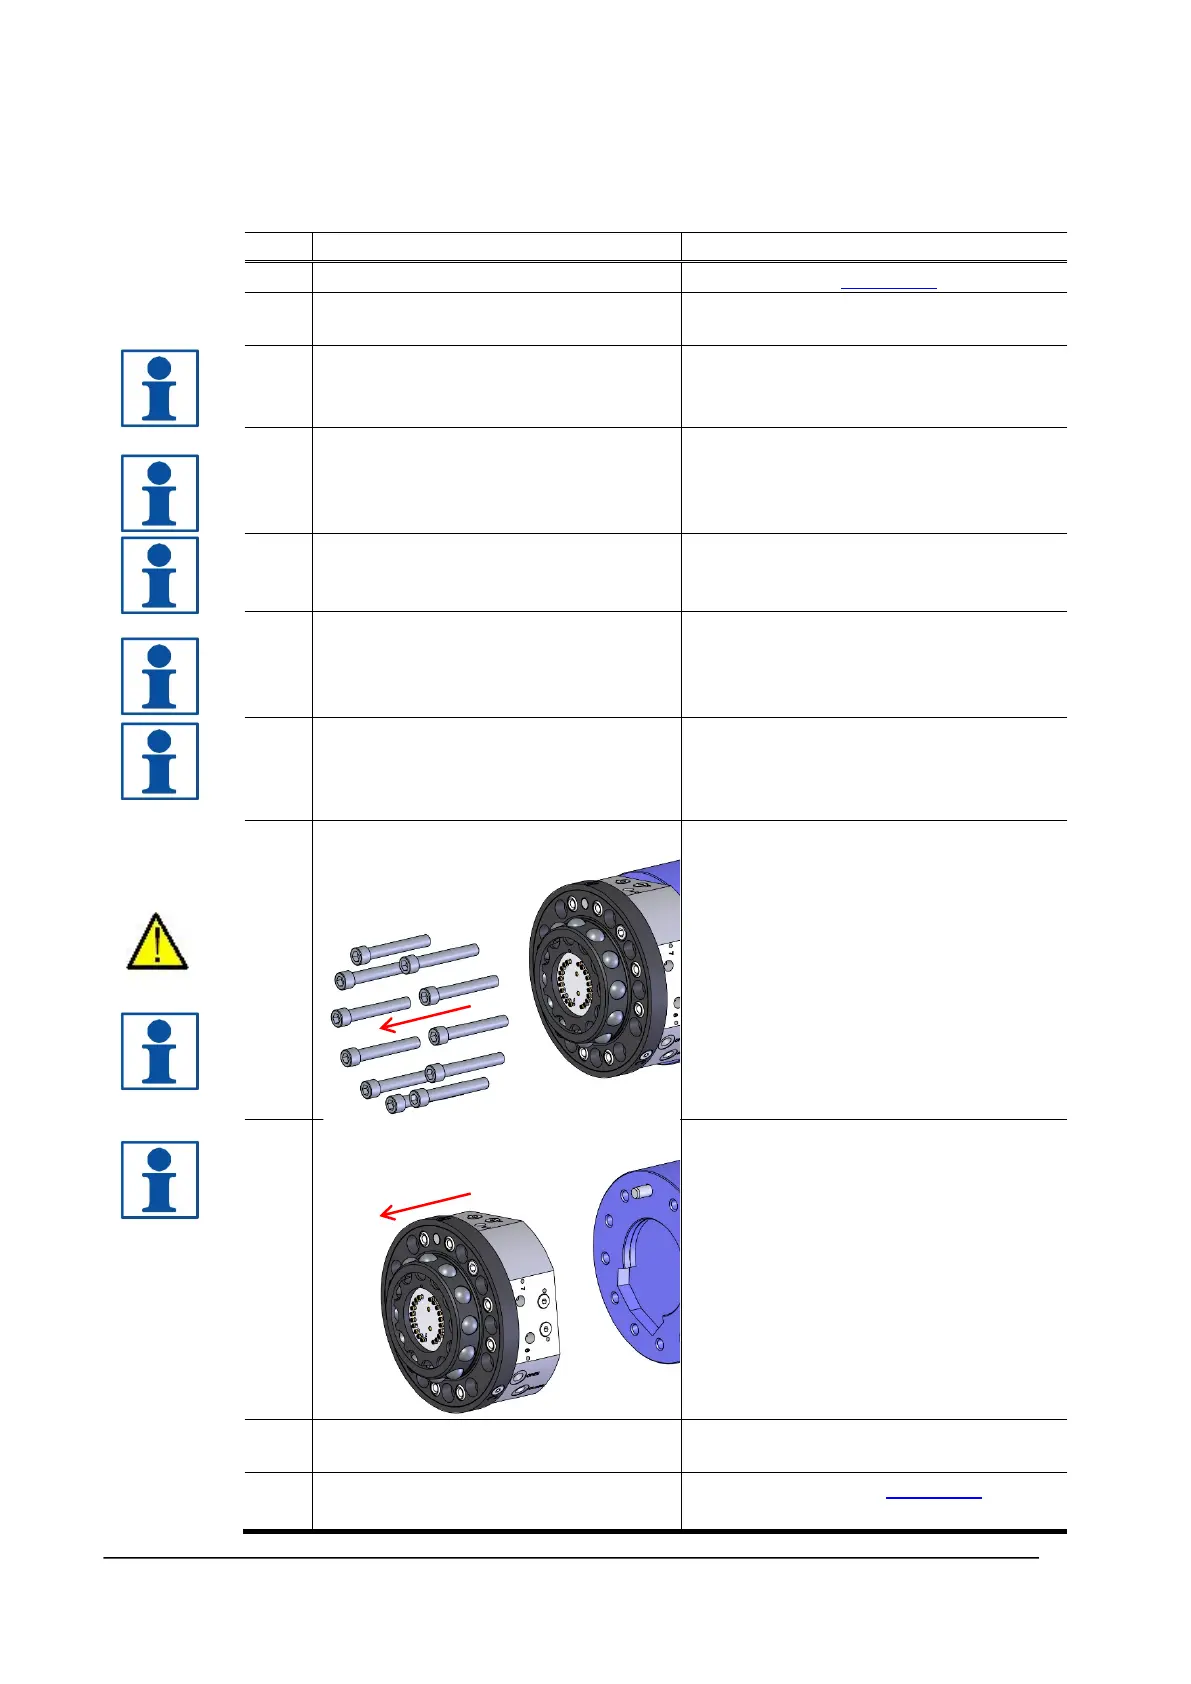
Remove the screws holding the tool
changer to the robot flange.
WARNING! The tool changer is heavy
and may cause personal injury and
equipment damage if dropped.
NOTE! Be careful not to damage the
signal pins.
NOTE! A guide pin is mounted between
the tool changer and the robot flange.
Clean the robot flange/adaptation plate
using a lint free cloth.
Mount replacement tool changer
Follow instructions in section 2.1.