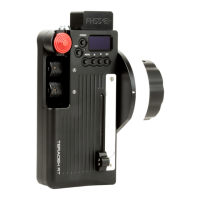
Updating the Controller Firmware
1. Run the RTFW Program.
2. Make sure the controller is turned off.
3. Connect the USB cable from the Controller to your computer.
4. Hold down the SET and POWER buttons simultaneously on the controller for about 2
seconds. The screen will display: “PC MODE”.
5. Connect the USB cable between port on computer and mini port on side of Controller.
6. The program will now detect and connect to the Controller. You should see, “Connected to
Device” in the program.
7. In the “Firmware” section, use the drop down menu to select a firmware version that
matches your controller type:-
1. Select Controller...S for a Controller without Force-Zoom.
2. Select Controller...Z for a Controller with Force-Zoom (red joystick).
8. Click the “Update Device” button.
Updating the Receiver Firmware
1. Run the RTFW Program.
2. Make sure the receiver is not powered and that no motors are attached.
3. Connect the USB cable from the Receiver to your computer. The Receiver should power up.
Some PCs do not supply the full 5V to USB devices. If the Receiver doesn't power up from USB alone, attach external
(~12V) power also.
4. The program will now detect and connect to the Receiver. You should see, “Connected to
Device” in the program.
5. In the “Which Device to Update” section, select Receiver from the drop down menu.
6. In the “Firmware” section, if you are presented with a choice, select the firmware you would
like to flash onto the device. NOTE: we always advise you choose the highest (non-Beta)
version.
7. Click the “Update Device” button.
Note: If you connect the Receiver to a computer without having the Firmware Updater Application already running,
the Receiver will boot into “normal” operation and not be visible as a USB device. Always run the Firmware Updater
application BEFORE attaching the Receiver to the computer.