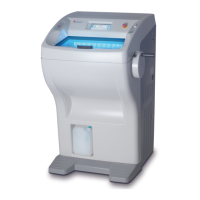
OPERATING INSTRUCTIONS
3.2 Revised 08/08/2013
5. Confirm that the loading station is positioned correctly
(see loading station installation).
6. Execute the priming function. If xylene bottle has not
already been positioned, it should be filled and set in
the designated area. (See xylene bottle installation)
7. Press the [PRIME] key and confirm that the xylene is
being dispensed.
NOTE: It is important the [PRIME] key is pressed until
xylene dispensing is confirmed.
8. Press the [START] key on the control panel. This
action starts instrument initialization. Once
initialization is complete, the standby screen will
appear.
9. Check the film length, dispensing amount, and the
counter number.
Setup Procedures
Modifying the Setup Menu
Using the instrument software, the operator has access
to a Setup Menu, which allows for programming various
functions. These functions enable the user to set specific
values for optimal performance. It is sometimes necessary
to modify a parameter setting to meet the diverse needs of
each lab.
On the control panel, the [<] and [>] keys move the
cursor up and down, and left and right respectively.
There are seven options available from the Setup
Menu:
1. Prime Volume
2. Film Length
3. Extended Prime
4. Count Reset
5. Key Sound
6. Alarm
7. Software Version
NOTE: The Setup Menu is only available when the
instrument is in the Standby or Suspension mode.
To Access the Setup Menu:
1. From the Main Menu, press the [MENU] key located
on the control panel under the display. The following
message displays:
2. The cursor blinks on the number of the first option, “1.
Prime Volume”. To choose this option, press the
[ENTER] key. To select another option, use the [<]
and [>] keys to scroll up or down and press the
[ENTER] key to choose the desired selection.
<Menu>
1. Prime Level
2. Film Length
3. Extended Prime
<Standby>
Film Prime Count
45mm Level 3
012345
>Set the basket
 Loading...