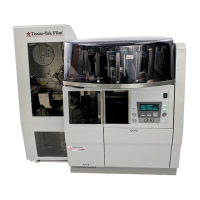
Section 3
Revised 08/08/2013 3.5
Coverslipping
1. Confirm that the [LOAD] LED located on the right side
of the control panel is lit. The standby screen
displays.
2. Open the loading door and gently pull the loading
drawer out of the loading station. The loading station
should be filled with xylene in order to keep
specimens from drying out prior to operation. The
xylene should be topped off or replaced when it
appears to be dirty or contains a significant amount of
debris. Two level lines are visible on the left edge of
the loading drawer. The xylene should be filled so that
it is at least at the lower level but not higher than the
highest level. This will ensure that the volume of
xylene is adequate to cover all specimens regardless
of the number of baskets that are being processed.
3. To position slide baskets in the loading station, set
the basket into the drawer with the “upside” marking
on the slide basket directed toward the right side of
the instrument. The loading drawer can accommodate
up to three baskets at a time. Baskets will be
coverslipped one by one form the front of the loading
drawer.
NOTE: The Tissue-Tek slide baskets are the only baskets
compatible with this instrument.
4. When all slide baskets are loaded into the loading
station, the drawer may be pushed into the loading
area enough so that it will not interfere with the door
upon closing. It is not necessary to push the drawer
all the way to the back of the unit, as the instrument
will automatically align itself during initialization. When
the door has been closed, coverslipping operation will
start automatically.
NOTE: The counter value displayed on the LCD display
increases by one when the coverslipping of each slide is
completed.
5. A basket can be added if the [LOAD] LED on the
control panel is lit. Repeat steps one through 4 to add
an additional basket.
NOTE: The [LOAD] LED is not lit when a basket is being
removed from the loading drawer. At this moment, the
loading door cannot be opened because it is locked.
As operation begins, the robotic arm moves downward
to the loading drawer and picks up the slide basket in the
first position. If no basket is in the first position, the robotic
arm moves to the second position, then third position, etc.
until a basket is located. When a basket is retrieved the
arm moves the basket to a position where another arm
moves the basket adapter handle over. The basket is then
moved to the coverslipping area.
The basket is ratcheted up one slide position at a time
until a slide is detected in a slot. An ejector arm pushes
the slide onto the coverslipping staging area where a pre-
determined amount of xylene is dispensed on the slide.
The coverslipping film is advanced past the cutter blade,
cut, and then positioned on the slide.
NOTE: The preset film length can be adjusted using the
instrument software 45 mm, 50 mm, 55 mm, or 60 mm
length.
After the slide is coverslipped, it is returned to its
original position in the slide basket. The coverslipping
action is repeated until all of the slides in the basket have
been coverslipped. The basket is then transported upward
where it is placed into an open position in the 12-basket
storage unit.
When the 12-basket storage unit is filled with baskets,
a warning sound is issued and a CAUTION screen
appears.
The coverslipping operation is temporarily suspended
until the baskets have been removed from the instrument.
Confirm that the COVER LED located on the control
panel is lit before lifting the cover.
<Standby>
Film Prime Count
45mm Level 3
012345
>Set the basket
<Operator Action>
Remove Basket

 Loading...