30 EB 6116 EN
Mounting and start-up
5.5.4 Electrical connection
Connectasdescribedinsection5.3.
5.5.5 Pneumatic connection
Generally, the pneumatic connection of the
i/p converter is established by connecting it
to the pneumatic input of the positioner.
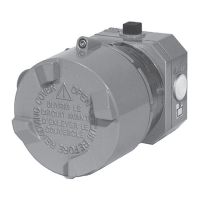
Type3766-000 Positioner
FordirectattachmenttotheType3766-000
Positioner(Fig.13),theconverterisconnect-
ed using the hollow screw with grommet (6)
and threaded bushing (5). The second screw
(7) is used to vent the converter over the po-
sitioner housing.
Beforeattachingtheadapter(8)totheposi-
tioner, remove the M20 screw plug and the
connecting nipple (input signal).
Type4765 and Type3760 Positioners
ForType4765andType3760Positioners
(Fig.14andFig.15)the
1
/
8
NPTthreaded
connectionoftheadapter(9)needstobet-
ted with a suitable cable gland and must be
connected to the input connection (input sig-
nal 27) of the positioner using a pipe or
hose. Try to keep the connection as short
andsmallaspossible,e.g.6x1mm
cross-section.
Thesecondbore(G¼)servesasventand
needs to be equipped with the vent plug (11)
included in the accessories.
All positioners
Î Remove the connecting plate (1) with
sealing element (1.1) from the bottom of
the housing and replace it with the con-
necting plate included in the accessories
(seesection3.3).Makesurethatthe
sealing element is correctly inserted in
theconnectingplate.Theltermustbe
located in front of the restrictor of the
connecting plate.
Î Type4765 and Type3766: plug on sili-
conehose(4,seeFig.13andFig.14).
Î Type3760: place on cap (4, see
Fig.15).
ForSUPPLY8andOUTPUT36oftheposi-
tioner, see associated positioner documenta-
tion.
5.5.6 Operation
Any adjustments to assign the travel of the
control valve to the electric input signal must
be made at the positioner separately from
the converter module (see associated posi-
tioner documentation).
Note