30
Using Smart Station
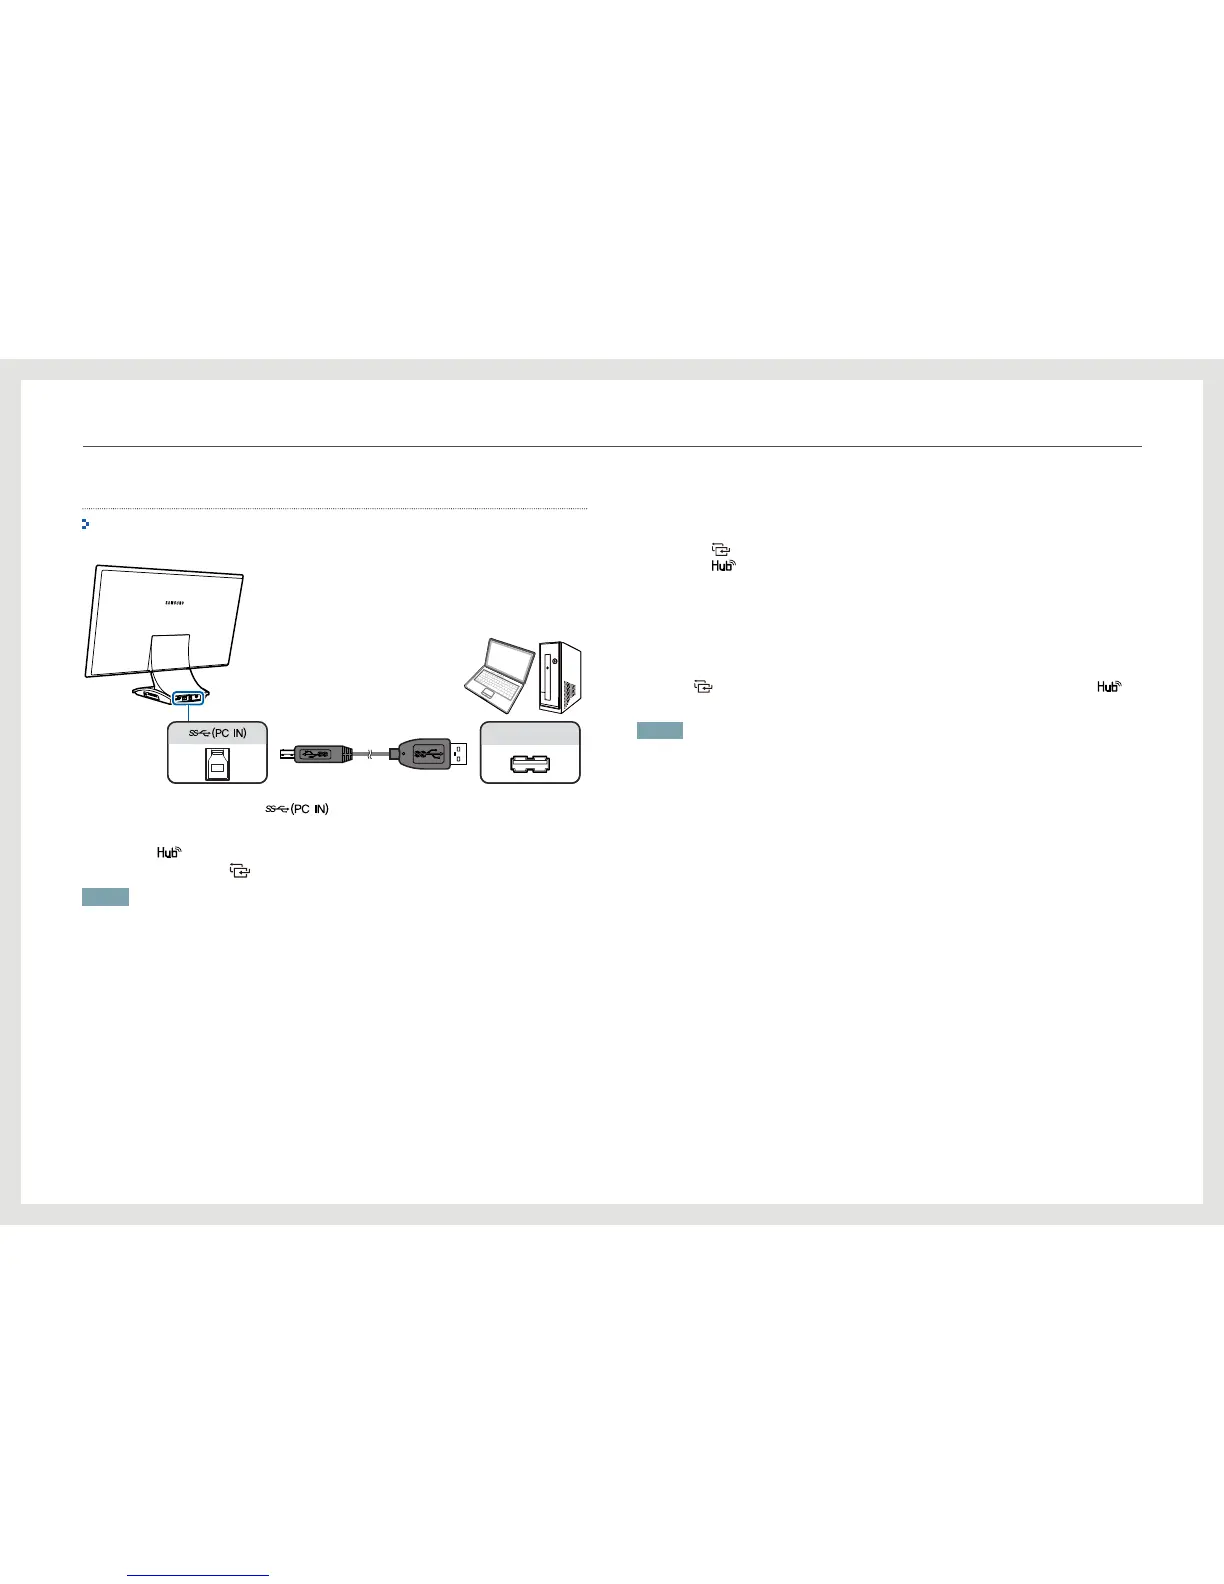
Connecting to a PC Using a USB Cable
For details on how to establish a wireless connection using the wireless-connection dongle,
refer to "Connecting to a PC Using the Wireless-connection Dongle" (page 26).
USB
1. Connect the USB cable to the [ ] port on the back of the product and a USB
port on the PC.
2. Press the [ ] button on the front of the product to change Select Source to USB.
Alternatively, press the [
] button to change the input source to USB.
NOTE
• The product is compatible with a USB 2.0 cable. However, it is best to use a USB 3.0 cable to ensure full
functionality of the product.
• The product screen may appear blank when some notebook PCs are connected using the USB 3.0 cable.
If the screen is blank, connect your notebook PC using a USB 2.0 cable.
To connect to a PC using a USB cable
1. Connect the USB cable to the product and PC.
2. Press the [ ] button until the input source of the product changes to USB. Alternatively,
press the [
] button and click Select Source - USB.
3. The product will display the PC screen when the connection is established.
Automatic/Manual USB Cable Connection
The input source may automatically change to USB if a connection is established between the
product and PC via the USB cable. If the input source does not change to USB automatically,
press the [
] button until the input source changes to USB. Alternatively, press the [ ]
button and click Select Source - USB.
NOTE
• If a USB cable and the wireless-connection dongle are connected at the same time, the highest priority
is given to the Wireless Connection. The product cannot connect to multiple PCs wirelessly at the same
time.
• Wireless Connection is supported on Series 7 only.
 Loading...