English _
●
To setup, follow steps 1 to 3 on page 92.
-1
. Press the
▲▼_ +
buttons to select the scene you want to
move (change the position), then press the button.
A yellow selection window is displayed on the scene to be
moved.
.
Press the
▲▼_ +
buttons to select the position to which you
want to move the selected scene, then select the button.
You cannot move the selected scene to the position of the next scene, because the selected scene should be
inserted before that position, which requires no action.
Depending on the kind of disc, the displayed screen may have a slight difference.
To setup, follow steps 1 to 3 on page 92.
-1
. Press the
▲▼_ +
buttons to select the scene that will have a
new scene inserted before it, then press the button.
The Add Scene screen is displayed.
.
Press the button at the starting point of the scene.
The image and starting point time is displayed on the
window.
Select the starting or ending point of the section you want to
modify using the playback related buttons ( ( ),
( ), ( ), ( )).
.
Press the button at the end point of the scene.
The image and end point time are displayed in the window.
To cancel, press the
_ +
buttons to select , then press
the button.
.
Press the
_ +
buttons to select , then press the button.
The section you want to add is inserted prior to the scene
selected in step
of Adding a Scene.
To setup, follow steps 1 to 3 on page 92.
-1
. Press the
▲▼_ +
buttons to select the scene you want to
delete, then press the button.
The message “Do you want to delete the scene?” is displayed.
. Press the
_ +
buttons to select , then press the to
delete the selected scene.
•
M
•
•
•
•
•
•
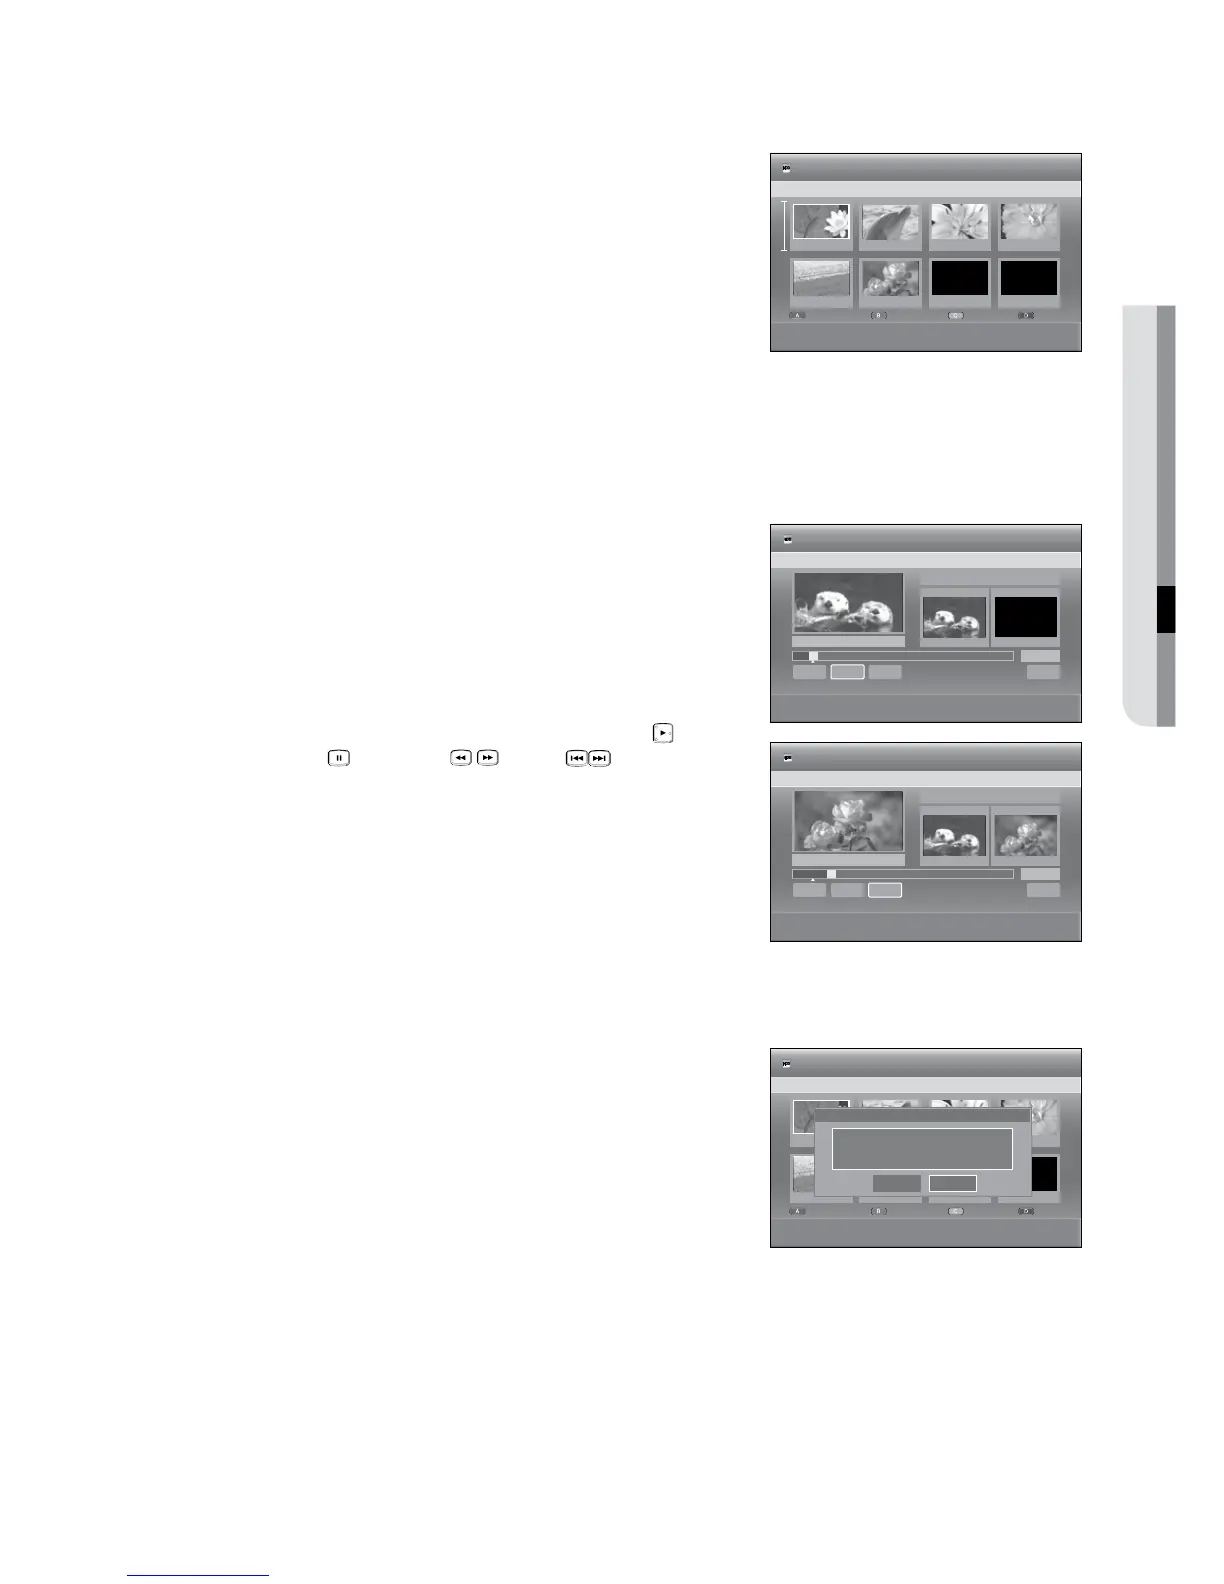
01 00:02:24 02 00:00:34 03 00:00:31
s
SAVE
e
EXIT
HDD
Edit Playlist
JAN/02/2009 13:47 Scene No. 1/6
04 00:01:22
05 00:00:09 06 00:01:06 07 00:00:00
Modify
Move
Add
Delete
Start
End
Return
Scene No. 001
00:00:0000:01:51
Start
End
< MOVE sSELECT rRETURN eEXIT
HDD
Add Scene
JAN/02/2009 13:47
+
Play
#
Pause
SCAN
# $
SKIP
00:01:51
►
Add
Title List 1/3
Start
End
Return
Scene No. 001
00:07:2800:01:51
Start
End
< MOVE sSELECT rRETURN eEXIT
HDD
Add Scene
JAN/02/2009 13:47
+
Play
#
Pause
SCAN
# $
SKIP
00:07:28
Add
Title List 1/3
01 00:02:24 02 03
< MOVE sSELECT rRETURN eEXIT
HDD
Edit Playlist
JAN/02/2009 13:47 Scene No. 1/6
04 00:01:22
05 00:00:09 06 00:01:06 07 00:00:00
Modify
Move
Add
Delete
Do you want to delete the scene?
No
Yes
 Loading...