MULTIPOINT
5
5
2.6 Make the electrical connection to the heater and set the controls. Do not switch on.
See section 3.
2.7 Fit a straight 3/4 BSP female to 22mm compression fitting to the 3/4 BSP outlet
boss.
2.8 Locate the heater onto the top fixing collars. Fit the two bottom fixings and tighten.
2.9 Connect the heater outlet to the services. Ensure the outlet fitting is supported
during assembly to prevent unnecessary stress on the tank. When plumbing ensure
that connecting pipework leaves adequate clearance for the removal of the immersion
heater. Fit an isolating valve close to the heater outlet. This enables terminal fittings to
be changed without draining the heater down.
2.10 Connect the mains water supply to the float operated valve using 15mm o/d pipe.
NB the float valve connection is a flat face with a 1/2 BSP male thread. Fit a female
1/2 BSP to 15mm copper tap coupling to the float valve. A servicing valve must be
fitted in the 15mm supply pipe close to the cistern to enable the unit to be isolated for
servicing.
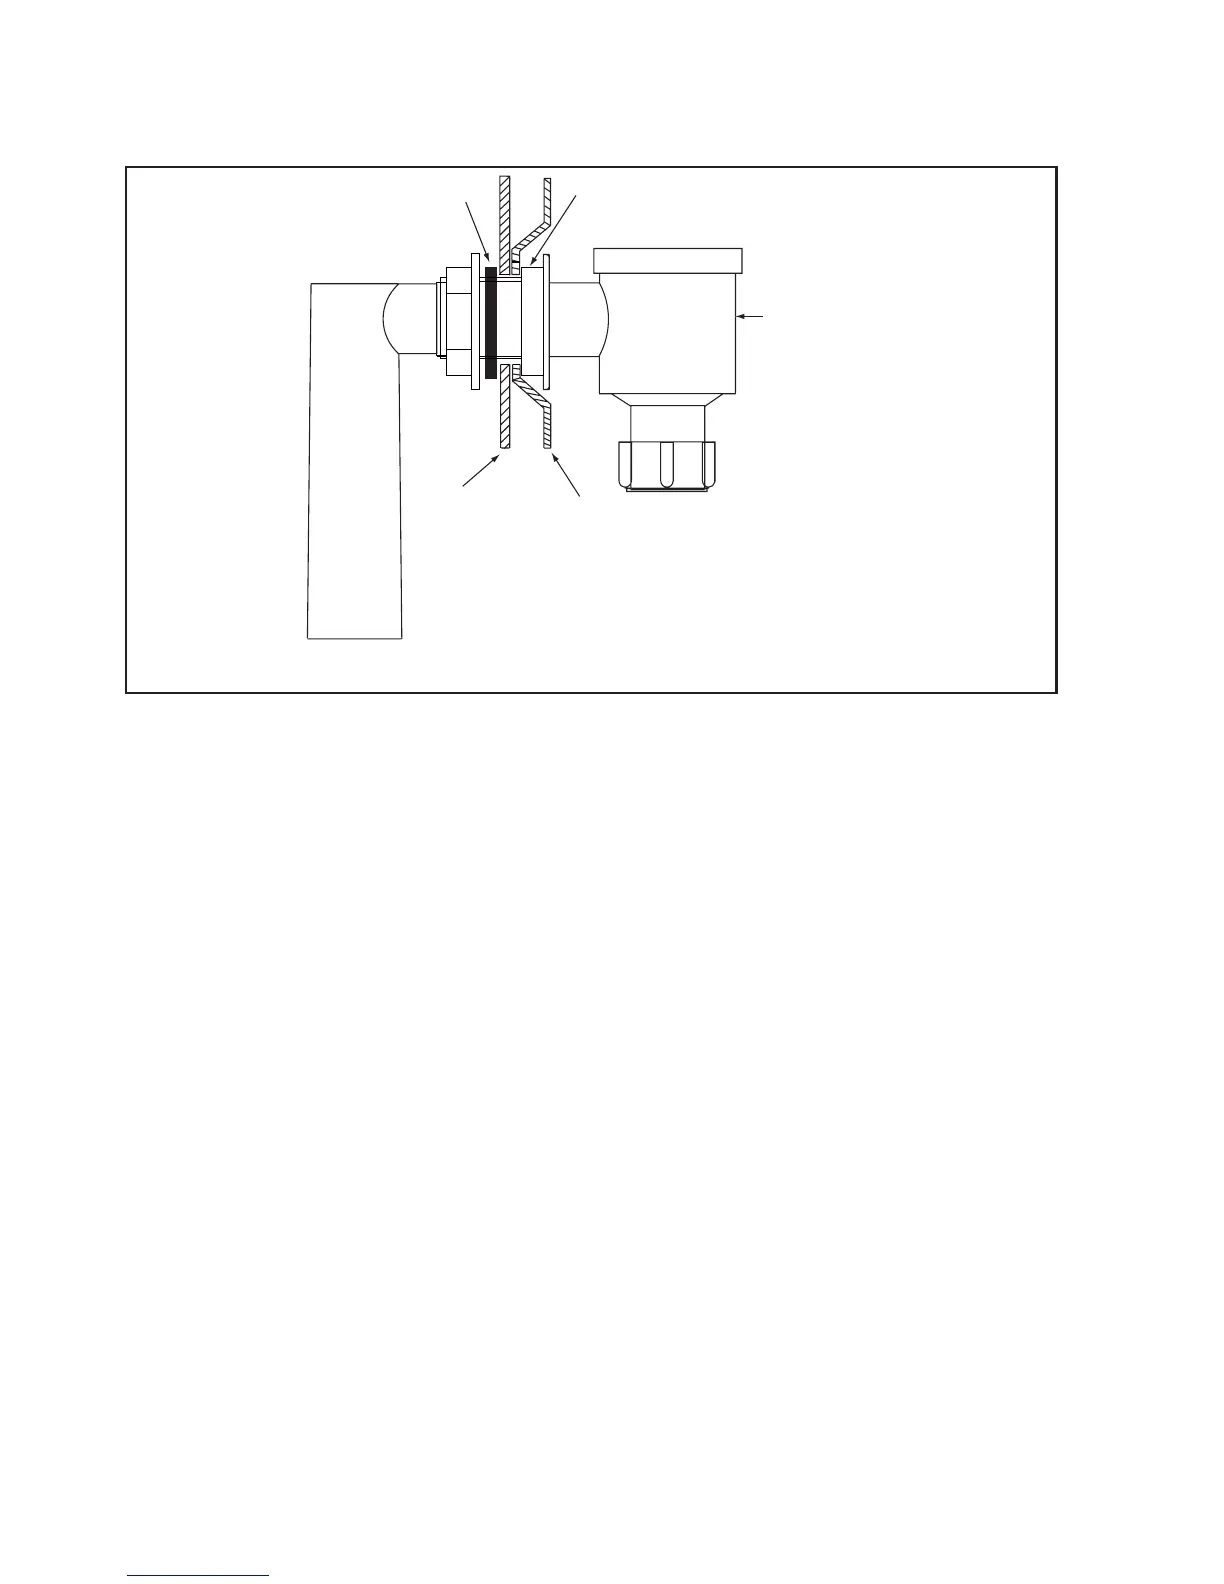
2.11 Connect the overflow pipe. The connection for the overflow pipe is 22 mm
compression for a 22mm o/d pipe. The overflow pipe must be laid in a continuous fall
and end in a safe, visible position.
2.12 Fit the washer to the screened breather, insert the screened breather into the hole
in the lid and secure with the plastic nut on the underside of the lid.
2.5 Fit the overflow fitting complete with dip tube. (Refer to figure 4.) Fit the blanking
plugs in the unused holes.
OVERFLOW ASSEMBL