EasyManua.ls Logo

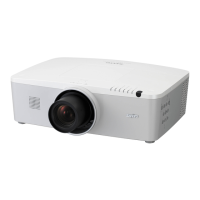
Sanyo PLC-XM150 User Manual

Sanyo PLC-XM150
149 pages
To Next Page IconTo Next Page
Page #1 background imageLoading...
Page #1 background image
Owners Manual
¹
Projection lens is optional.
Multimedia Projector
MODEL PLC-XM100
PLC-XM150
PLC-XM100L
¹
PLC-XM150L
¹
Network Supported
Refer to the Owner's Manual below for
details about network function.
Ƒ Network Set-up and Operation

Table of Contents

Other manuals for Sanyo PLC-XM150

Questions and Answers:

Sanyo PLC-XM150 Specifications

General IconGeneral
BrandSanyo
ModelPLC-XM150
CategoryProjector
LanguageEnglish

Summary

Features and Design

Functionally Rich

Lists projector's various useful functions like lens shifting, projection types.

Network-capable

Supports wired LAN for remote operation and management.

Safety Instructions

General Safety Warnings

Important warnings on product usage, placement, and ventilation to prevent hazards.

Part Names and Functions

Front

Identifies and describes components located on the front of the projector.

Rear Terminal

Details the various input/output terminals and their functions on the rear panel.

Side Control and Indicators

Explains the projector's side control buttons and top panel indicators.

Remote Control

Describes the functions of each button on the projector's remote control.

Installation

Positioning the Projector

Guidelines and diagrams for optimal projector placement relative to the screen.

Connecting to a Computer (Digital and Analog RGB)

Explains cable connections for digital and analog RGB signals from computers.

Connecting the AC Power Cord

Guides on connecting the projector's AC power cord, including regional differences.

Basic Operation

Turning On the Projector

Step-by-step guide for powering on the projector, including PIN code entry.

Turning Off the Projector

Instructions on how to properly turn off the projector and cooling procedures.

How to Operate the On-Screen Menu

Guide on navigating and using the projector's on-screen menu system.

Input Selection

Menu Operation

How to select computer input sources using the on-screen menu.

Computer Input

Auto PC Adjustment

How to perform automatic adjustment for computer input signals.

Manual PC Adjustment

Detailed steps for manually adjusting PC signal parameters like sync, dots, and position.

Video Input

Video System Selection

Selecting video system formats (PAL, SECAM, NTSC) for video sources.

Image Adjustment

Adjusting video image parameters like Contrast, Brightness, Color, and Tint.

Setting

Language

Selecting the on-screen menu language from multiple options.

Network PIN code setting

Setting a PIN code to restrict network access to the projector.

Lamp control

Adjusting screen brightness and fan speed for lamp power management.

Filter control

Managing filter replacement notifications and controls.

Power management

Configuring power saving features to reduce consumption and extend lamp life.

Key lock

Locking side and remote control buttons to prevent unauthorized operation.

Maintenance and Care

Filter Instructions

Information on filter replacement icons, warnings, and precautions.

Replacing the Filter Cartridge

Step-by-step guide for replacing the projector's filter cartridge.

Lamp Replacement

Step-by-step guide for replacing the projector's lamp, including safety precautions.

Appendix

Troubleshooting

Common problems and their solutions for projector operation.

Indicators and Projector Condition

Explains projector status based on indicator lights and their combinations.

Technical Specifications

Detailed technical specifications of the projector, including dimensions, power, and interfaces.

Serial Control Interface

Instructions for controlling the projector via RS-232C serial port.

Network Set-up and Operation

Connecting to the LAN line

Steps to connect the projector to the network via LAN cable.

Network configuration

Detailed steps for setting IP address, subnet mask, gateway, and DNS via browser.

Chapter 3 Basic Setting and Operation

Login the setting page of the projector

Steps to access the projector's web-based setting interface.

Initial setting

Performing basic initial setup for language, model name, and PIN code.

Network PIN code setting

Setting a PIN code to restrict network access to the projector.

E-mail setting

Configuring the projector to send alert emails for abnormalities.

Chapter 4 Controlling the Projector

Power control and status check

Controlling projector power (ON/Standby) and checking status via web browser.

Information

Displaying basic projector status information like input, system, and lamp status.

Chapter 5 Appendix

Use of telnet

Steps for using telnet to control the projector via command line.

Web browser setting

Configuring browser proxy settings for network access to the projector.

Q&A

Q&A on network connection issues, browser display, and access restrictions.

Related product manuals