TIMER RECORDING PROGRAMMING
❑ Timer recording enables you to set up to 6 recordings upon
a period of up to 1 year.
❑ Daily recordings (Monday through Friday) are possible.
❑ Before setting the timer recordings, be sure that the present
displayed time is correct.
Example: To record a programme on channel position
number “5” from 21:30 to 23:15 on December
26, 1994.
Press the PROG button.
The timer recording setting mode is then activated, to
return to the normal mode press the
PROG button
again.
Set the channei position number using the numeric
buttons, for single channel number
(Exampie: “5”),
pressthe OIAV button
first.
❑ When recording from an external source, press the O/AV
button twice. The indicator “AV” will light.
If you entered a wrong number, press the
CL button to
erase it then enter the correct number.
Set the date on which the recording has to take place.
Exampie: For December 26 (26/12)
Enter 2612
l!llmEl
•l When recording in the everyday (Monday through Friday)
mode, press the CHANNEL (+) button. The indicator “E”
will light. The selected channel will be recorded everyday at
the same time.
Set the time at which the recording has to start.
(ON-time)
Example: For 21:30
Enter 2130
Illm%El
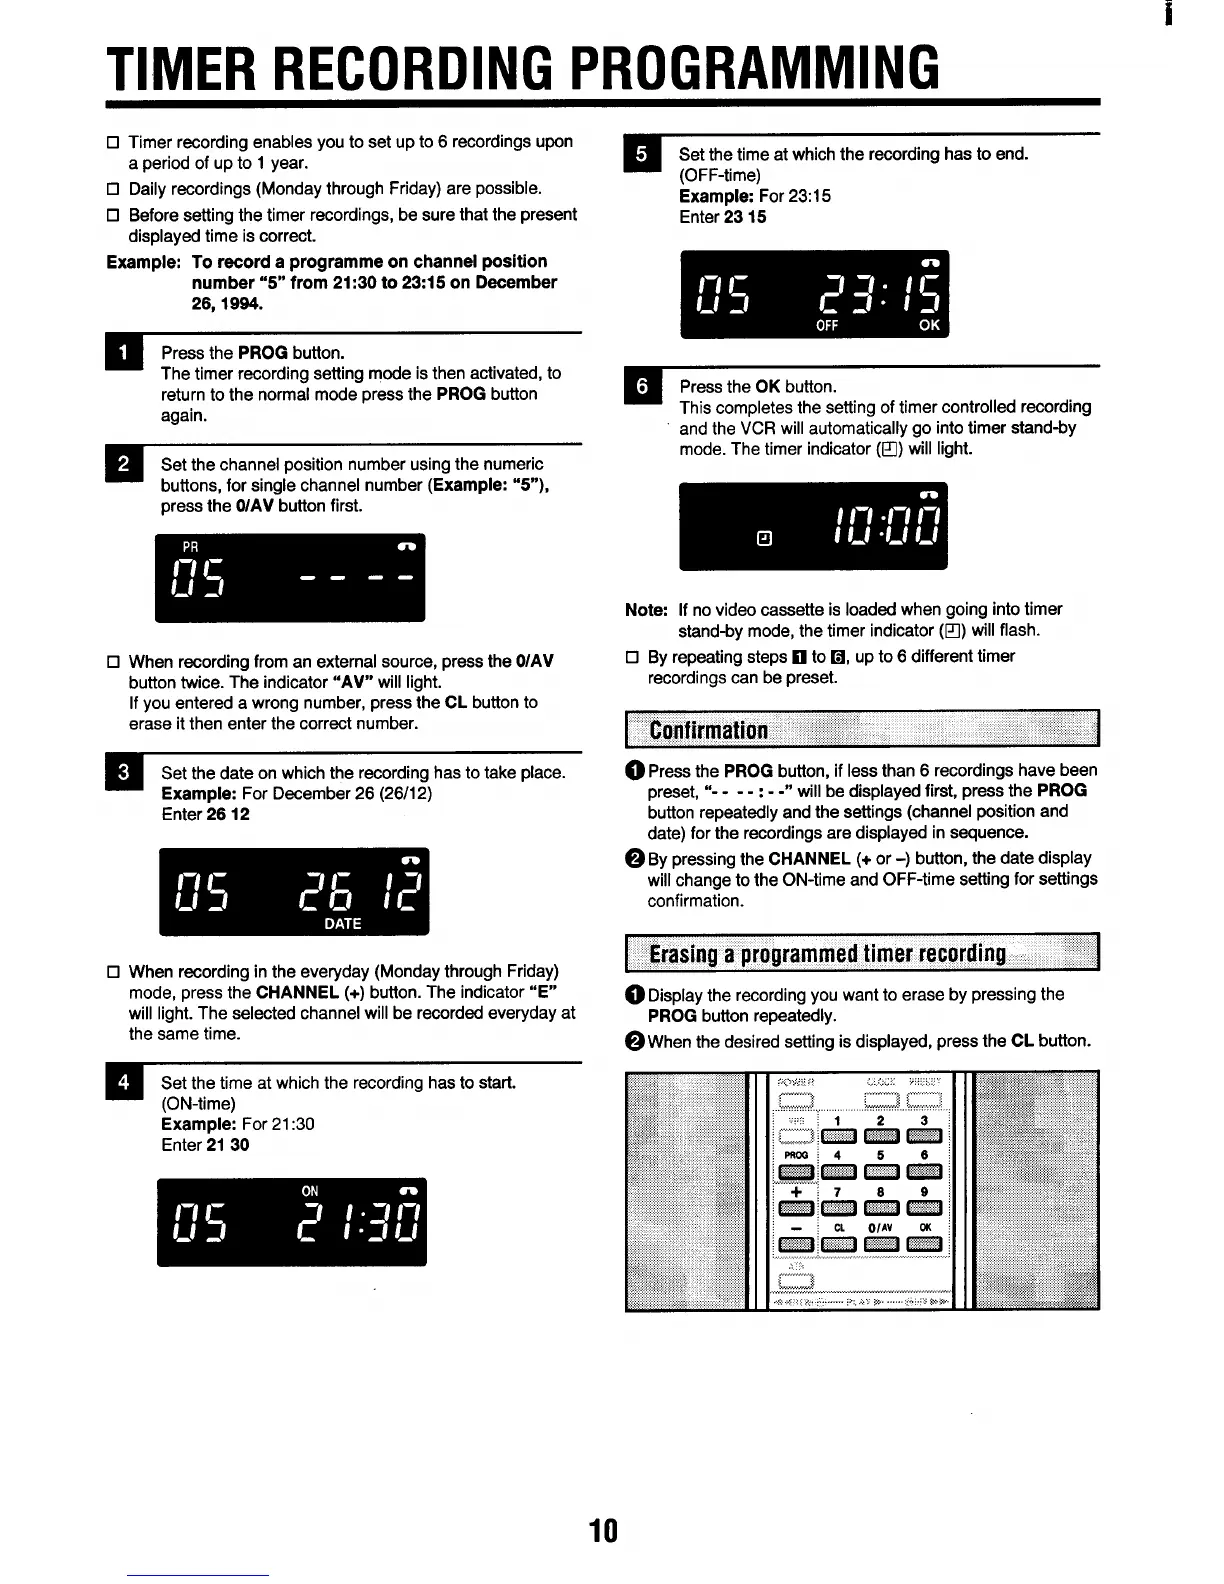
Set the time at which the recording has to end.
Example: “For 2315
Enter 2315
Illmmil
Press the OK button.
This comrdetes the setting of timer controlled recording
and the VCR will automa~cally go into timer stand-by -
mode. The timer indicator (Q) wili light.
mllllRl
Note If no video cassette is loaded when going into timer
stand-by mode, the timer indicator (Q) will flash.
❑ By repeating steps El to H, up to 6 different timer
recordings can be preset.
~ Press the
PROG button, if less than 6 recordings have been
preset, “- - --:--
“ will be displayed first, press the
PROG
button repeatedly and the settings (channel position and
date) for the recordings are displayed in sequence.
OBy pressing the CHANNEL (+ or -) button, the date display
will change to the ON-time and OFF-time setting for settings
confirmation.
I
Erasing a programmed timer recording ~
ODisplay the recording you want to erase by pressing the
PROG button repeatedly.
@When the desired setting is displayed, press the CL button.
10