24
Section 4
1. To engage the spreader, push the spreader switch.
Refer to section 4.11A, Figure 4-15.
2. Adjust the spreader speed to the desired speed
using the spreader speed knob. Refer to section
4.11A, Figure 4-15.
3. Wait for the spreader to reach operating speed
before opening the spreader door.
4. To open the hopper gate, pull the hopper gate
control handle. Refer to section 4.11B, Figure 4-17.
5. If needed, engage the deflector to avoid spreading
material in undesired areas. Refer to section 4.11C,
Figure 4-18.
6. Use the hopper diffuser to adjust where the material
falls on the spreader impeller. This will adjust the
spread pattern of the spreader. (If the spreader is
spreading heavily to one side this adjustment will
need to be made until the spread pattern becomes
centered (make adjustments in small increments).
Refer to section 4.11D, Figure 4-19.
7. Close the hopper gate with the spreader at operating
speed. Then disengage the spreader by disengaging
the spreader switch. See Figure 4-15.
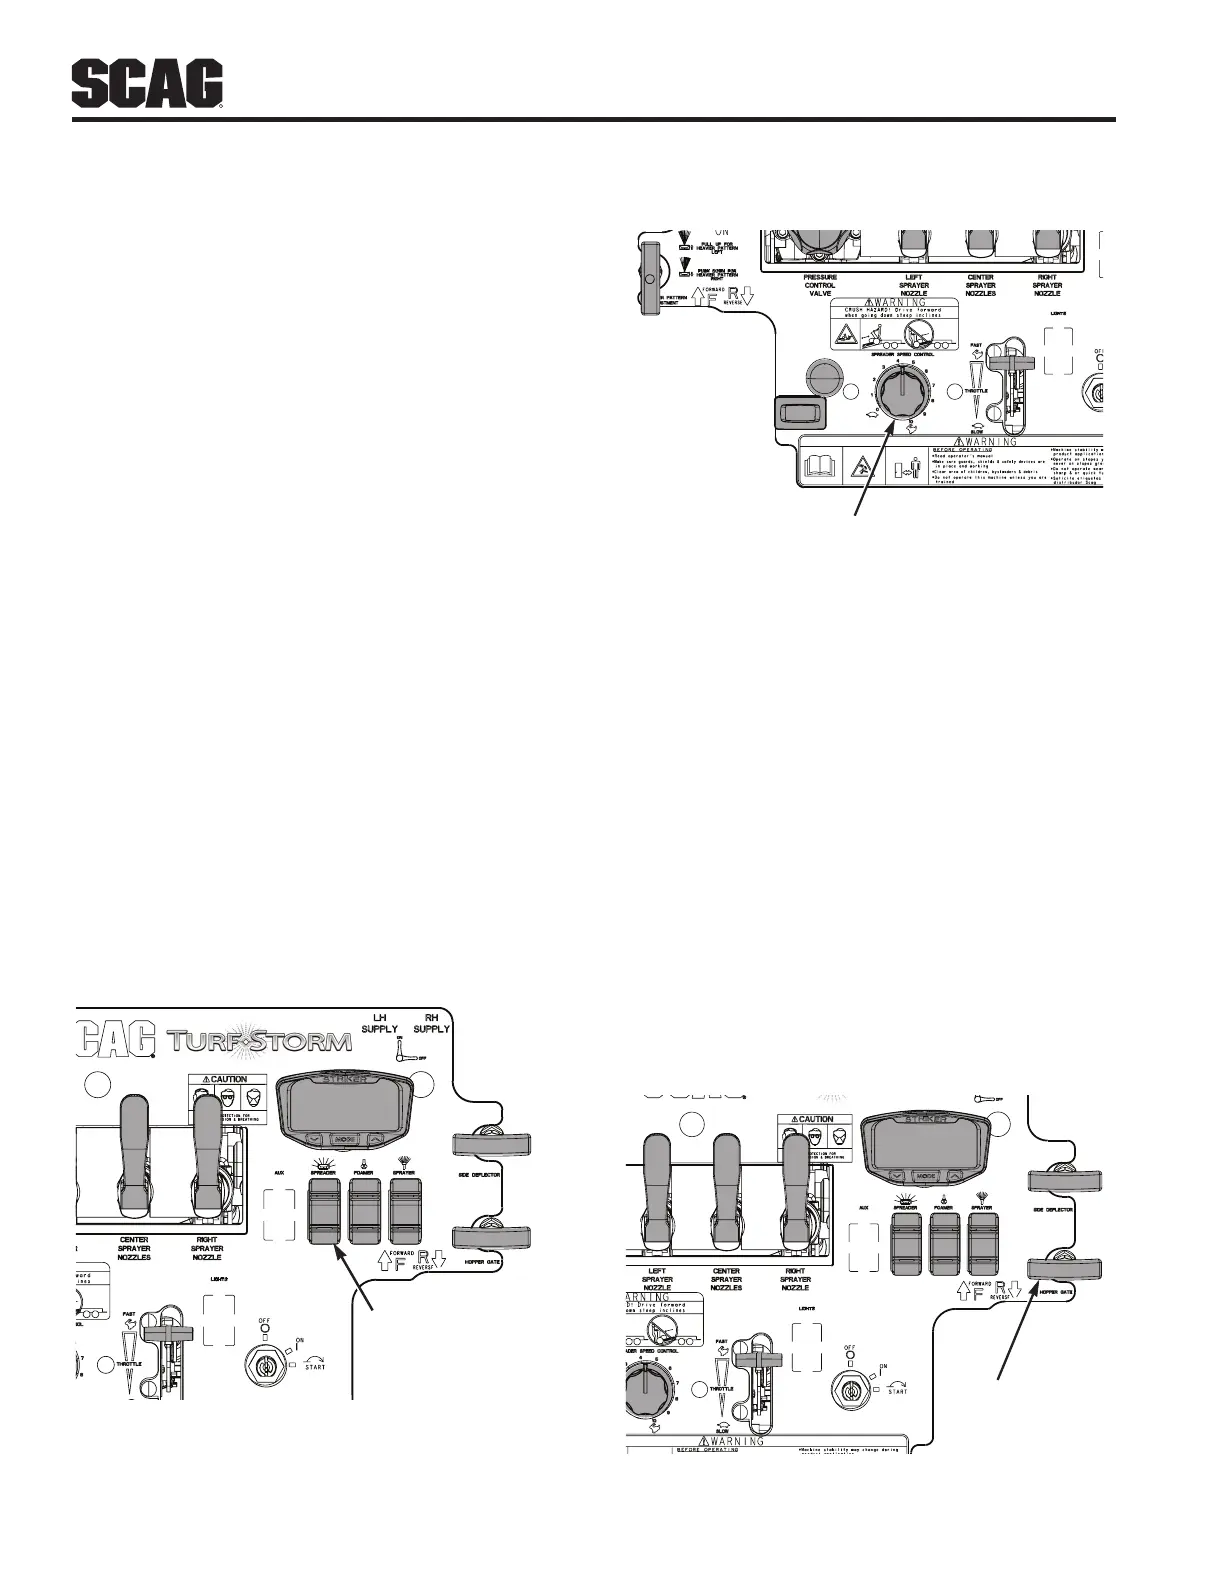
A. SPREADER SPEED CONTROL ADJUSTMENT
The spreader speed control is used to control impeller
motor speed and to adjust the broadcast width.
1. Engage the spreader switch to turn the spreader
motor on. See Figure 4-15.
SPREADER CONTROL
SWITCH
Figure 4-15. Spreader Engage Switch
2. Rotate the control knob clockwise to increase the
impeller motor speed and broadcast pattern.
3. Rotate the control knob counterclockwise to
decrease the motor speed and broadcast pattern.
SPREADER SPEED
Figure 4-16. Spreader Speed Control Knob
B. HOPPER GATE ADJUSTMENT
The hopper gate control is used to open and close the
hopper gate. The gate allows the granular material to flow
from the hopper.
-NOTE-
The granular drop rate cam controls how far the
hopper gate will open. Refer to Section 4.11E
1. To open the hopper gate and allow granular material
to flow out of the hopper onto the impeller, pull up on
the hopper gate control handle.
2. To close the hopper gate and stop the flow of
granular material out of the hopper and onto the
impeller, push down on the hopper gate control
handle.
HOPPER GATE
CONTROL
Figure 4-17. Hopper Gate Control