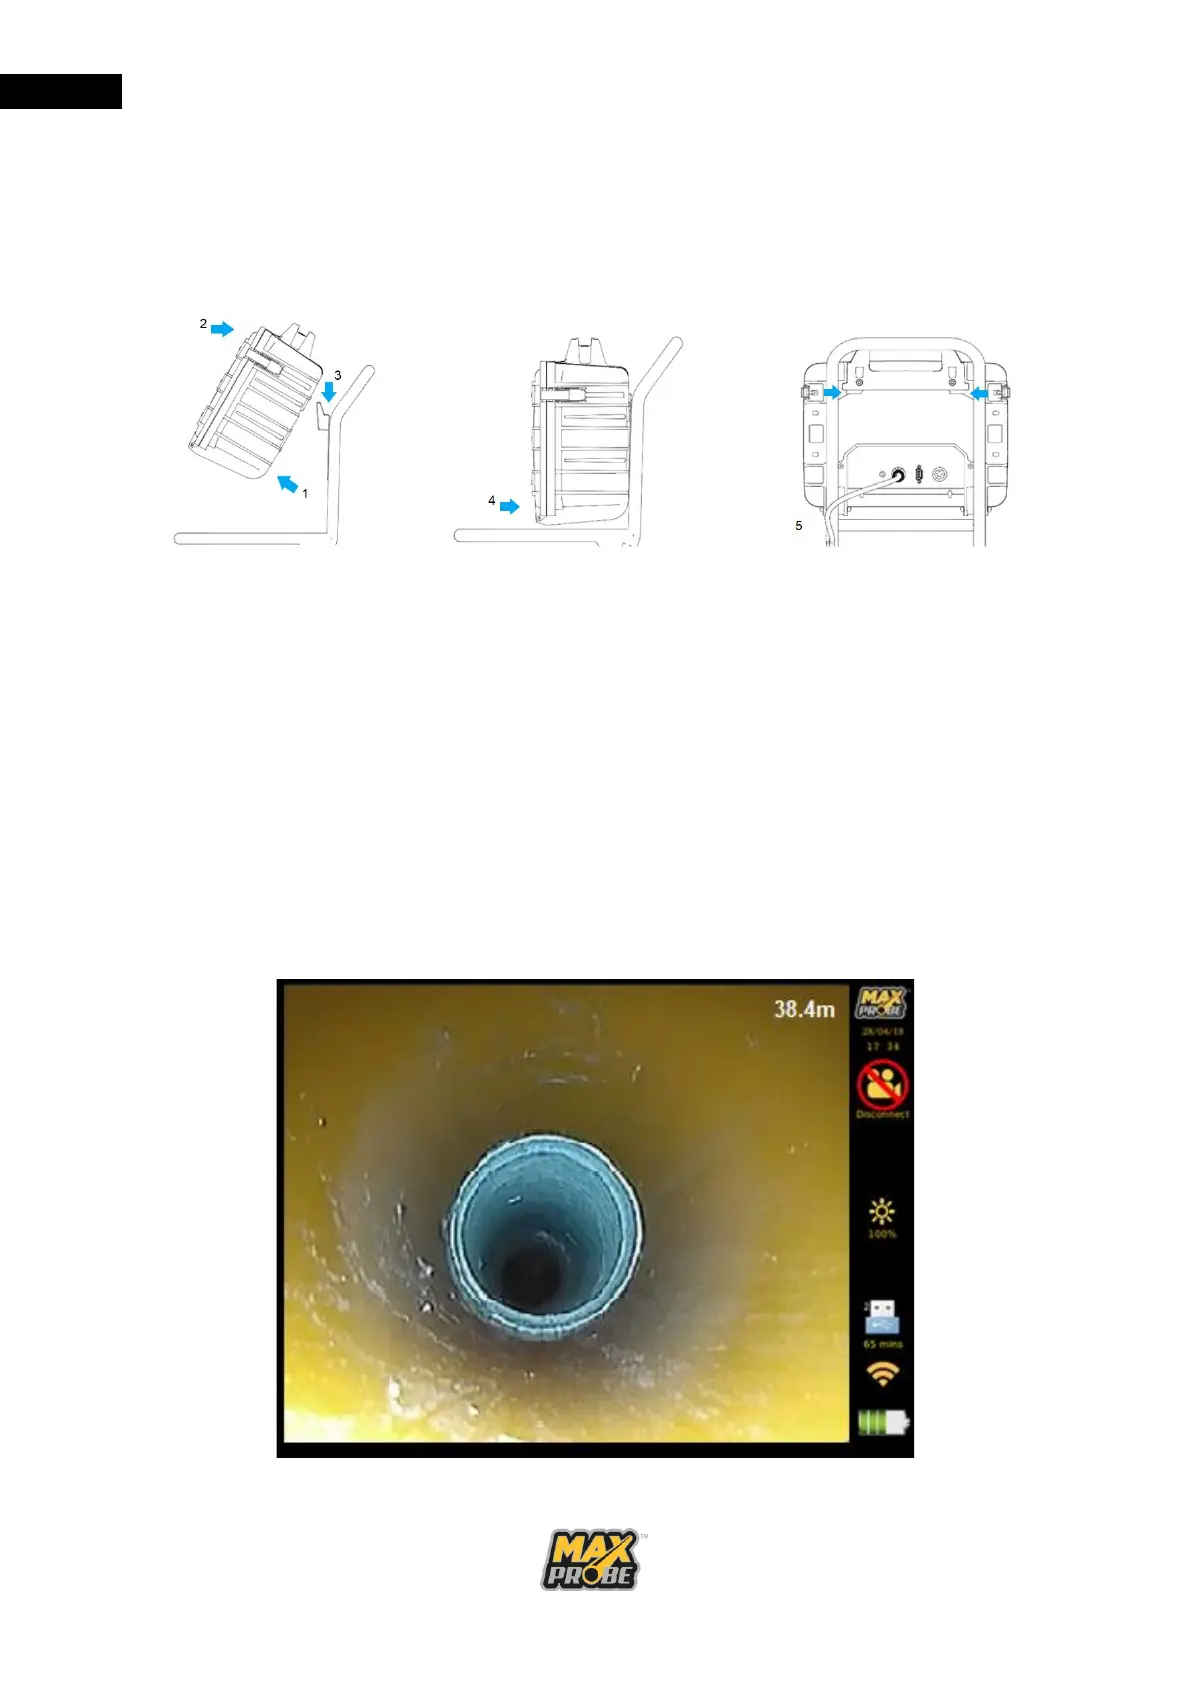
Mounting the CCU
As shown in Figure 10, lift the CCU at an angle above the mounting plate (1). Align the base
of the handle (2) and clip over the plate (3). Lower the CCU so it rests against the frame (4).
Check that the CCU is central to the frame (5). Connect the cables to the rear connectors.
Figure 10: Mounting the CCU
Dismounting the CCU
Disconnect the cables from the rear of the CCU, tilt the bottom of the CCU away from the
frame and lift the CCU away from the frame.
Maxprobe CCU Display
On the Start Screen, press the <Enter> button to navigate to the main display (see
Figure 11). The meterage of pushrod fed out from the coiler is also displayed in the top right
corner of the video screen by default, though this can be moved by pressing the “Meterage
Placement” button on the keypad. This can be reset by pressing the “Meterage Counter
Reset” button on the keyboard for three seconds.
Figure 11: Maxprobe CCU Display