12
IDENTIFY YOUR DEVICE
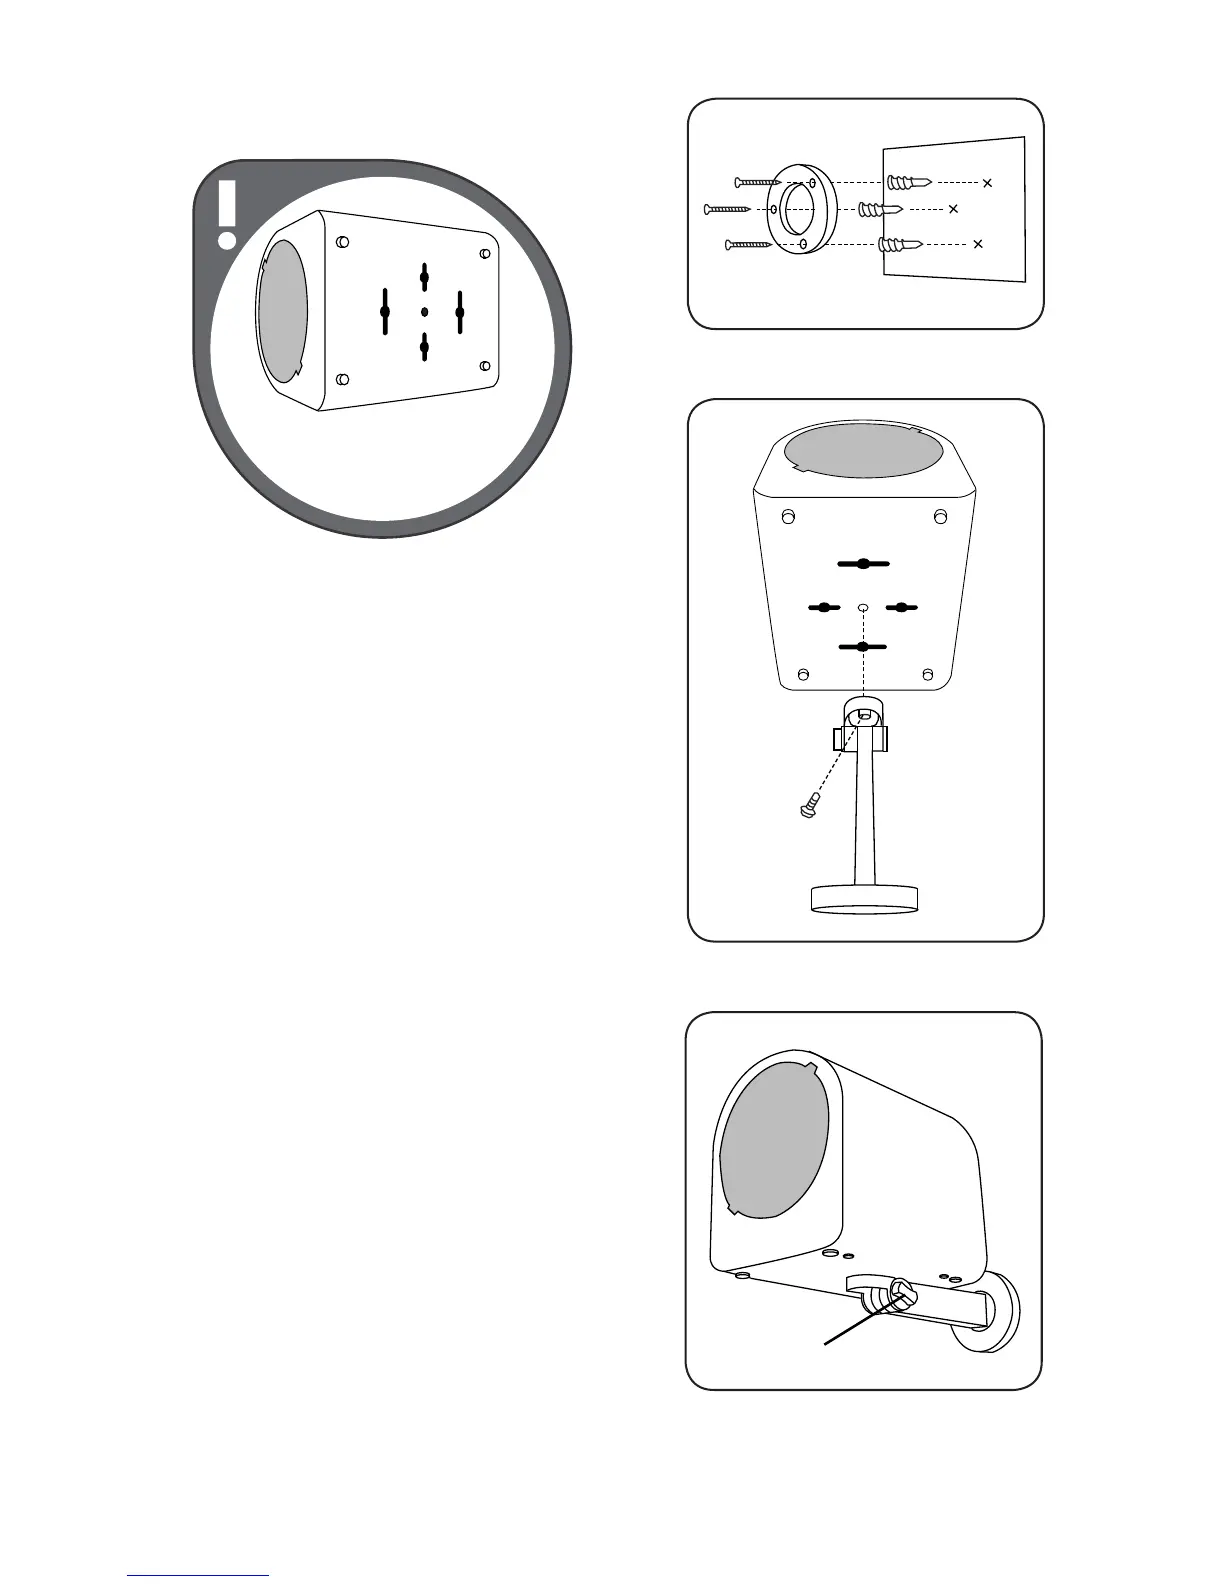
NOTE: Ensure the ScentWave intended
to be mounted has the hole pattern on
the bottom of the system.
PLATE-LESS ARM MOUNTING
The ScentWave 1005 is equipped to allow mounting
to a wall surface using the optional arm mounting
kit and hardware.
ARM MOUNTING THE SCENTWAVE:
1. Remove the mounting ring from the base by
loosening the retainer ring on the universal
mount arm.
2. Hold the base in the desired location and
mark three (3) screw holes with pencil.
• For drywall, drill a 1/4” (7.5mm) pilot
hole and use a screwdriver to drive the
provided white plastic anchors into the
wall. (Fig.18)
• Use the screwdriver to drive the screws
into the holes, holding the base in
place.
3. Attach the Mounting Arm to the ScentWave.
• Attach the ScentWave to the pivot end
of the wall mounting arm through the
center hole using the provided screw.
Tighten using a screwdriver to secure
the screw in place. (Fig.19)
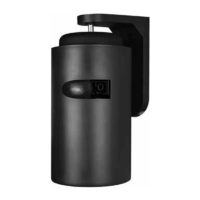
4. Attach the assembly to the wall.
• Attach the wall mounting arm to the
base using the retainer ring on the
arm and tighten at the desired angle.
(Fig.20)
• Adjust the pivot end as necessary for a
correct angle and secure fit.
Pivot
Adjustment
Fig.18: You can mount the retainer ring in any direction,
there is no up or down.
Fig.19: Do not over tighten the screw so as to prevent
stripping of the pilot hole.
Fig.20: You can change the direction of the ScentWave
with the pivot adjustment screw.