www.scheppach.com
GB
|
27
9.8 Dismantling the compressed air hose (not in-
cluded in the scope of delivery)
• Press the coupling ring on the quick coupler (2) to-
wards the compressor. The compressed air hose
pops out of the quick-coupling (2).
m Attention!
The compressed air hose is ung away depending on
the pressure present in the compressor.
In order to prevent injury, hold the compressed air hose
tightly immediately after the quick-coupling (2) when
disassembling.
10. Electrical connection
The electrical motor installed is connected and ready
for operation. The connection complies with the appli-
cable VDE and DIN provisions. The customer‘s mains
connection as well as the extension cable used must
also comply with these regulations.
When working with spray attachments and during tem-
porary use outdoors, the device must be connected to
a residual current circuit breaker with a trigger current
of 30 mA or less.
Damaged electrical connection cable
The insulation on electrical connection cables is often
damaged.
This may have the following causes:
• Pressure points, where connection cables are
passed through windows or doors.
• Kinks where the connection cable has been improp-
erly fastened or routed.
• Places where the connection cables have been cut
due to being driven over.
• Insulation damage due to being ripped out of the wall
outlet.
• Cracks due to the insulation ageing.
Such damaged electrical connection cables must not
be used and are life-threatening due to the insulation
damage.
Check the electrical connection cables for damage
regularly. Ensure that the connection cables are dis-
connected from electrical power when checking for
damage.
• Fasten the wheel (5) with the wheel bolt (D). If nec-
essary use a combination spanner for this (not in-
cluded in the scope of delivery).
• Repeat the steps with the other tyre (5).
9.2 Fitting the foot (g. 4)
• Fit the supplied supporting foot (4) with 2 hexago-
nal bolts (C), 2 washers (B) and 2 ange nuts (A) as
shown in g. 4.
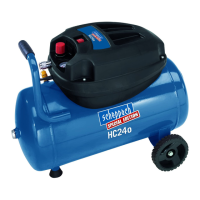
9.3 Mains connection
• The compressor is equipped with a mains cable with
protective contact plug. This can be connected to
any 230 V~ / 50 Hz protective contact socket, with
fuse protection of at least 16 A.
• Before commissioning, ensure that the mains volt-
age matches with the operating voltage and the ma-
chine’s power rating on the type plate.
• Long supply cables, extensions, cable reels, etc.
cause a drop in voltage and can impede motor start-
up.
• In the case of temperatures below +5°C, motor start-
ing can be endangered by sluggishness.
9.4 On/o switch (Fig. 2)
• The compressor is switched on by setting the on/o
switch (9) to position I.
• The compressor is switched o by setting the on/o
switch (9) to position 0.
9.5 Pressure adjustment:(Fig. 1)
• The actual pressure in the pressure vessel (3) is
shown on the pressure gauge (7)
• The desired pressure can be adjusted with the pres-
sure regulator (6).
• The pressure at the quick-coupling (2) can be adjust-
ed from 0 to 10 bar.
9.6 Pressure switch adjustment
• The pressure switch is set in the factory.
- Cut-in pressure approx. 8 bar
- Cut-out pressure approx. 10 bar
9.7 Fitting the compressed air hose (not included
in the scope of delivery)
• Push the compressed air hose into one of the two
quick-couplers (2). The compressed air hose latch-
es into place.
 Loading...