www.scheppach.com
GB
|
31
8. Attachment and operation
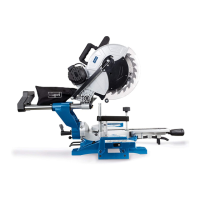
8.1 Attaching the saw (Fig. 1 - 6)
• To adjust the rotary table (16), push the locking le-
ver (13) downwards and pull the lower indexed posi-
tion lever (12) upwards with your index nger.
• Rotate the rotary table (16) and pointer (14) to the
desired angle on the scale (15) and lock in place by
folding up the locking lever (13).
• Pressing the machine head (5) lightly downwards
and removing the locking bolt (24) from the motor
bracket at the same time disengages the saw from
the lowest position.
• It is possible to secure the clamping device (8) to
the left or right on the stationary saw bench (17).
• Attach the workpiece supports (9) to the xed saw
table (17) as shown in Figure 6a,b,c and push all
the way through. Secure the shafts with the retain-
ing springs to prevent them from slipping out ac-
cidentally. The fasten in the desired position with
the screw (10).
• It is possible to tilt the machine head (5) a max. 45°
to the left by loosening the set screw (22), to tilt the
machine head (5) to the right to max. 45° the safety
bolt (22a) must be loosened.
8.2 Precision adjustment of the stop for crosscut
90° (Fig. 3, 5, 16)
No stop angle included.
• Lower the machine head (5) and secure using the
locking bolt (24).
• Loosen the set screw (22).
• Position the angle stop (a) between the saw blade
(7) and the rotary table (16).
• Slacken the counternut (d). Adjust the adjusting
screw (30) until the angle between the saw blade
(7) and rotary table (16) is 90°.
• Retighten the counternut (d) to secure this setting.
• Subsequently check the position of the angle indi-
cator. If necessary loosen the pointer (20) using a
Philips screwdriver, set to position 0° on the angle
scale (19) and re-tighten the retaining screw.
8.3 Precision adjustment of the stop for mitre cut
45° (Fig. 1, 3, 5, 17)
No stop angle included.
• Lower the machine head (5) and secure using the
locking bolt (24).
• Fix the rotary table (16) in the 0° position.
• Loosen the set screw (22) and use the handle (1) to
angle the machine head (5) 45° to the left.
• Avoid accidental starting of the machine: the oper-
ating button may not be pressed when inserting the
plug in an outlet.
• Use the tool that is recommended in this manual.
In doing so, your mitre saw provides optimal per-
formance.
• Hands may never enter the processing zone when
the machine is in operation. Release the handle
button and switch o the machine prior to any op-
erations.
7. Before starting the equipment
• Open the packaging and remove the device care-
fully.
• Remove the packaging material as well as the pack-
aging and transport bracing (if available).
• Check that the delivery is complete.
• Check the device and accessory parts for trans-
port damage.
• If possible, store the packaging until the warranty
period has expired.
m ATTENTION!
The device and packaging materials are not toys!
Children must not be allowed to play with plastic
bags, lm and small parts! There is a risk of swal-
lowing and suocation!
• The equipment must be set up where it can stand
securely, i.e. it should be bolted to a workbench, a
universal base frame or similar. Use the holes in the
frame of the machine.
• All covers and safety devices have to be properly
tted before the equipment is switched on.
• It must be possible for the blade to run freely.
• When working with wood that has been processed
before, watch out for foreign bodies such as nails
or screws, etc.
• Before you press the ON/OFF switch check that
the saw blade is tted correctly. Moving parts must
run smoothly.
• Before you connect the equipment to the power sup-
ply make sure the data on the rating plate are den-
tical to the mains data.
 Loading...
