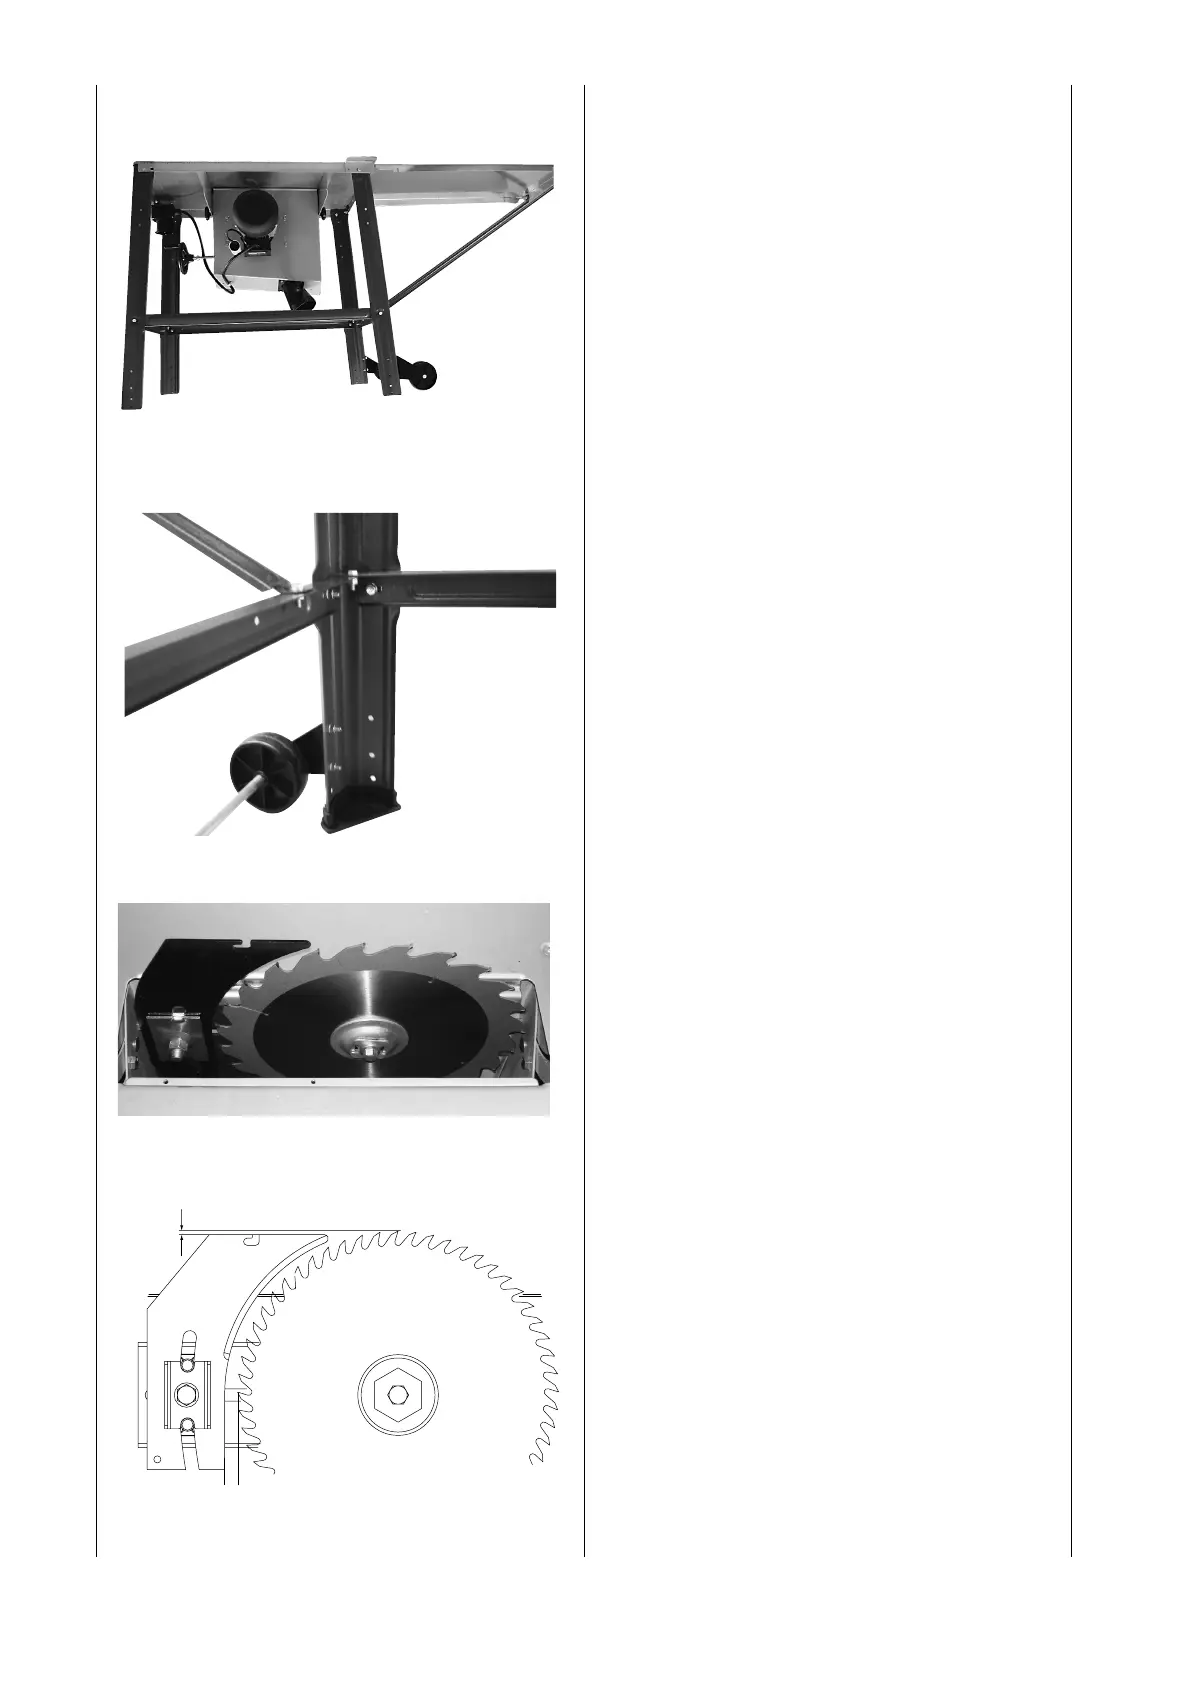
13
Fig. 10
Place the machine on its feet and firmly tighten
all bolts of table, legs and braces (except those
of the wheel assembly).
Fig. 11
Firmly tighten the wheel assembly in the posi-
tion where the wheels slightly touch the ground.
Fig. 12 / 12.1
Fasten the riving knife in line with the saw
blade as described in the illustration. Slightly
release the bolt without removing it. Retighten
it firmly after resetting. For doing this, it is nec-
essary to remove the saw blade insert (19, Fig.
13).
Fig. 10
Fig. 11
Fig. 12
Fig. 12.1