17
Fig. 21
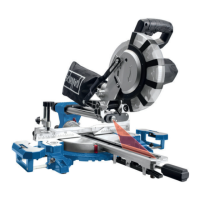
Move the saw blade to the very top and release the bolt with
the saw blade key.
Attention: Left-handed thread.
Fig. 22
Remove the saw blade flange (31) and the saw blade (32).
Then change the saw blade.
When mounting the saw blade mind the recess.
After changing the saw blade, check the setting of the
riving knife and refit the table insert (19) and the suction
hood (20).
Set-up:
Prepare the workplace where the machine is to be placed.
Insure sufficient room to allow safe work without malfunc-
tions. The machine is designed to operate in closed rooms
and must be placed stabily on firm level ground. Stabil-
ity is insured by attachment to the ground with 4 screws
(Fig. 23).
Transport:
The machine may only be transported with suitable lifting
devices (crane or fork lift). The connection point for the
rope (crane) is on the upper band wheel cabinet. Never
lift from the saw bench. If the machine is to be moved fre-
quently within the work area, use of the wheel assembly
special accessory is recommended.
Putting into Operation
Observe the safety instructions!
Important: The machine must only be brought into service
with completely installed safety and protection devices.
Before starting to use it, connect the machine to an ex-
traction system.
For every operation, the extraction cover has to be lowered
down to the work piece.
Secure long workpieces at the end of the cutting process
against tipping (e. g. unwind stands).
Fig. 21
Fig. 22
31
32
Fig. 23